In this article, you will learn the steps to create a competitive search staff position.
 |
First, log into UGAJobs.
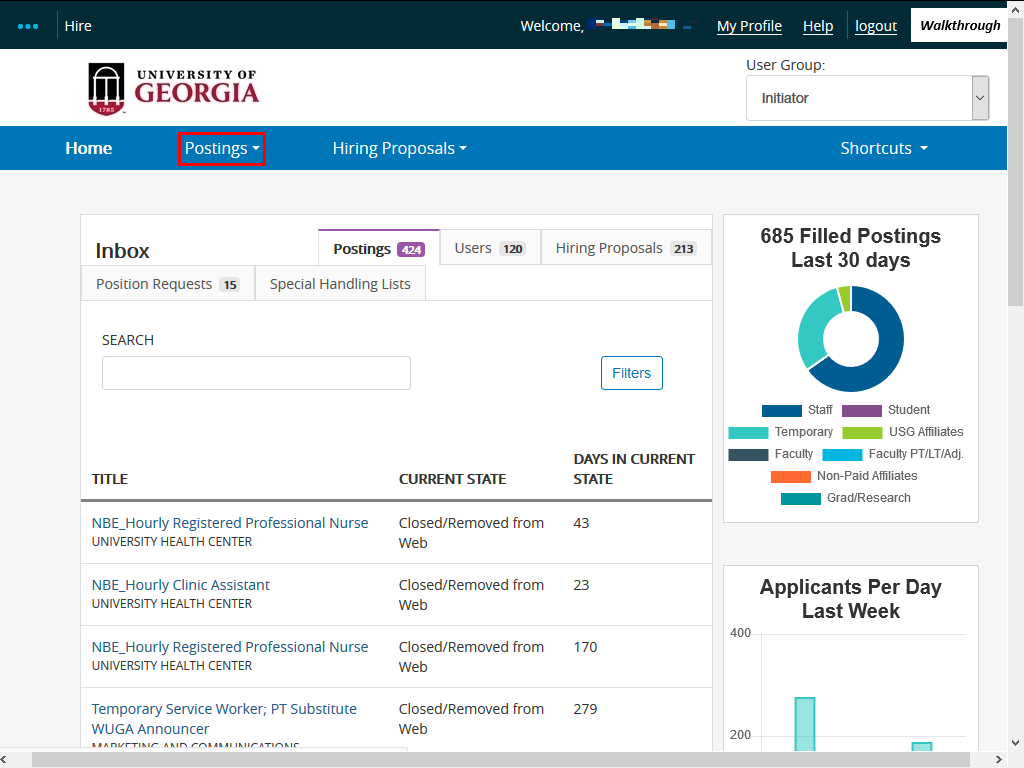
In the UGAJobs Hire module, click the Postings link.
|
|
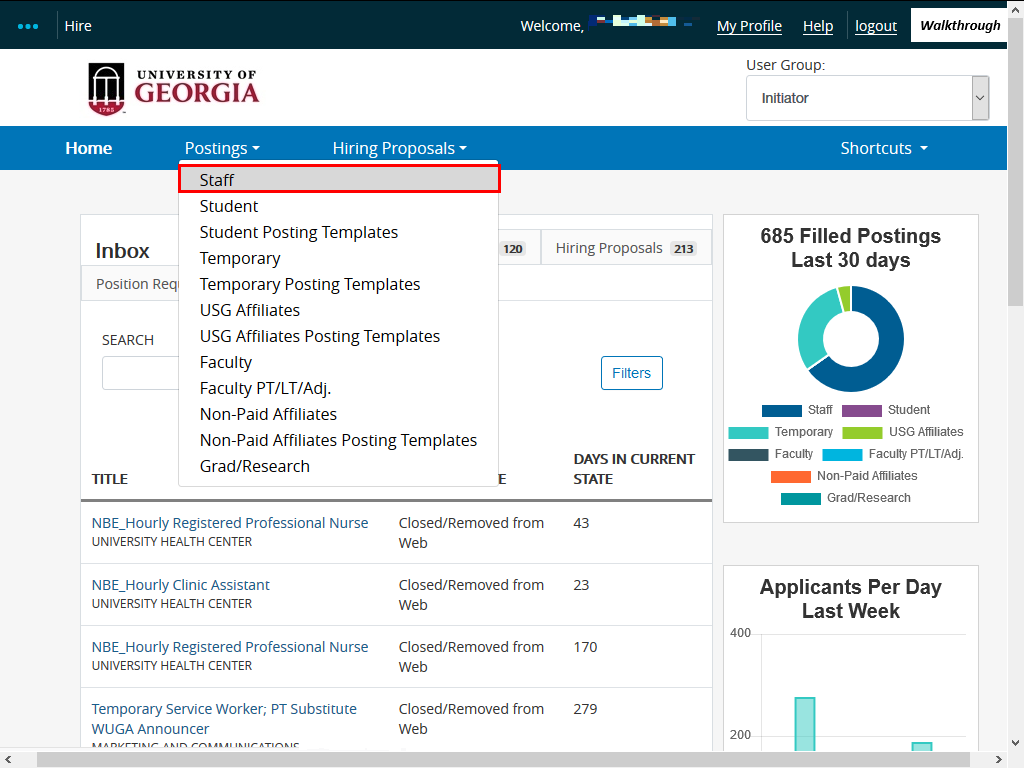 |
The drop-down list for different posting type is displayed.
Example shown here: You will create a staff position.
Click the Staff link.
|
|
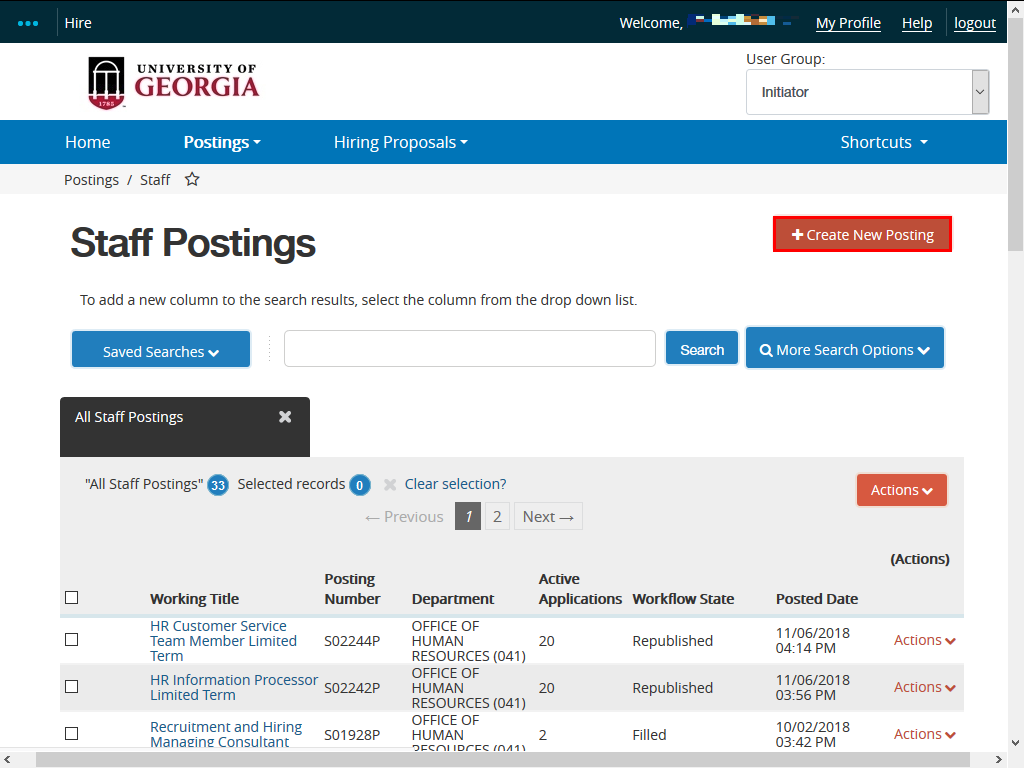 |
The Staff Postings page is displayed.
Click the Create New Posting link.
|
|
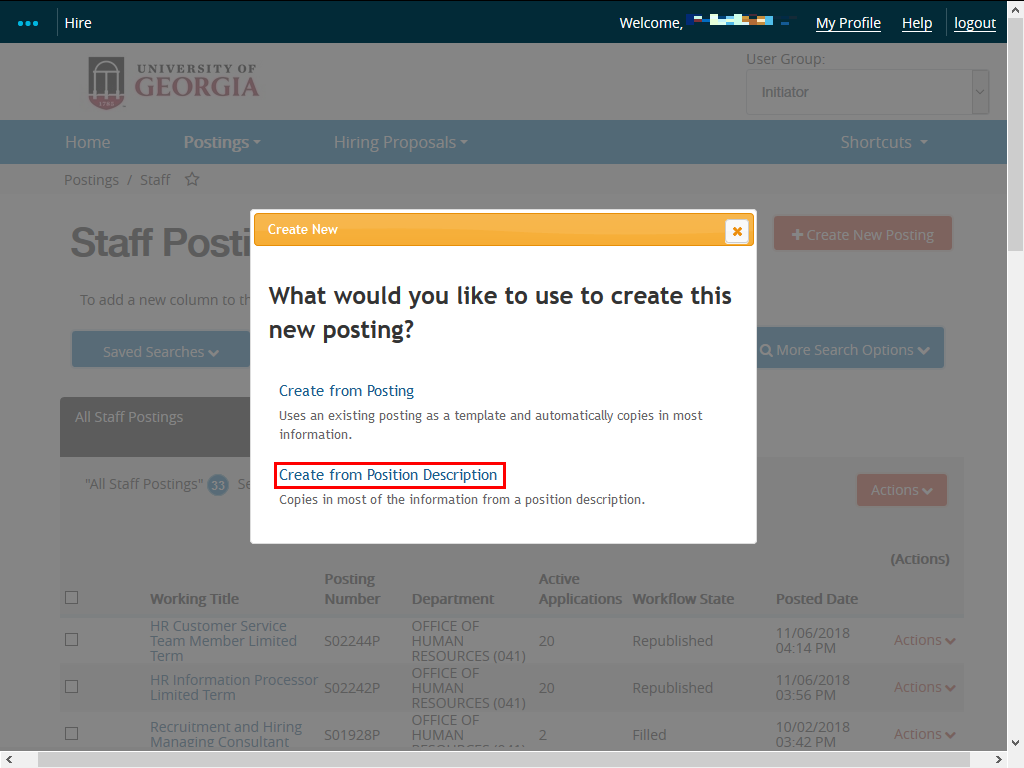 |
The Create New window will appear. This window gives you options of creating the new posting using an existing posting as a template or creating the posting from position description.
For this article, click the Create from Position Description link.
|
|
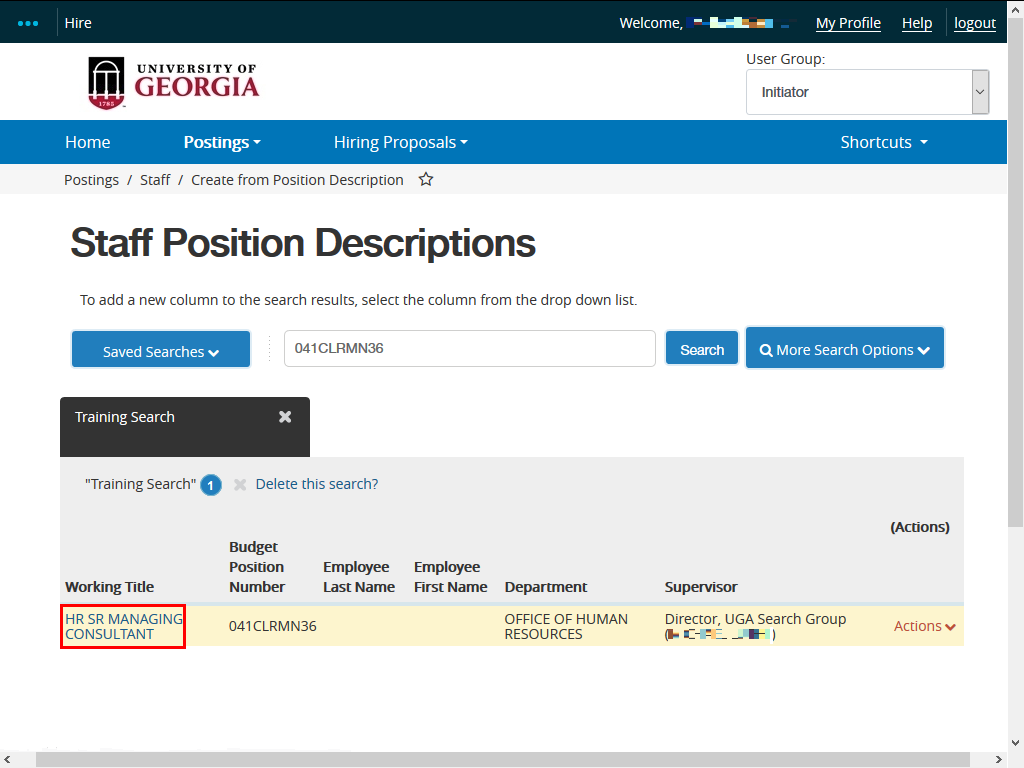 |
The Staff Position Descriptions page is displayed.
Select the appropriate position from which you want to create the posting.
Click the HR SR MANAGING CONSULTANT link under the Working Title column.
|
|
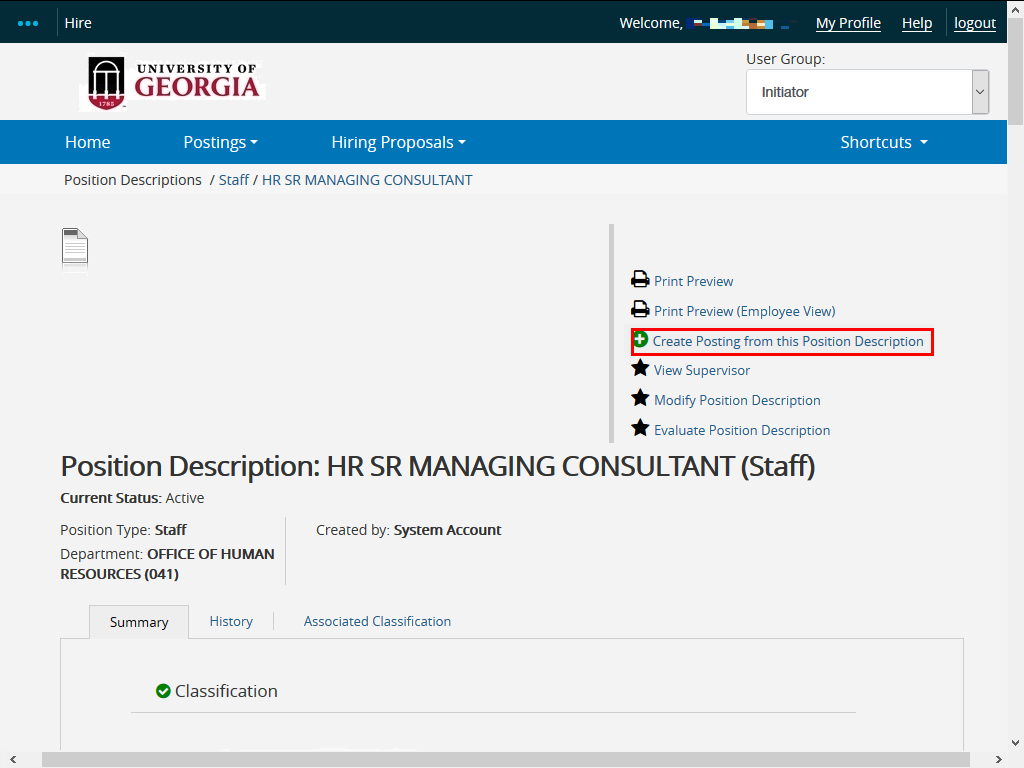 |
The Position Description for the specific position is displayed.
Click the Create Posting from this Position Description link.
|
|
 |
|
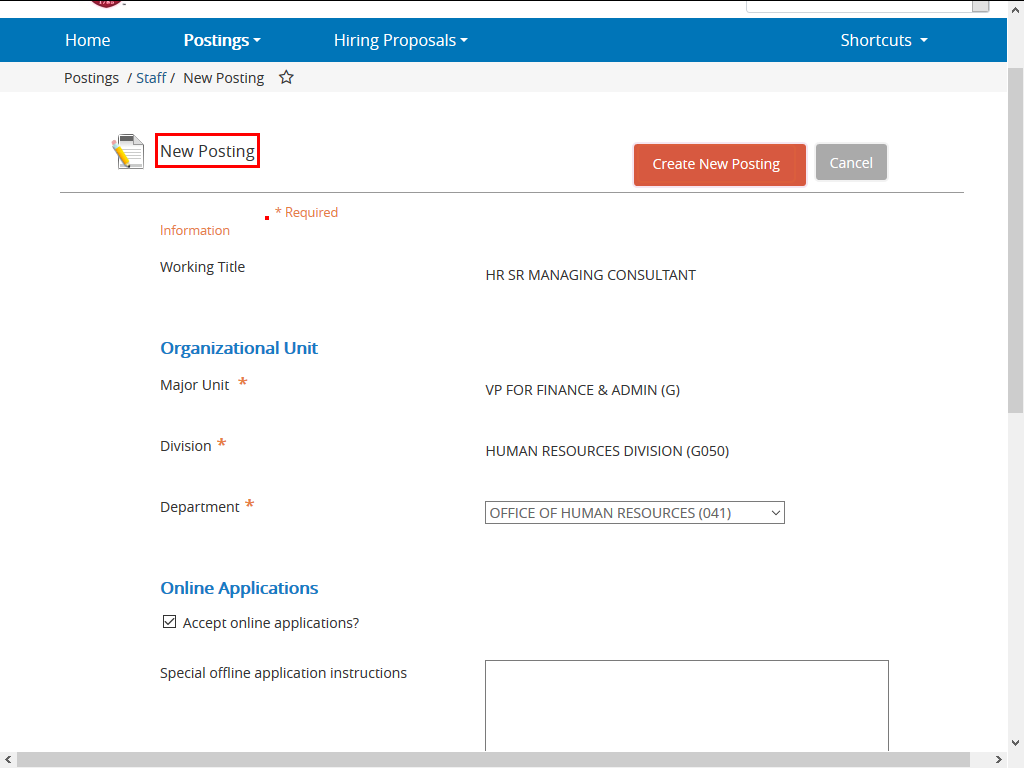
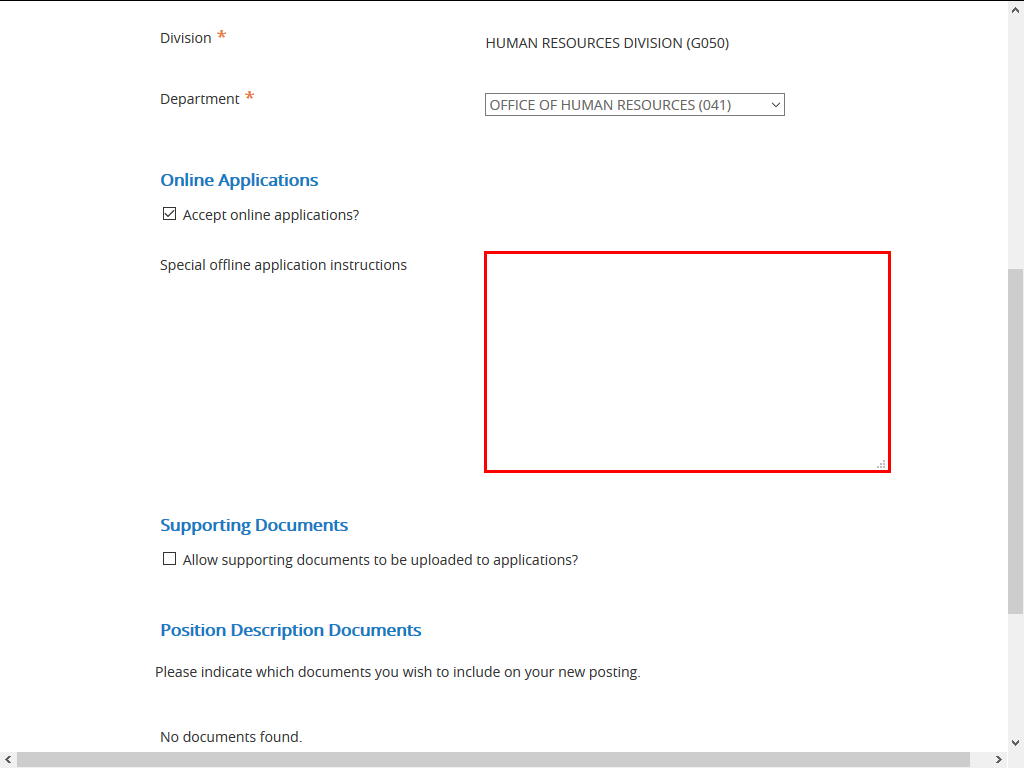
The New Posting page is displayed. Scroll down to complete the available fields.
|
|
 |
|
Enter appropriate information into the Special offline application instructions field as needed.
|
|
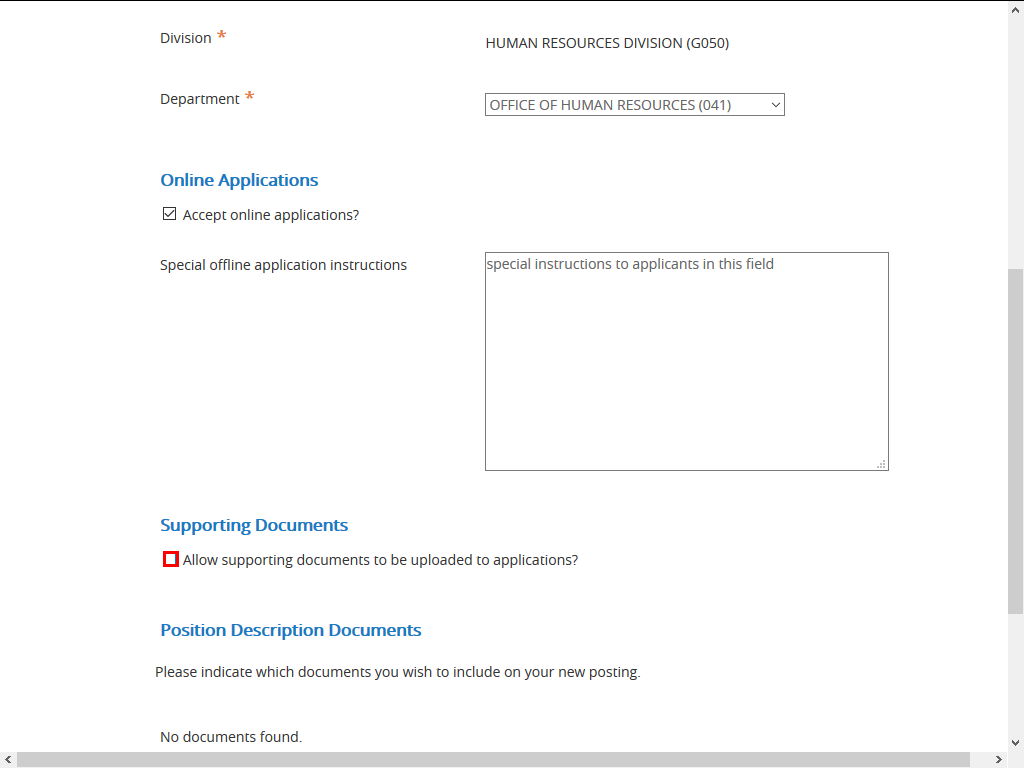 |
Click the Allow supporting documents to be uploaded to applications? option.
|
|
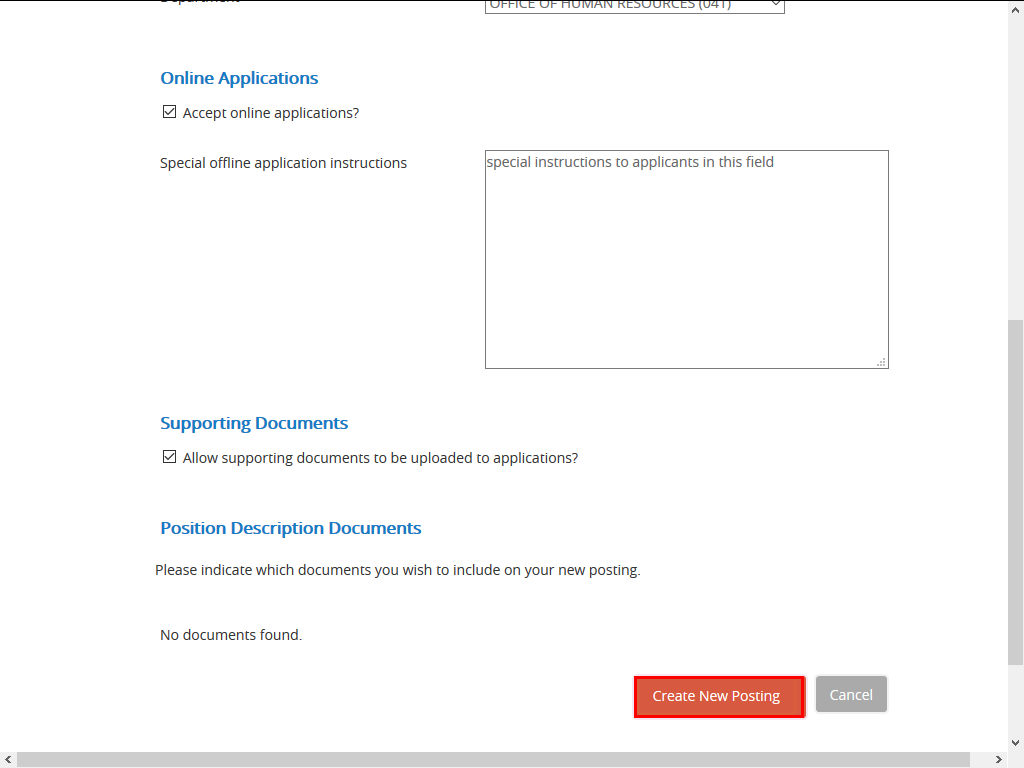 |
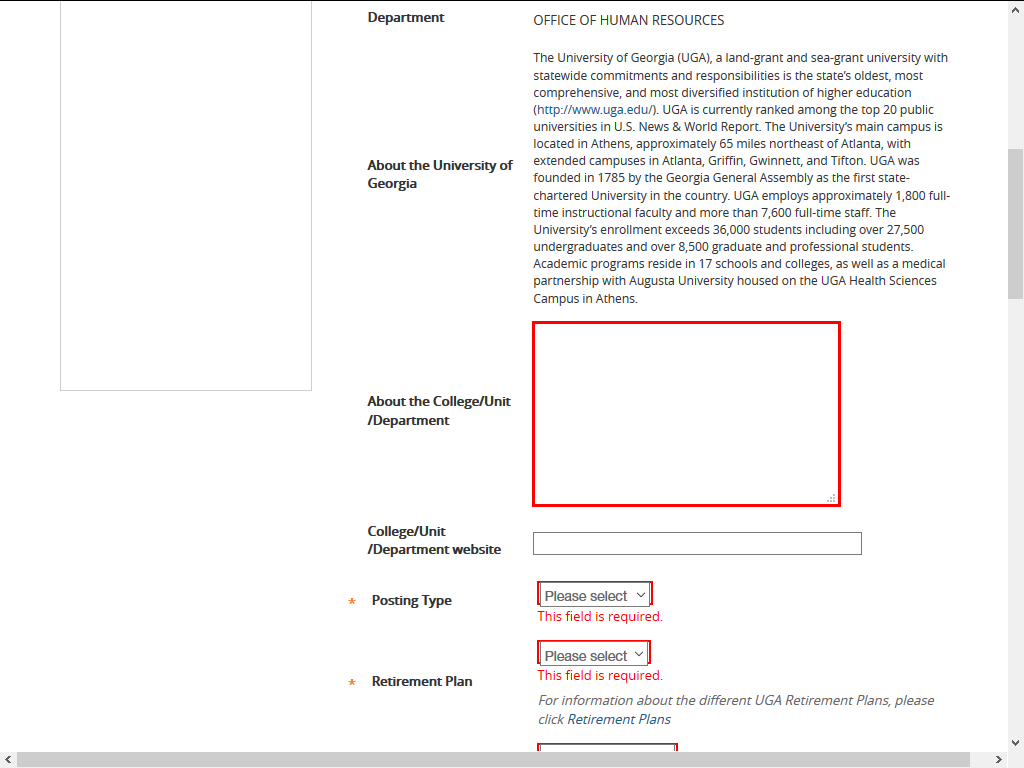
Click the Create New Posting button.
|
|
 |
|
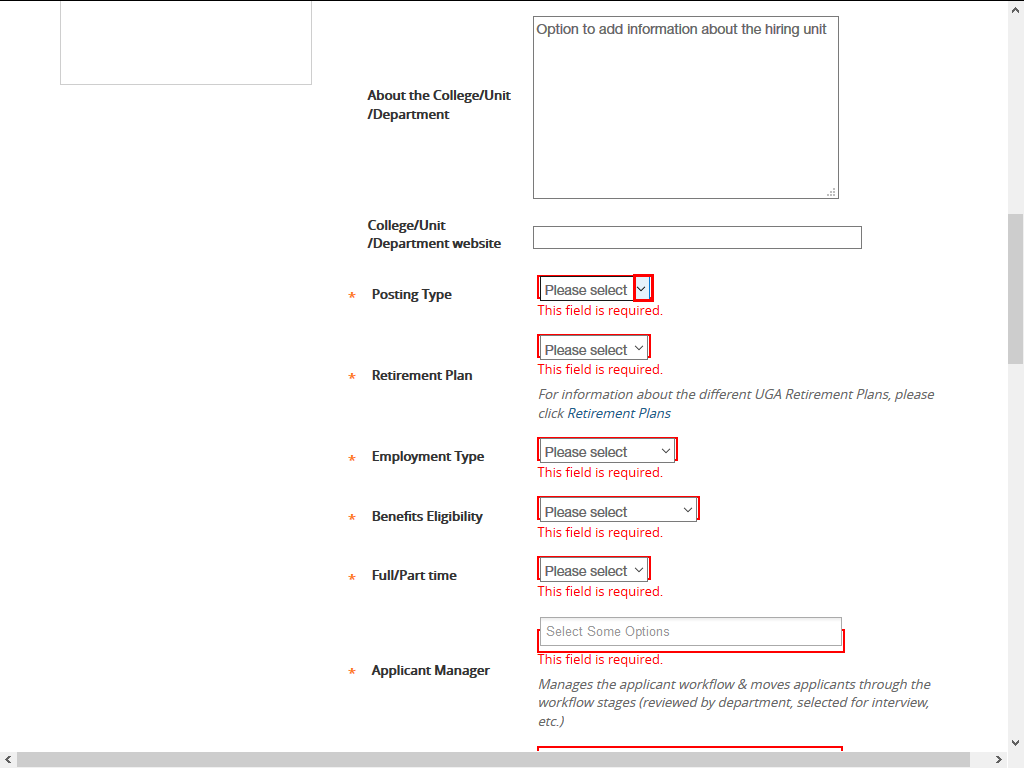
The Posting Details page is displayed. You will enter information regarding the new posting on this page.
Scroll down and enter appropriate information into the About the College/Unit/Department field.
|
|
 |
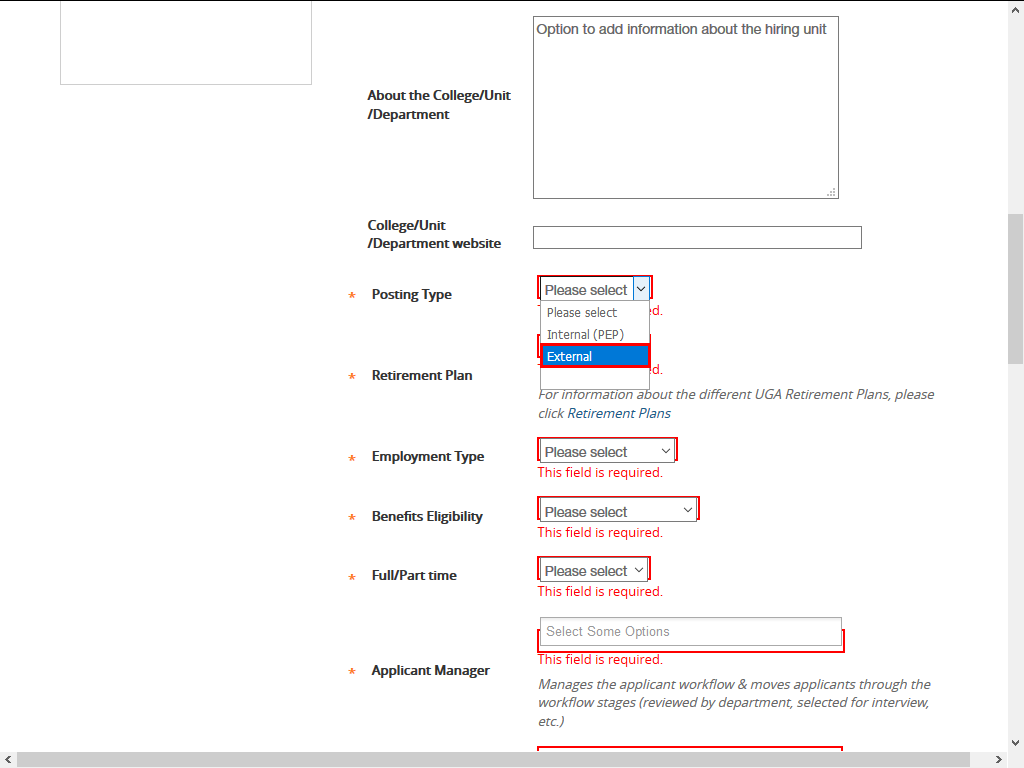
Click the Posting Type drop-down list.
|
|
 |
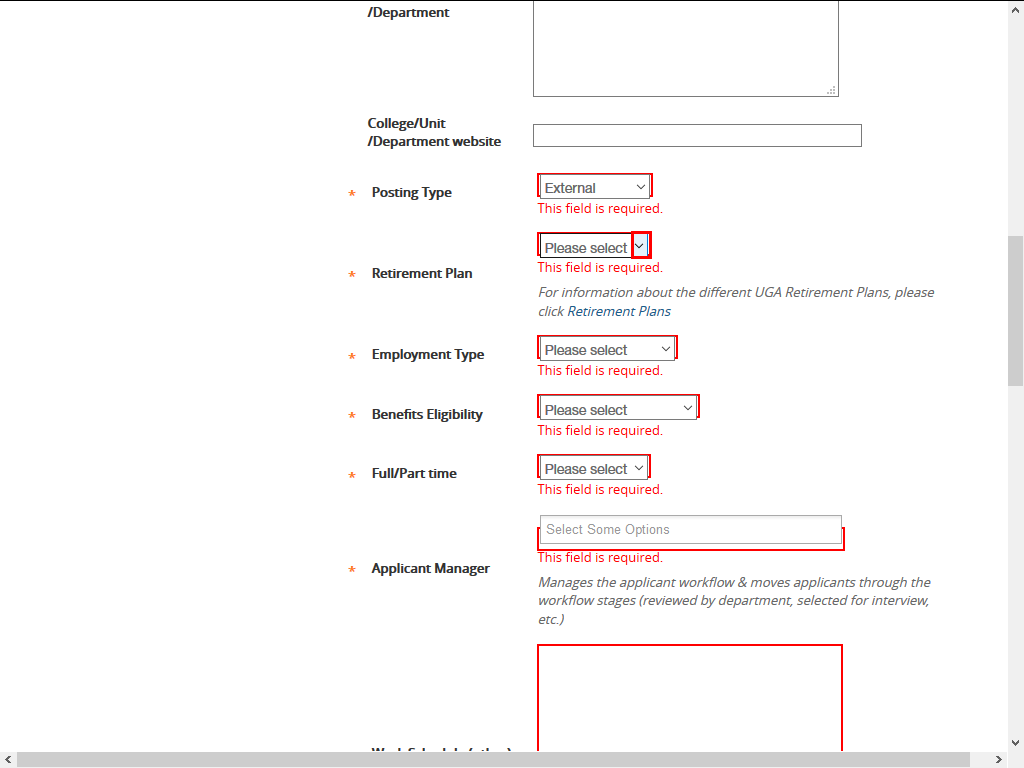
Click the External list item.
|
|
 |
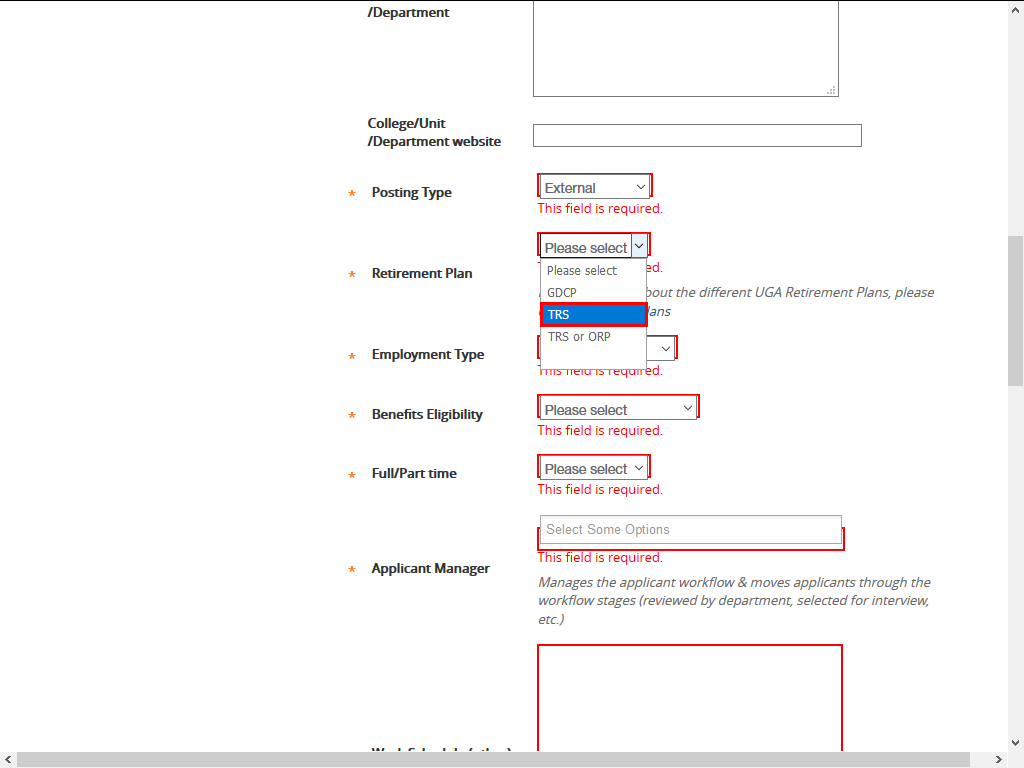
Click the Retirement Plan drop-down list.
|
|
 |
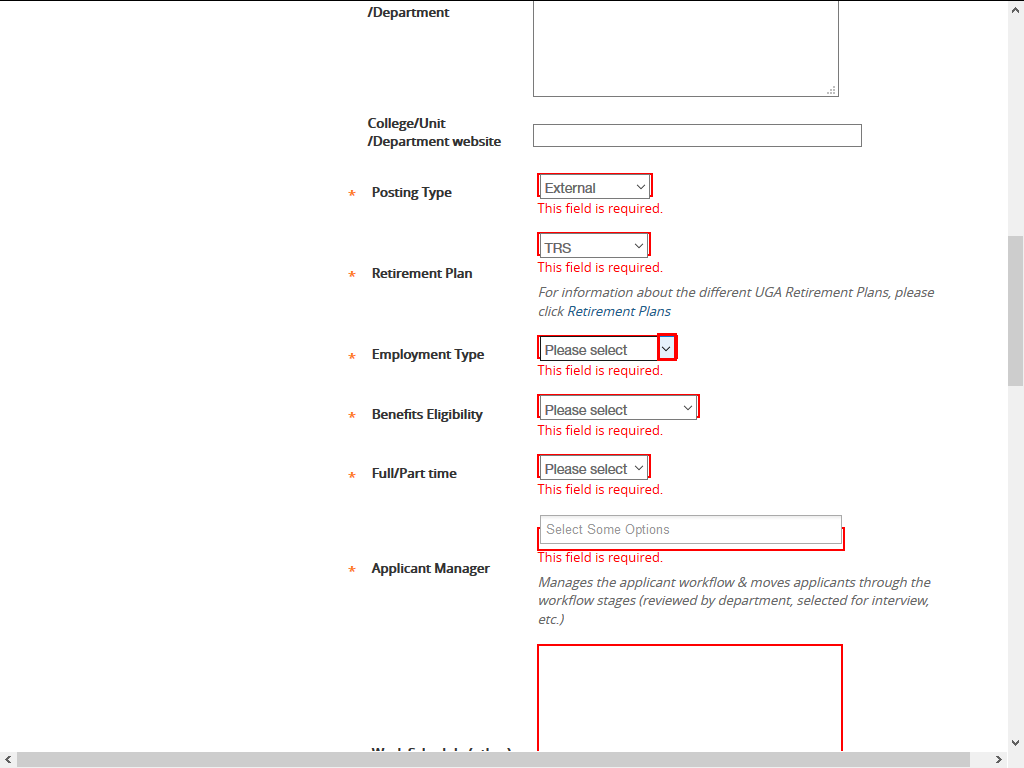
Select the appropriate Retirement Plan.
Example shown here: Click the TRS list item.
|
|
 |
Click the Employment Type drop-down list.
|
|
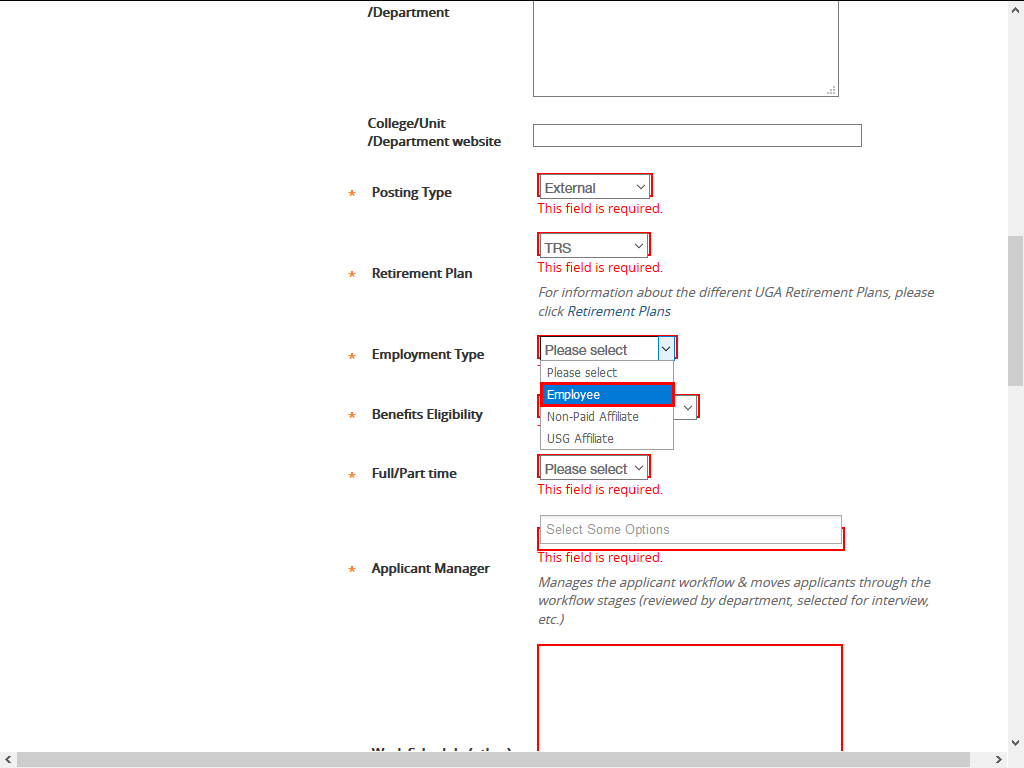 |
Select the appropriate employment type.
Example shown here: Click the Employee option.
|
|
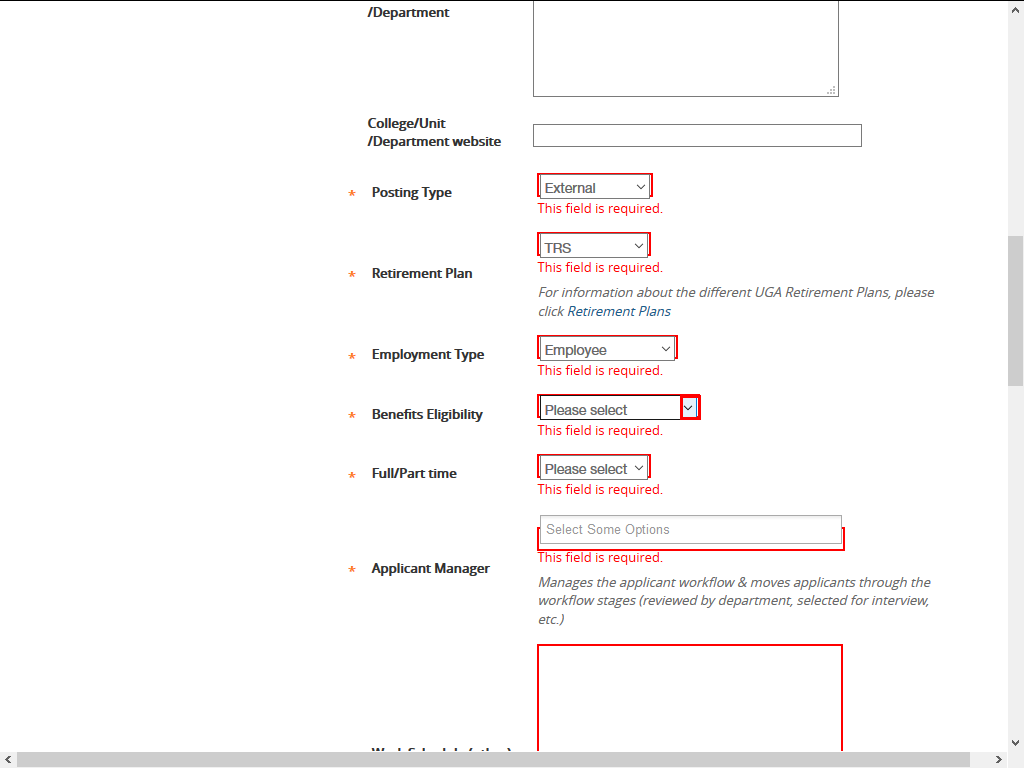 |
Click the Benefits Eligibility drop-down list.
|
|
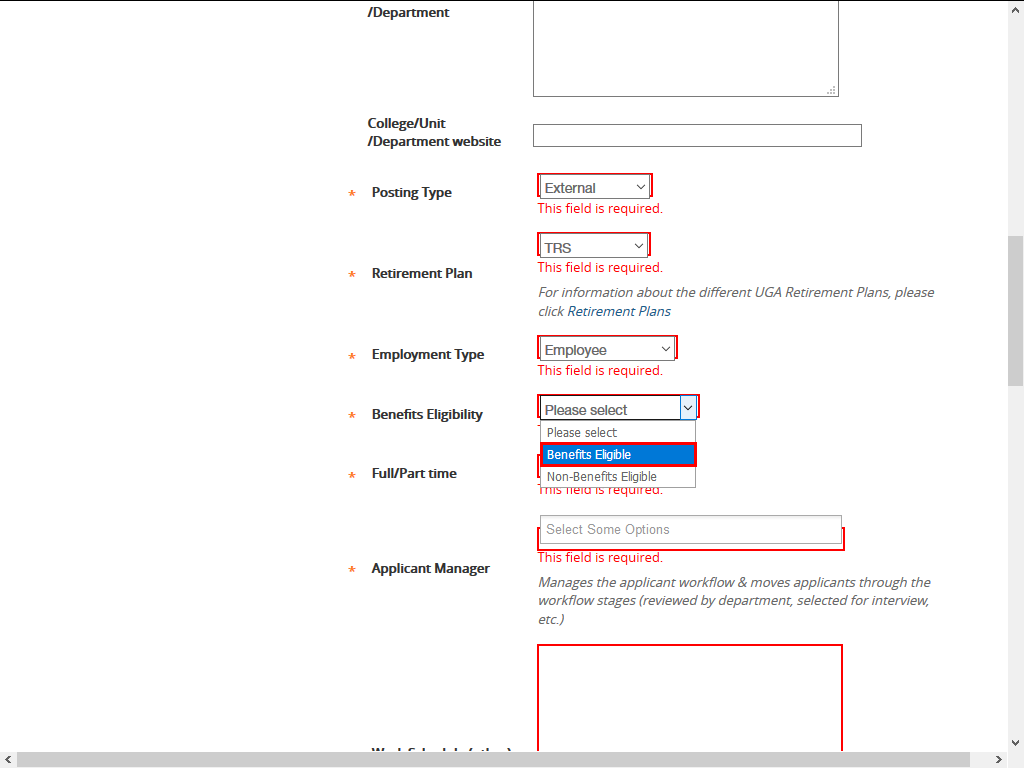 |
Select the appropriate option.
Click the Benefits Eligible option.
|
|
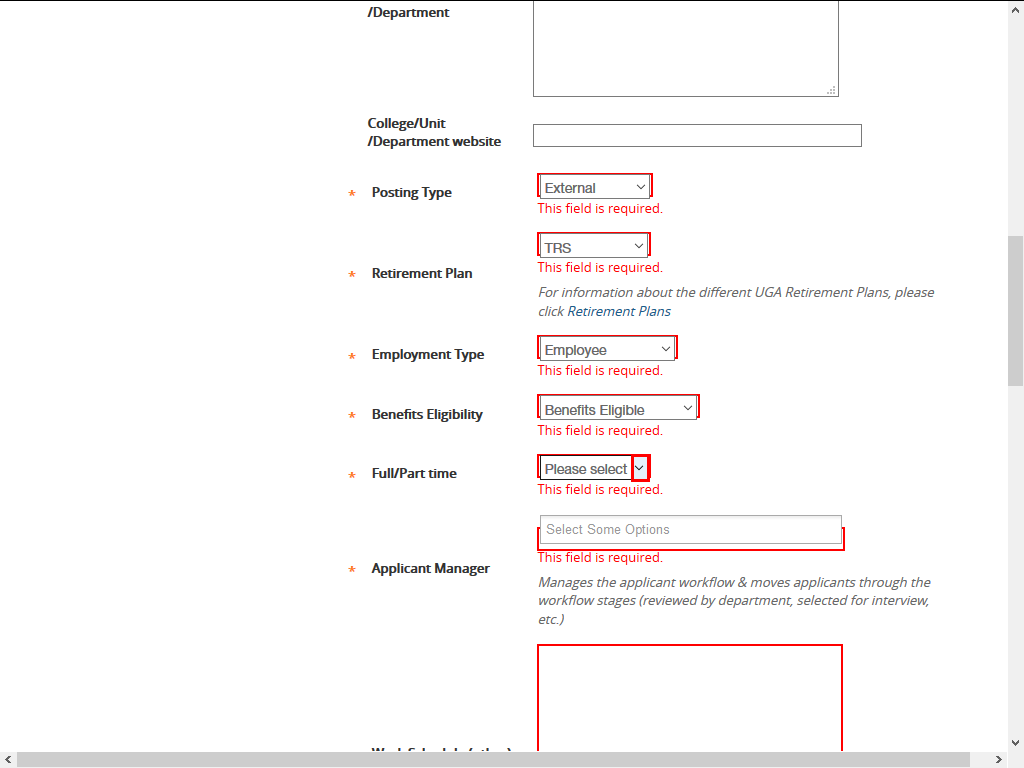 |
Click the Full/Part time drop-down list.
|
|
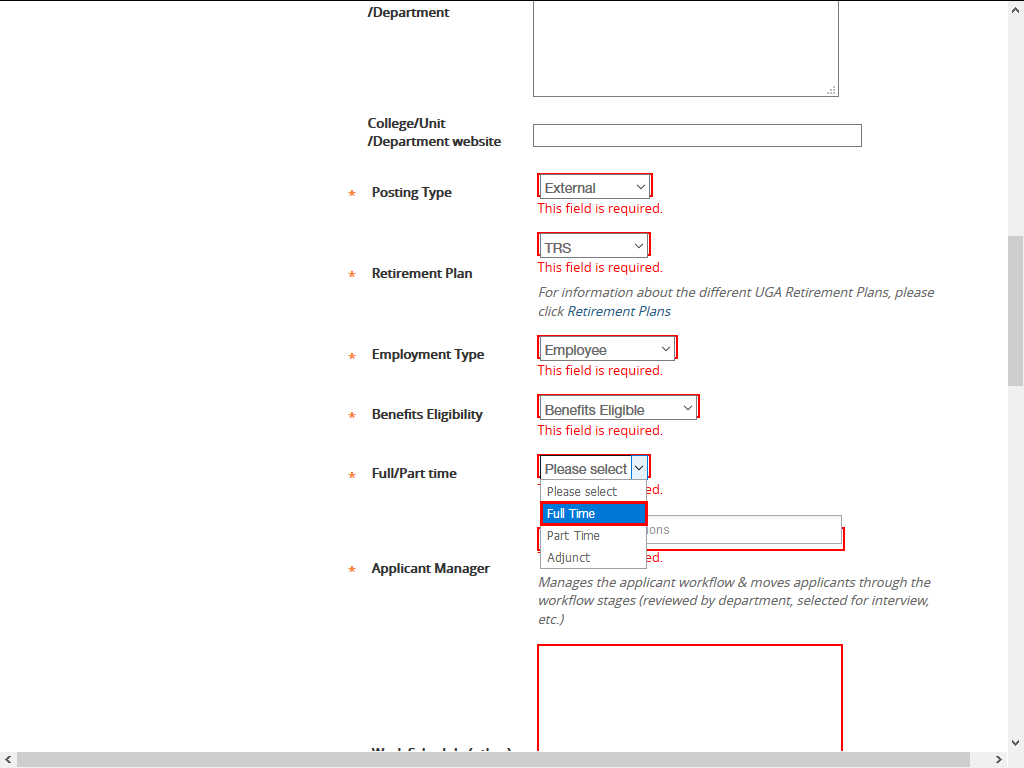 |
Click the appropriate option.
Click the Full Time option.
|
|
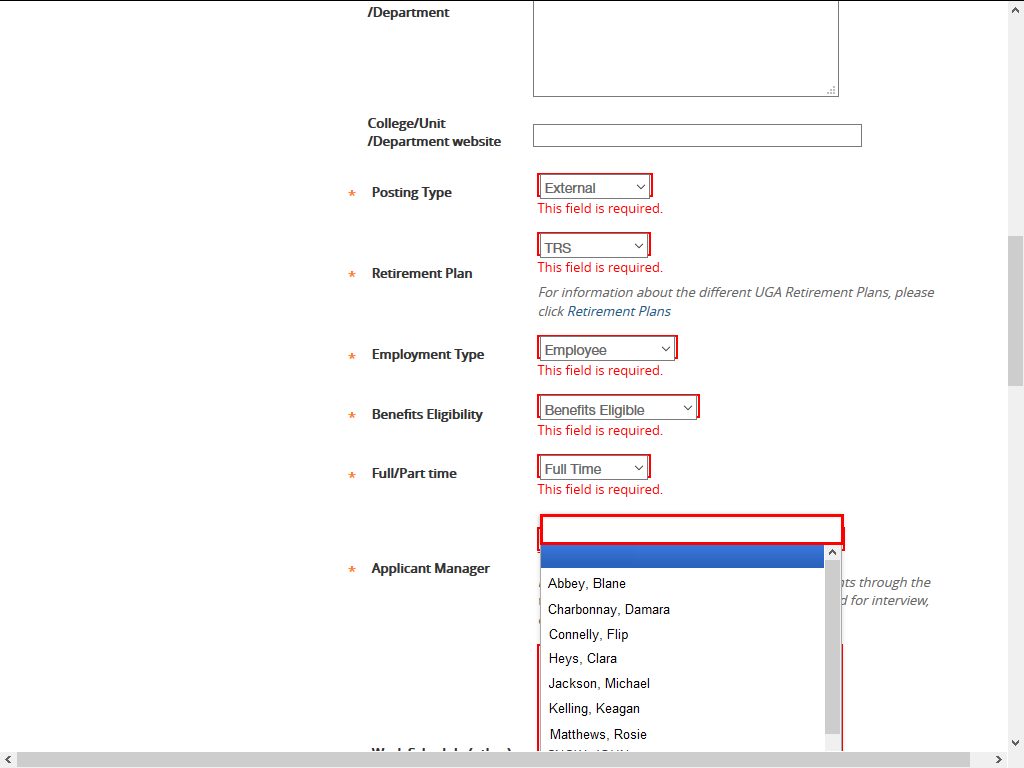 |
Enter the name of the Applicant Manager into the field to locate the employee.
Example shown here: Enter "Michael" into the field.
Note: Data has been distorted to protect employee information.
|
|
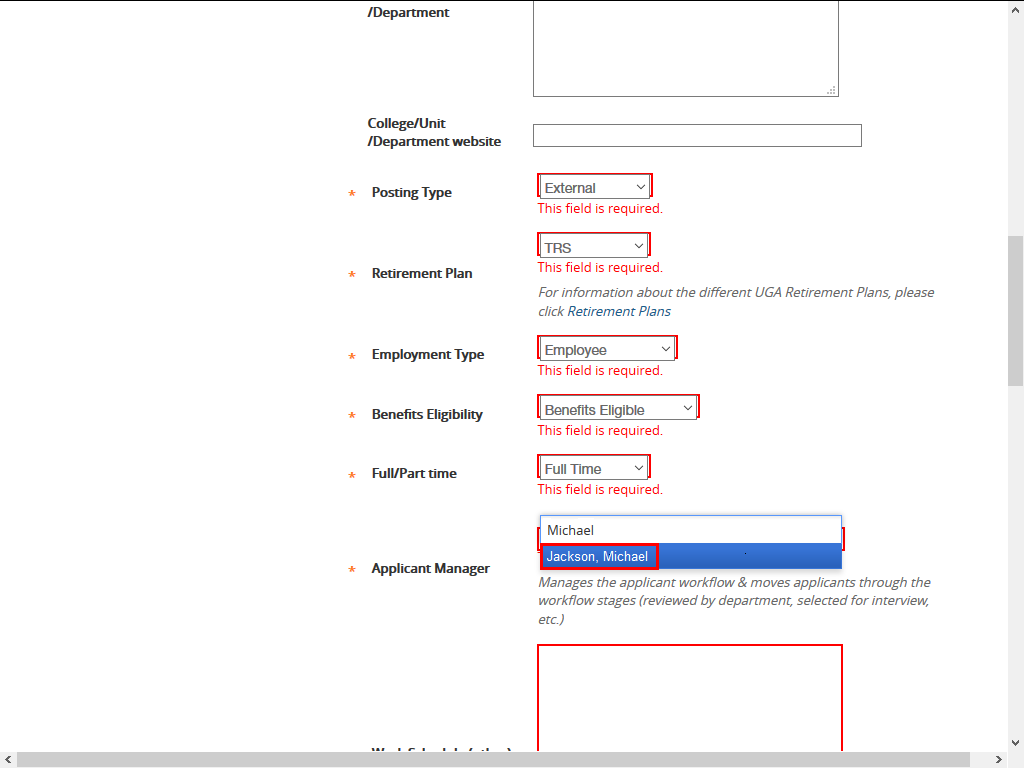 |
Select the appropriate Applicant Manager.
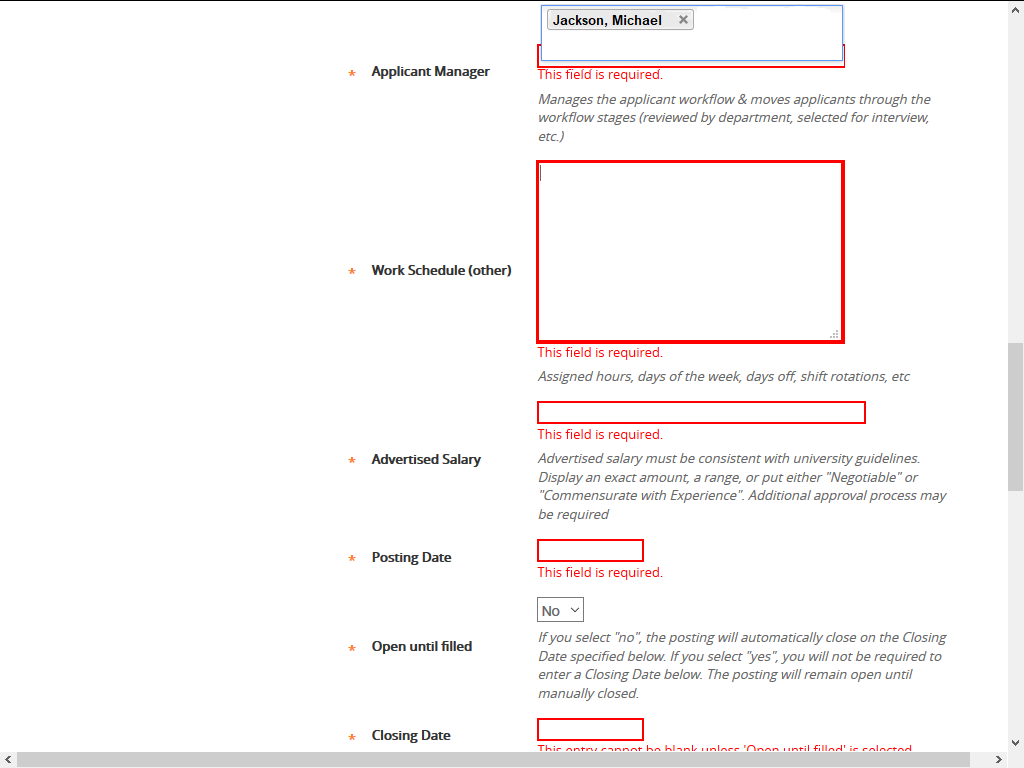
Example shown here: Select the name JACKSON, MICHAEL.
|
|
 |
|
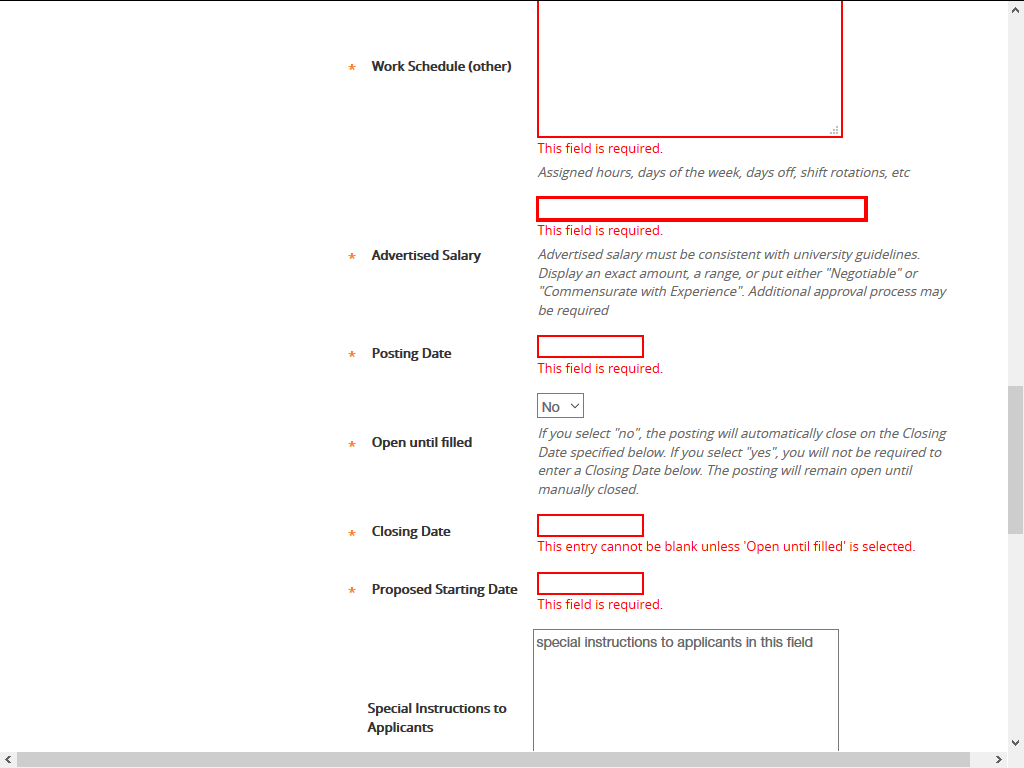
Enter appropriate information into the Work Schedule (other) field.
|
|
 |
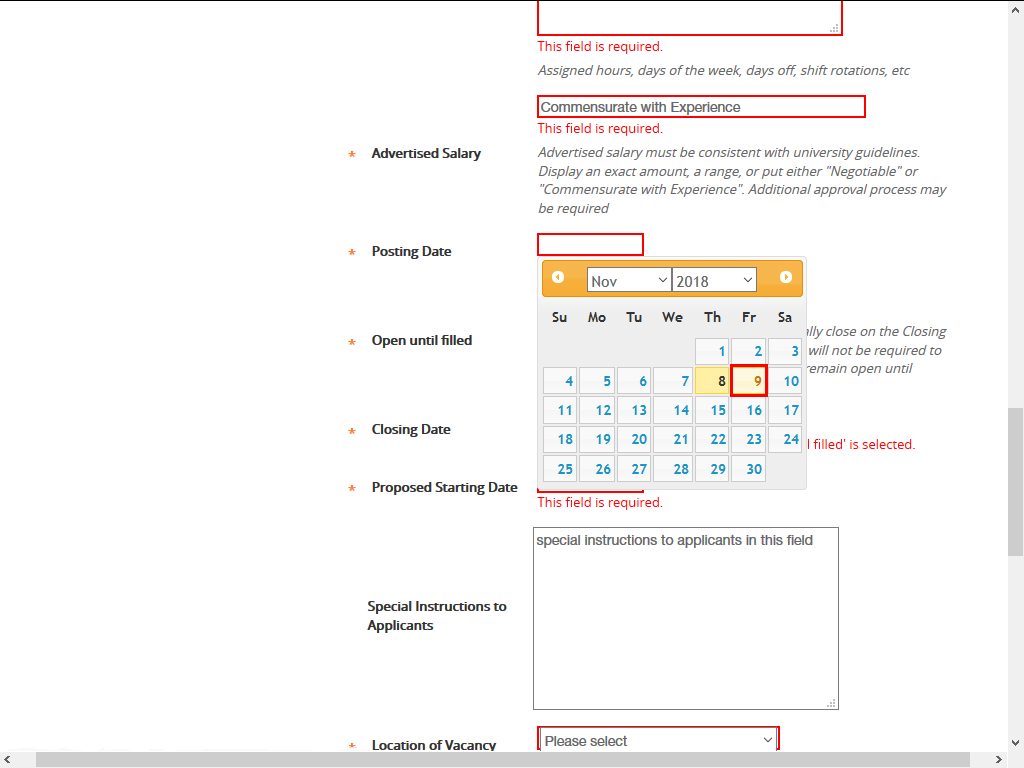
Enter appropriate information into the Advertised Salary field.
Enter "Commensurate with Experience".
|
|
 |
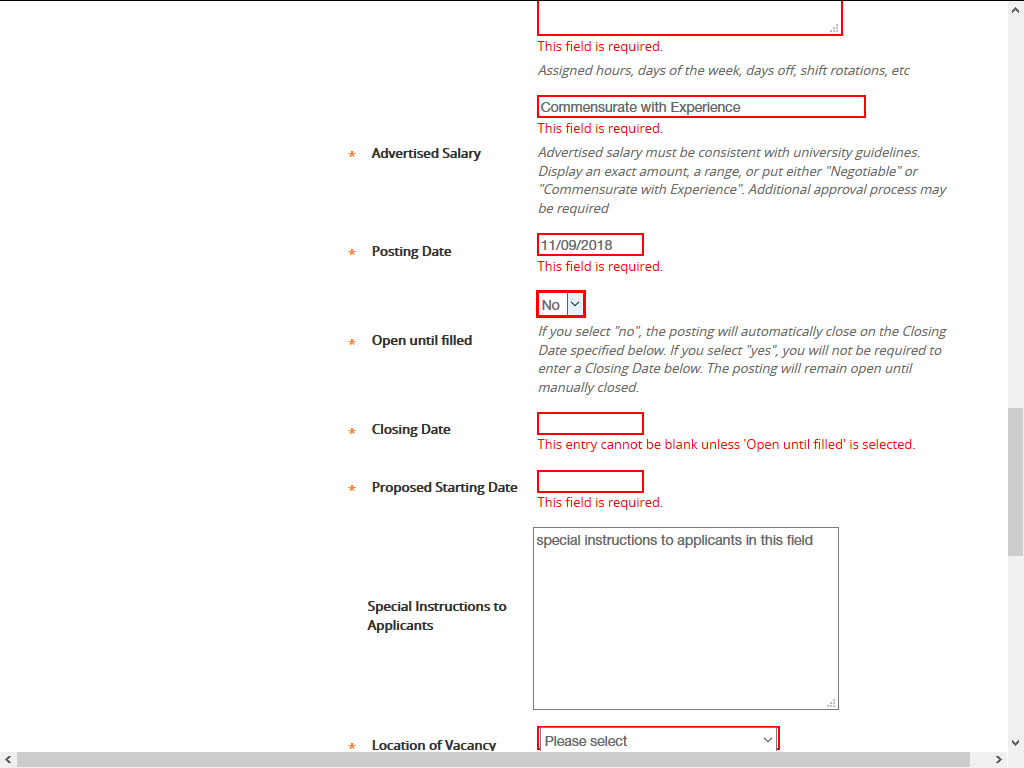
Enter or select the appropriate Month and Date into the Posting Date field.
Example shown here: Click the November 9 link.
|
|
 |
|
Select the appropriate option in the Open until filled drop down list.
Example shown here: Leave the Open until filled list as displayed.
|
|
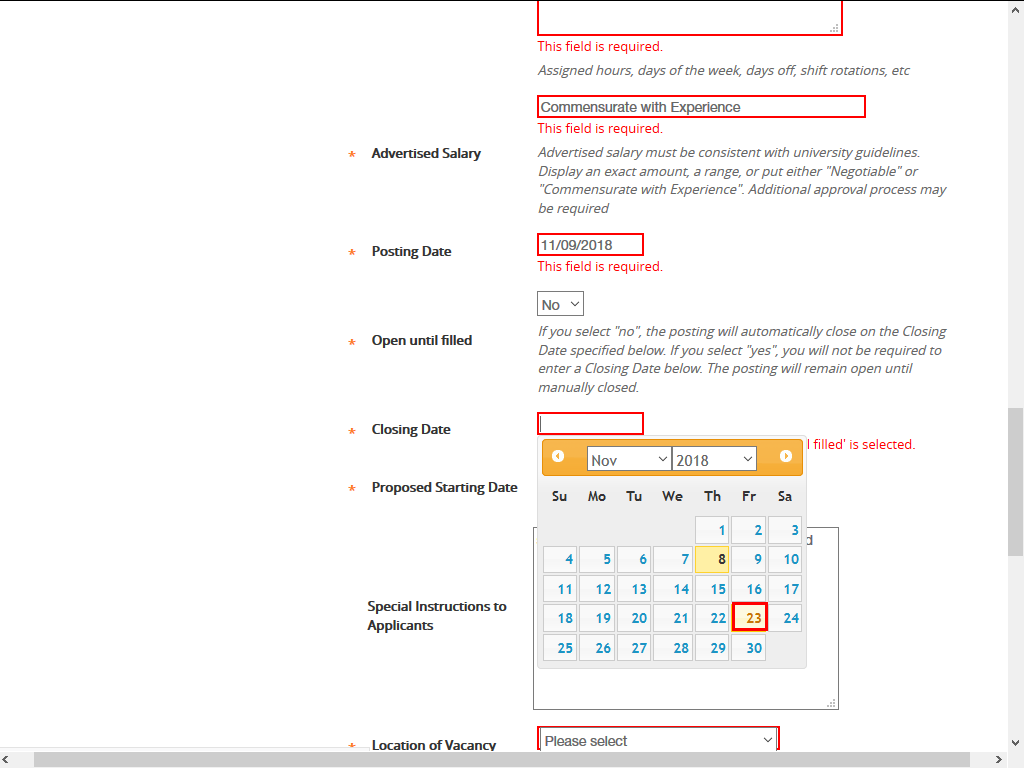 |
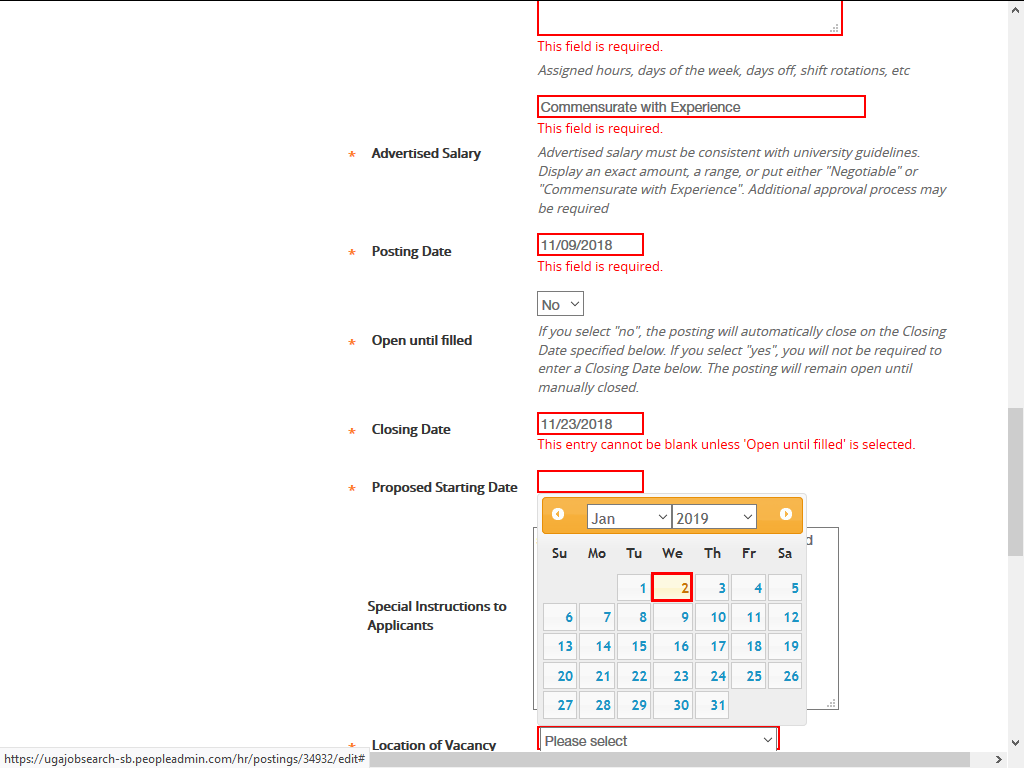
Enter or select the appropriate Closing Date.
Example shown here: Click the November 23 link.
|
|
 |
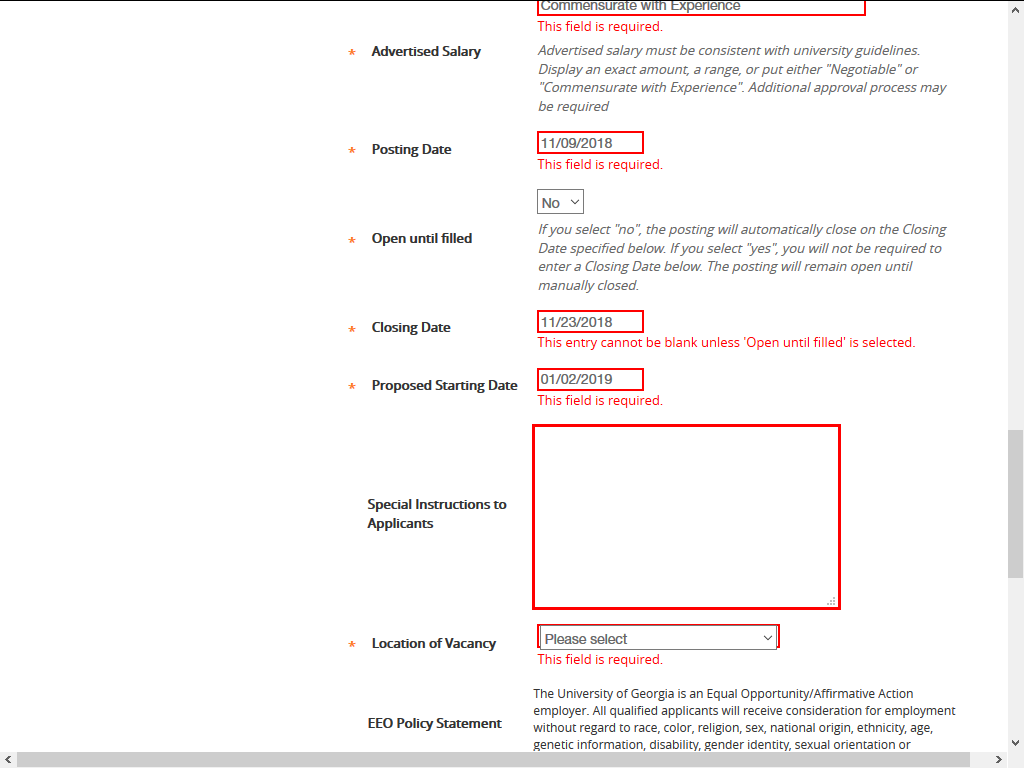
Enter or select the appropriate Proposed Starting Date.
Example shown here: Click the January 2 link.
|
|
 |
|
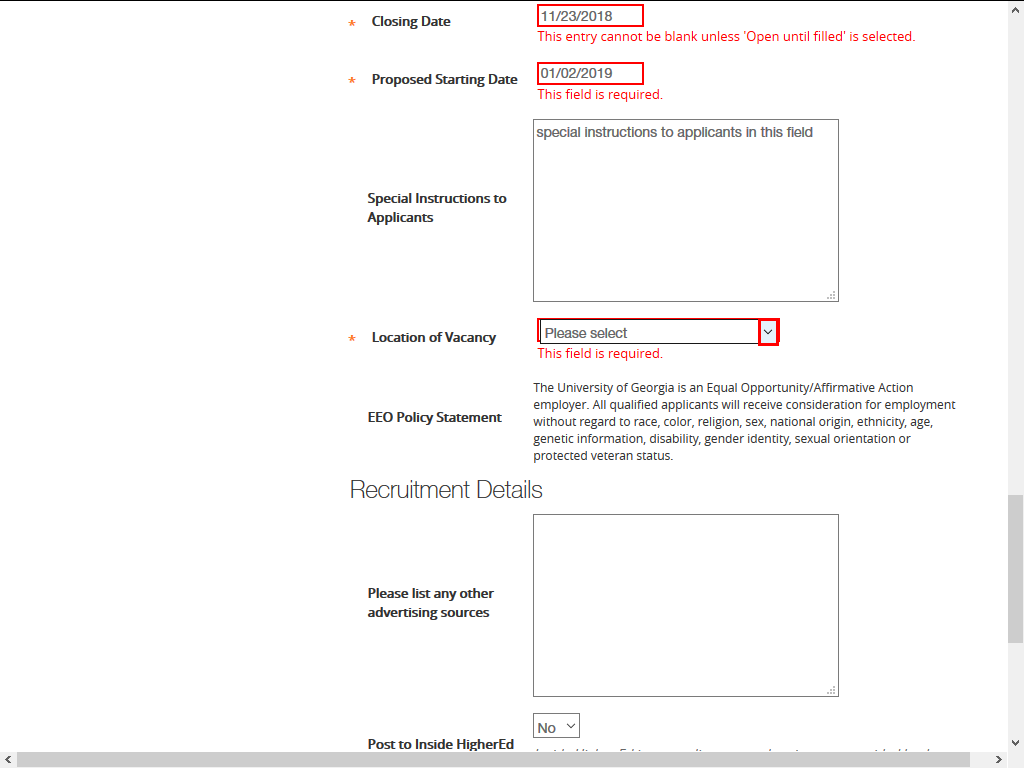
Enter appropriate information into the Special Instructions to Applicants field as needed.
|
|
 |
Click the Location of Vacancy drop-down list.
|
|
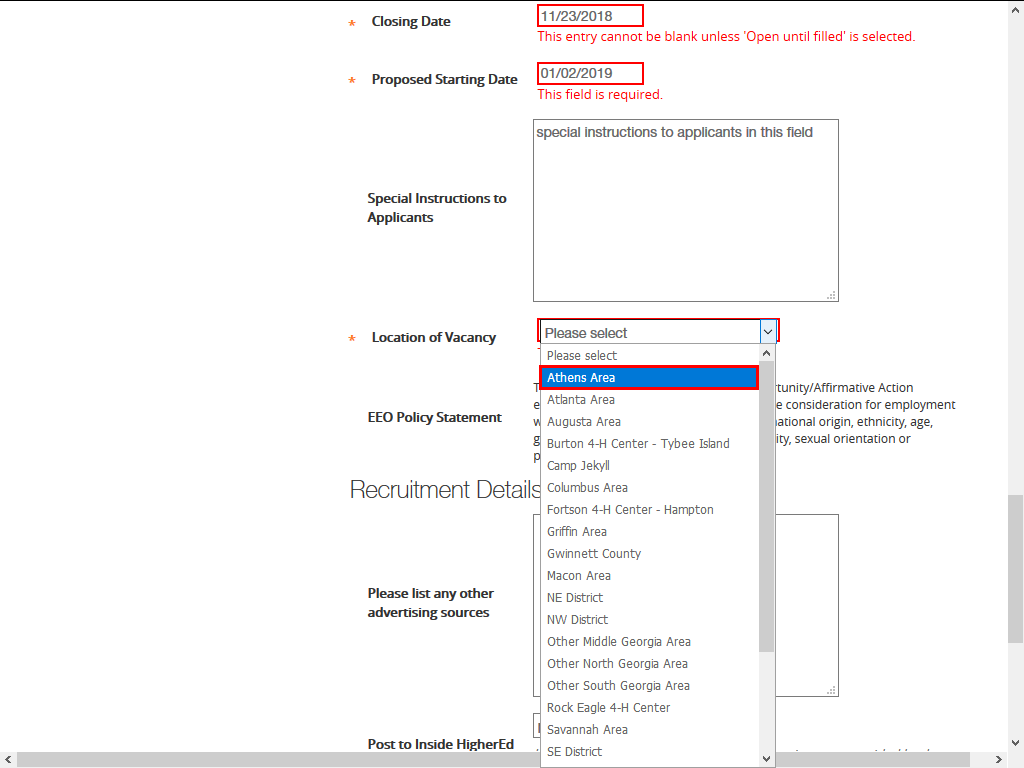 |
Select the appropriate location from the list.
Example shown here: Click the Athens Area option.
|
|
 |
|
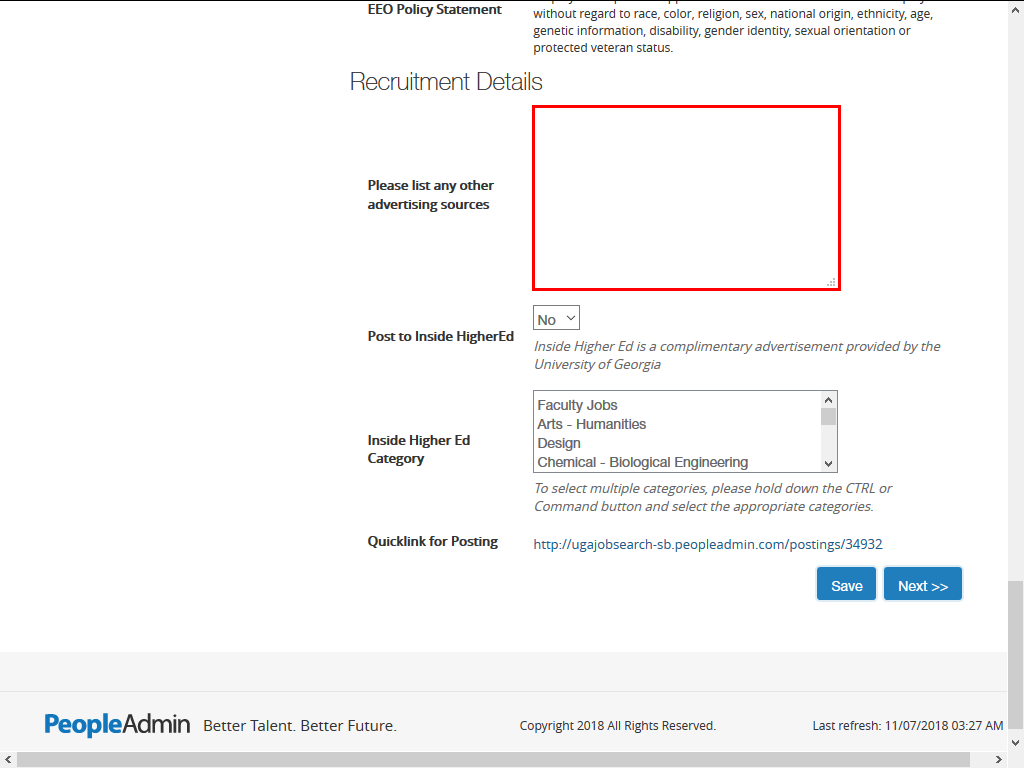
Enter appropriate information into the Please list any other advertising sources field as needed.
|
|
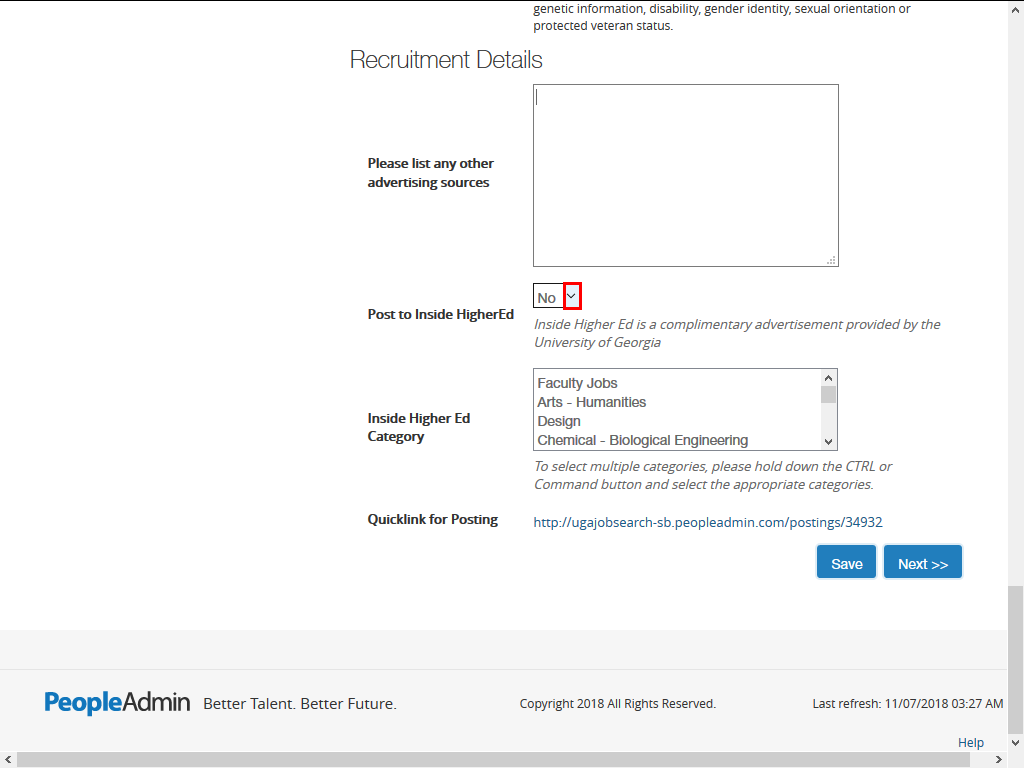 |
Click the Post to Inside HigherEd drop-down list.
|
|
 |
|
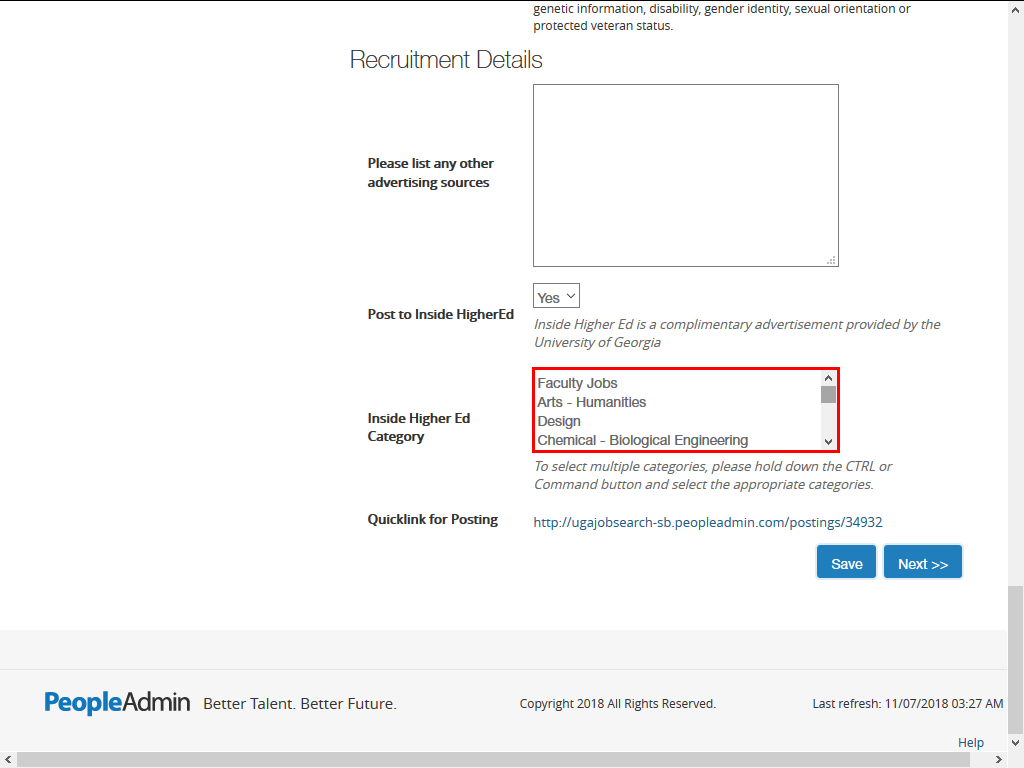
Select the appropriate list item from the Inside Higher Ed Category field.
|
|
 |
|
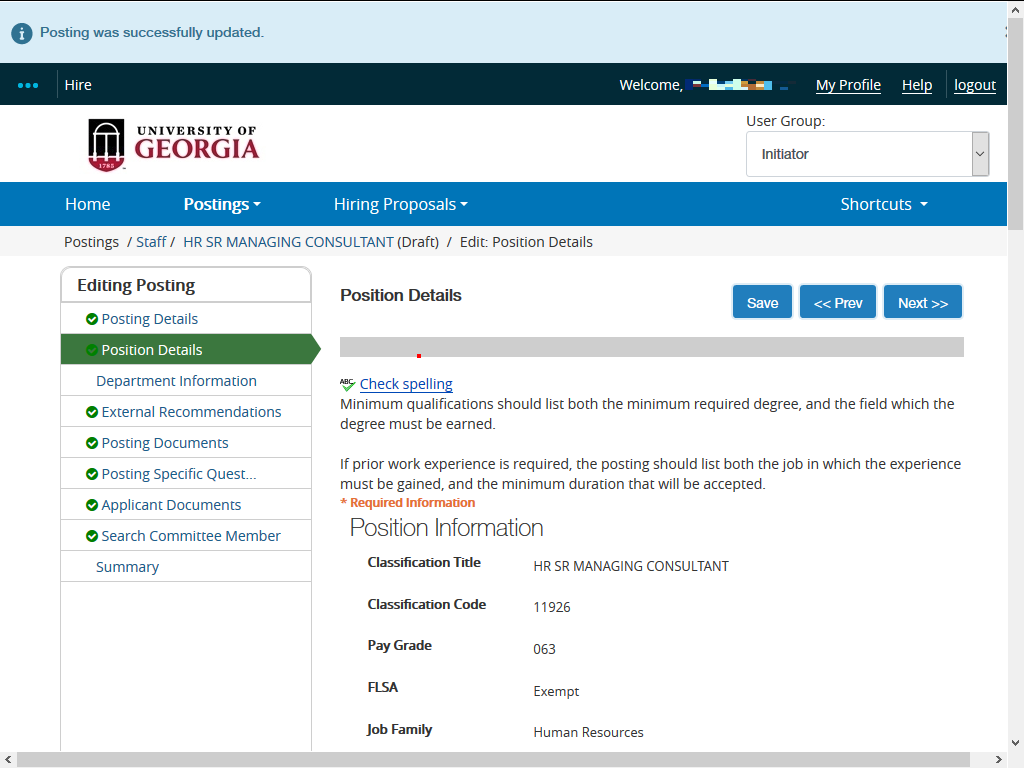
The Position Details page is displayed. Review the Position Information.
|
|
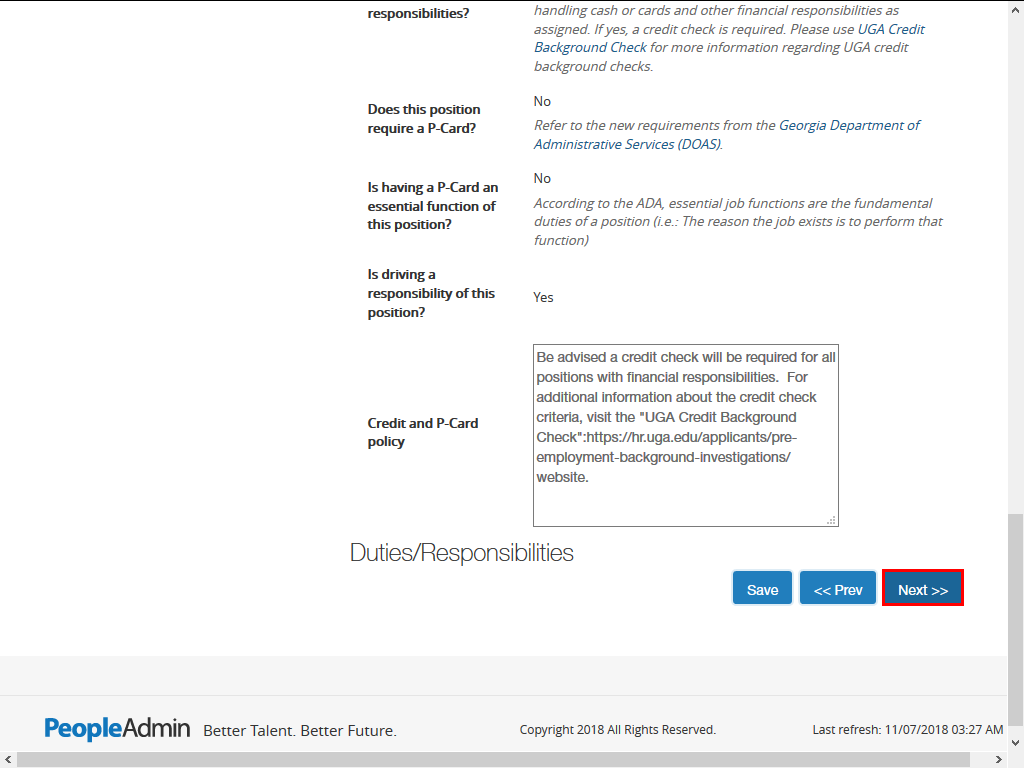 |
Scroll down and click the Next >> button.
|
|
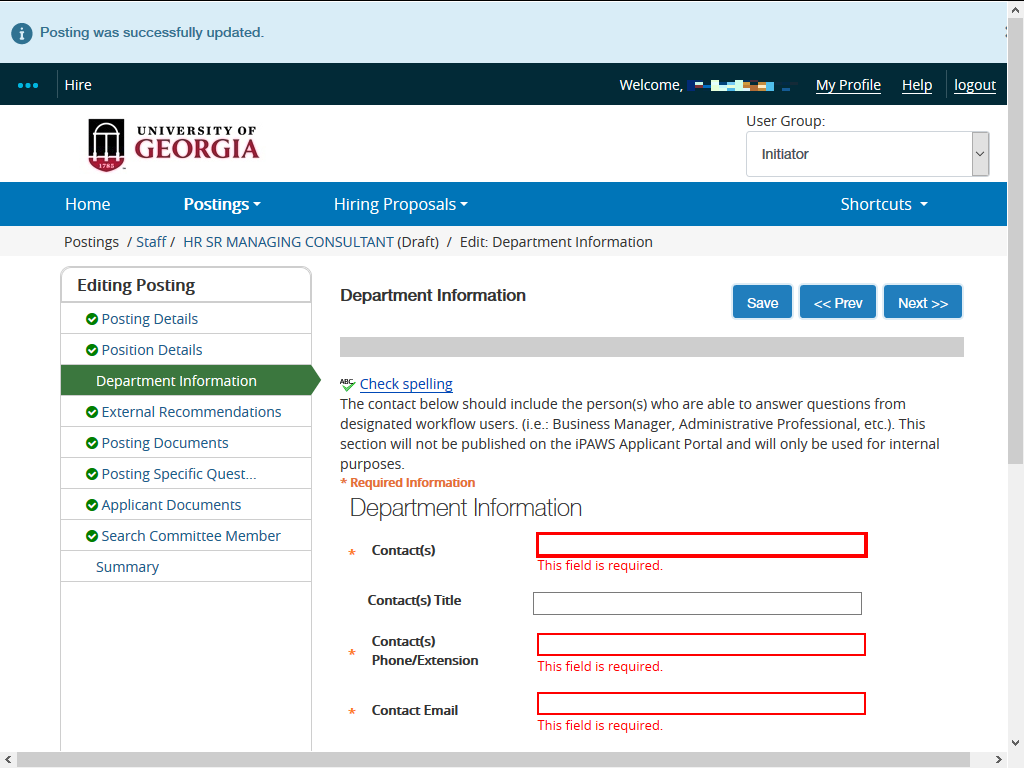 |
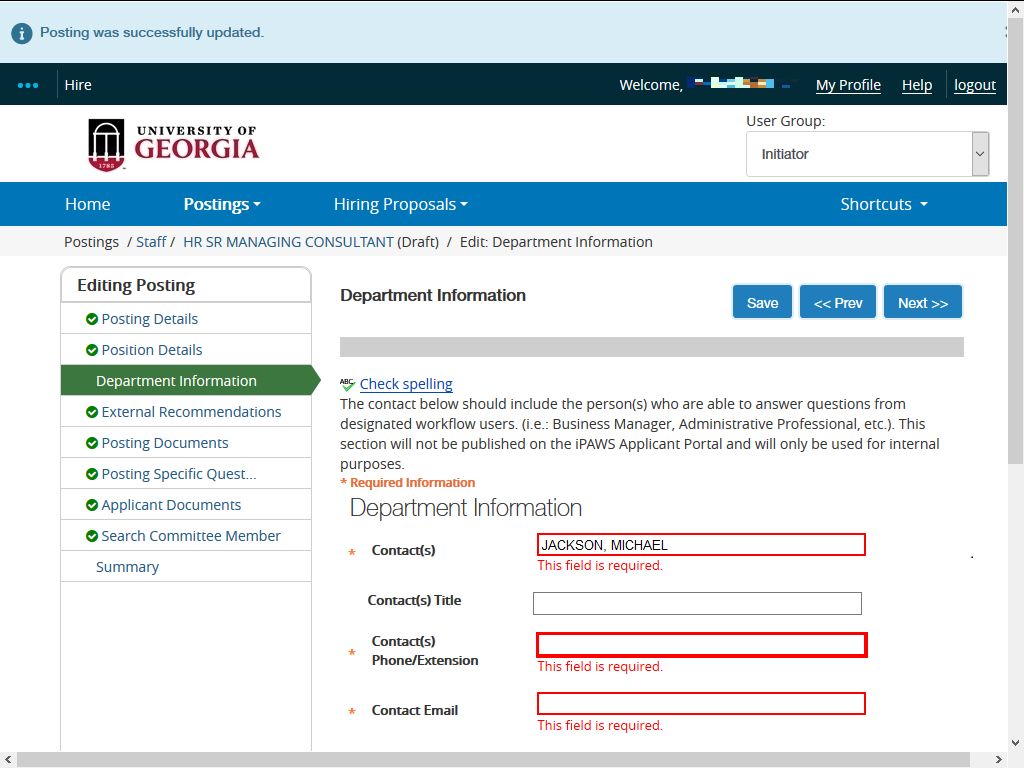
The Department Information page is displayed. Enter appropriate information into the Contact(s) field.
Example shown here: enter "JACKSON, MICHAEL" into the Contact(s) field.
|
|
 |
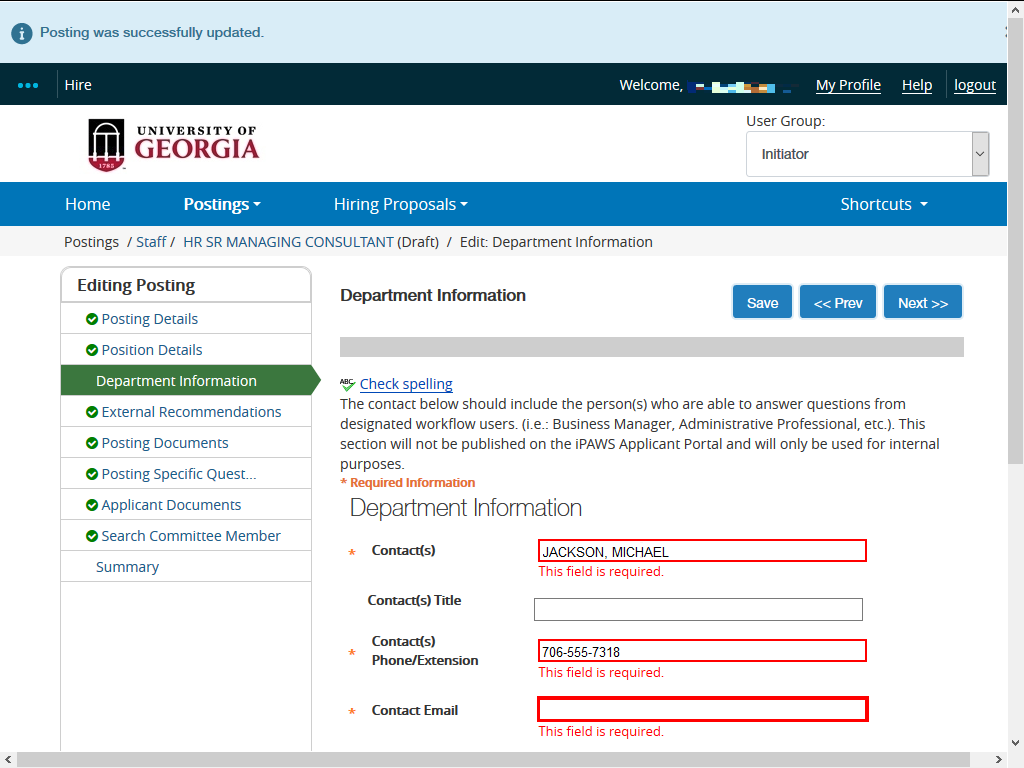
Enter appropriate information into the Contact(s) Phone/Extension field.
Example shown here: Enter "706-555-7318" into the Contact(s) Phone/Extension field.
|
|
 |
|
Enter appropriate information into the Contact Email field.
|
|
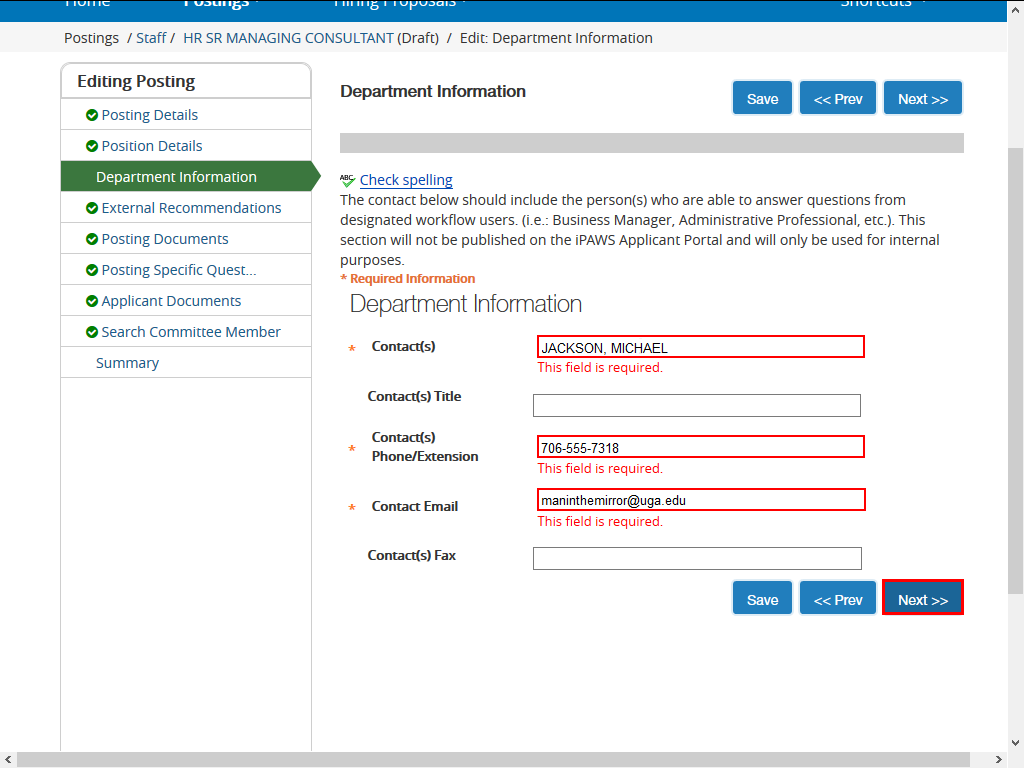 |
Click the Next >> button.
|
|
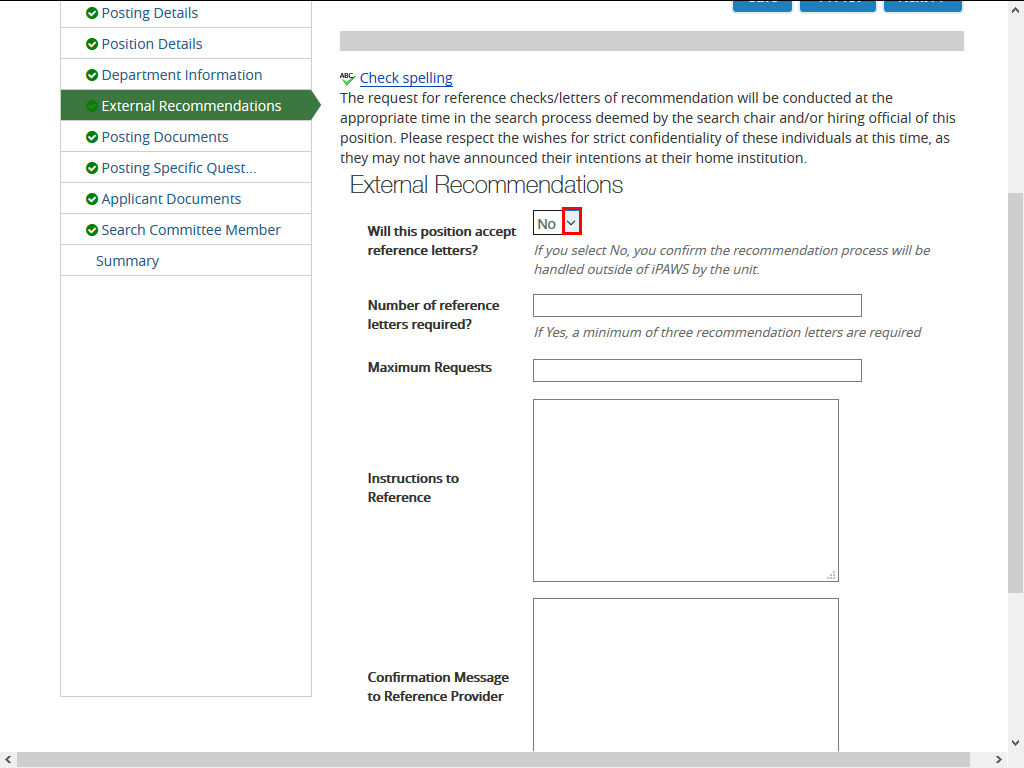 |
The External Recommendations page is displayed.
Click the Will this position accept reference letters? drop-down list.
|
|
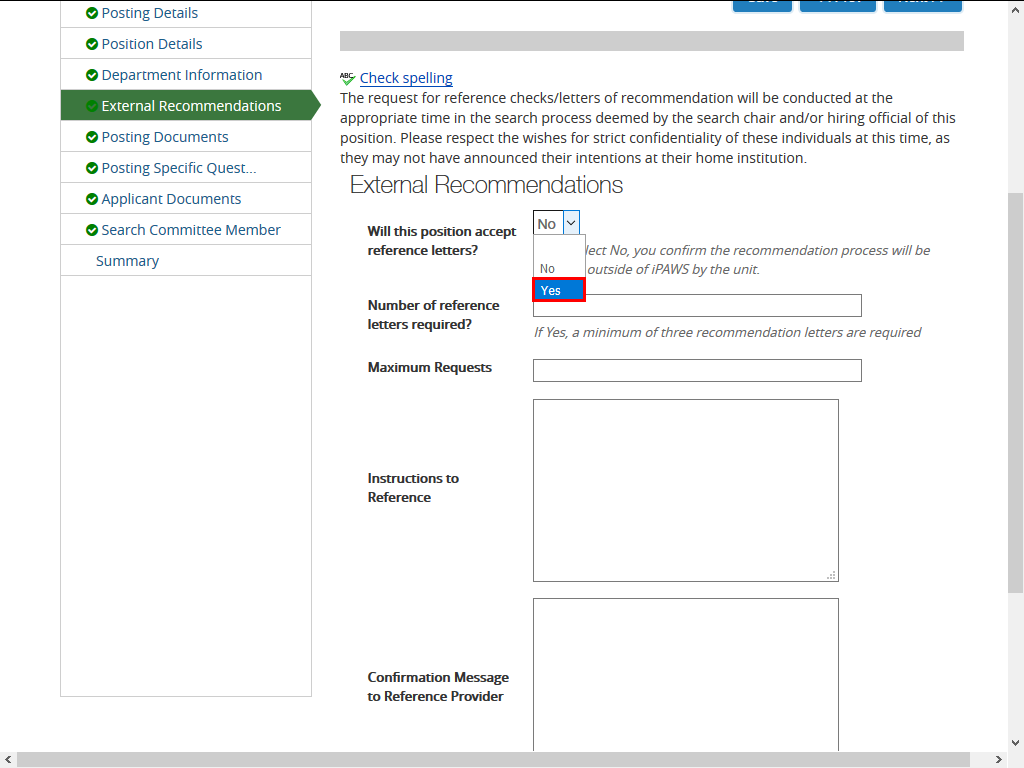 |
Click appropriate option.
Click the Yes list item.
|
|
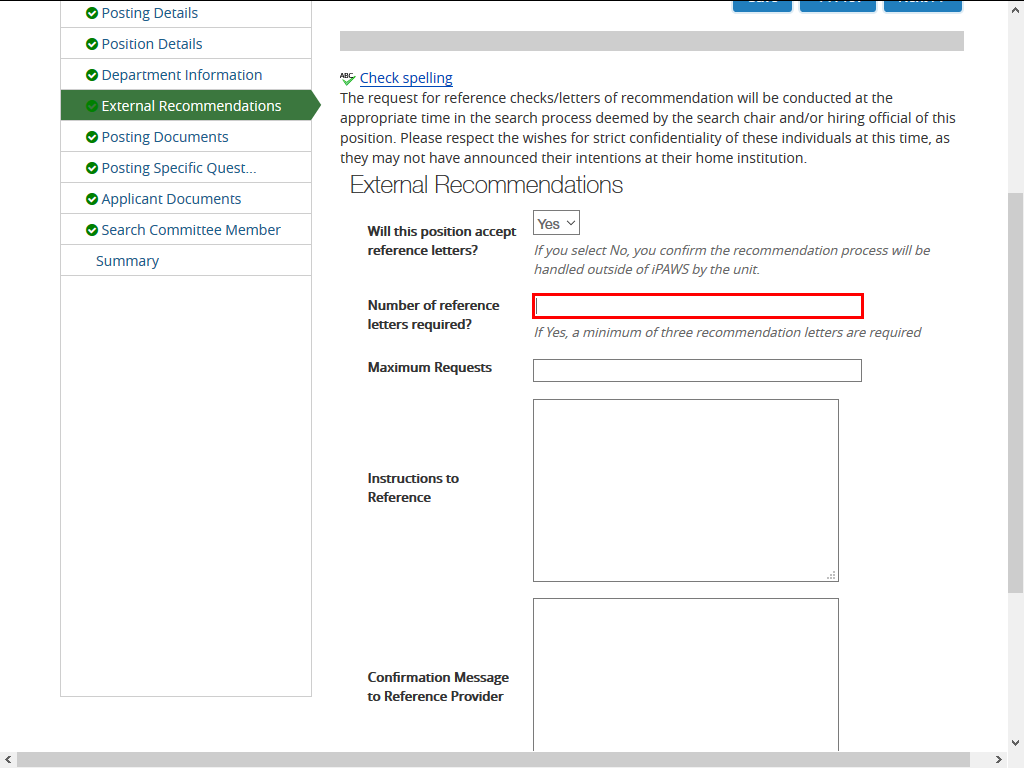 |
Enter appropriate information into the Number of reference letters required? field.
Example shown here: Enter "3".
|
|
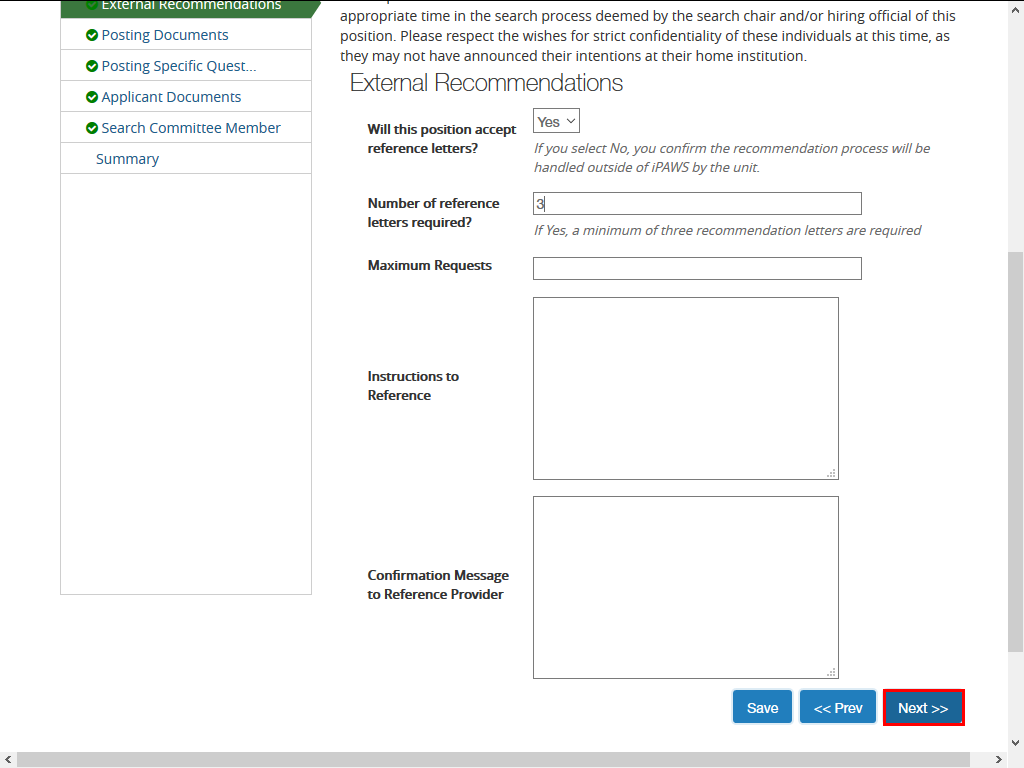 |
Click the Next >> button.
|
|
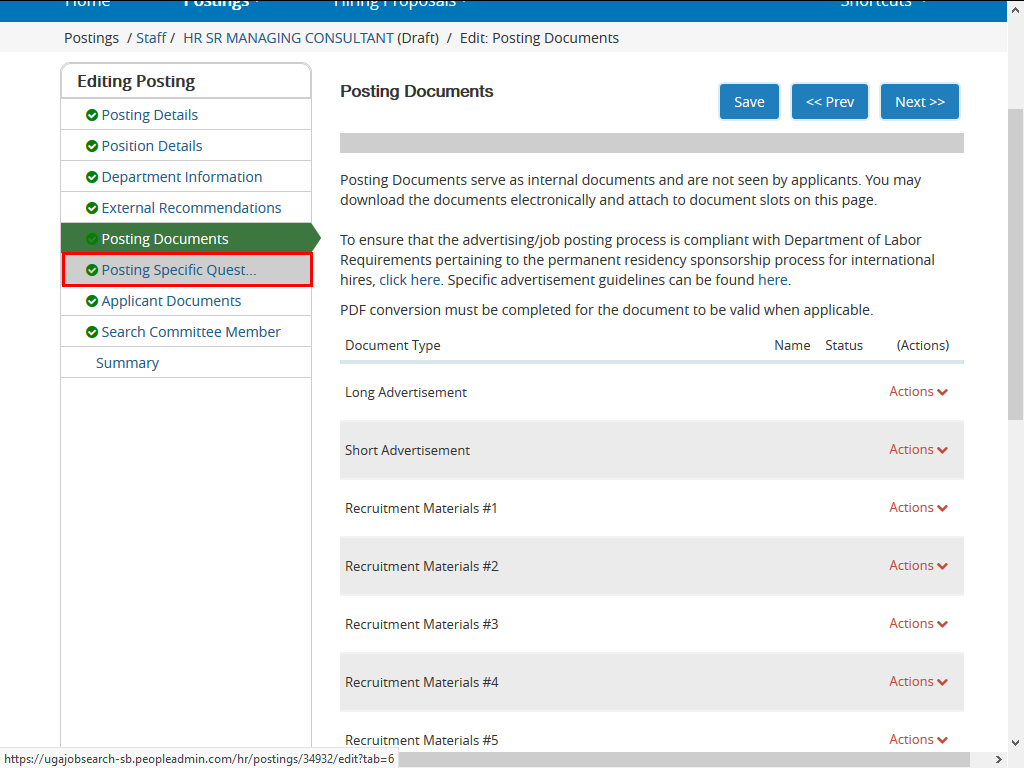 |
The Posting Documents page is displayed.
Once you have reviewed the information on the page, click the Posting Specific Questions link.
|
|
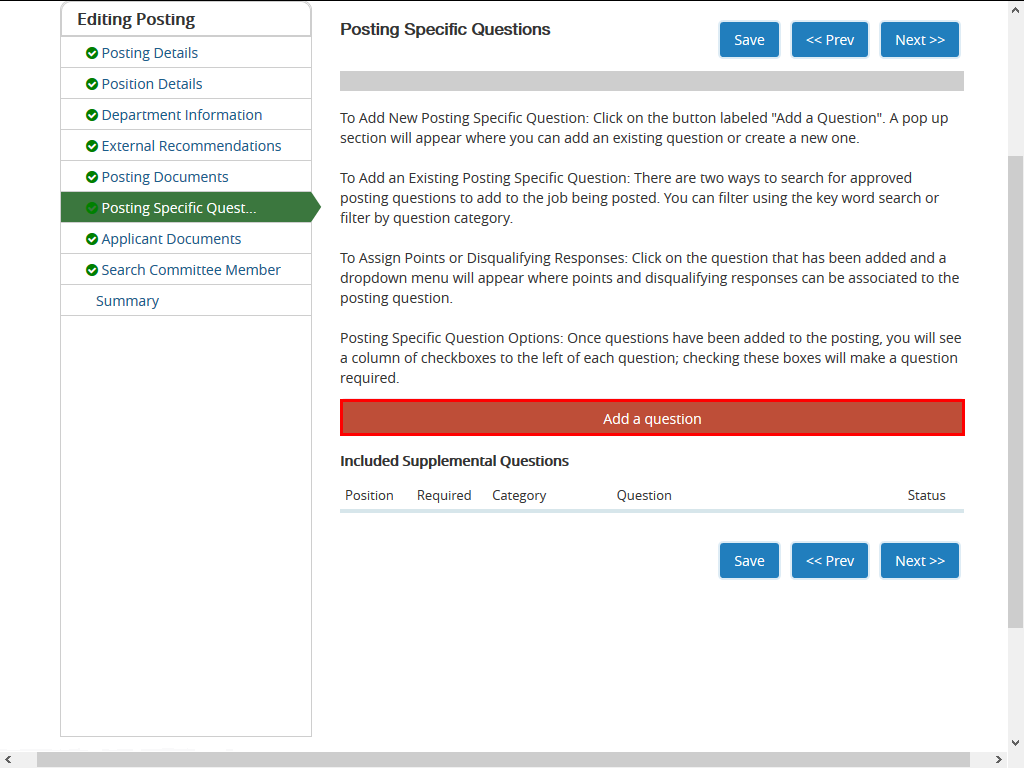 |
The Posting Specific Questions page is displayed.
Click the Add a question button to add question(s) to the posting.
|
|
 |
|
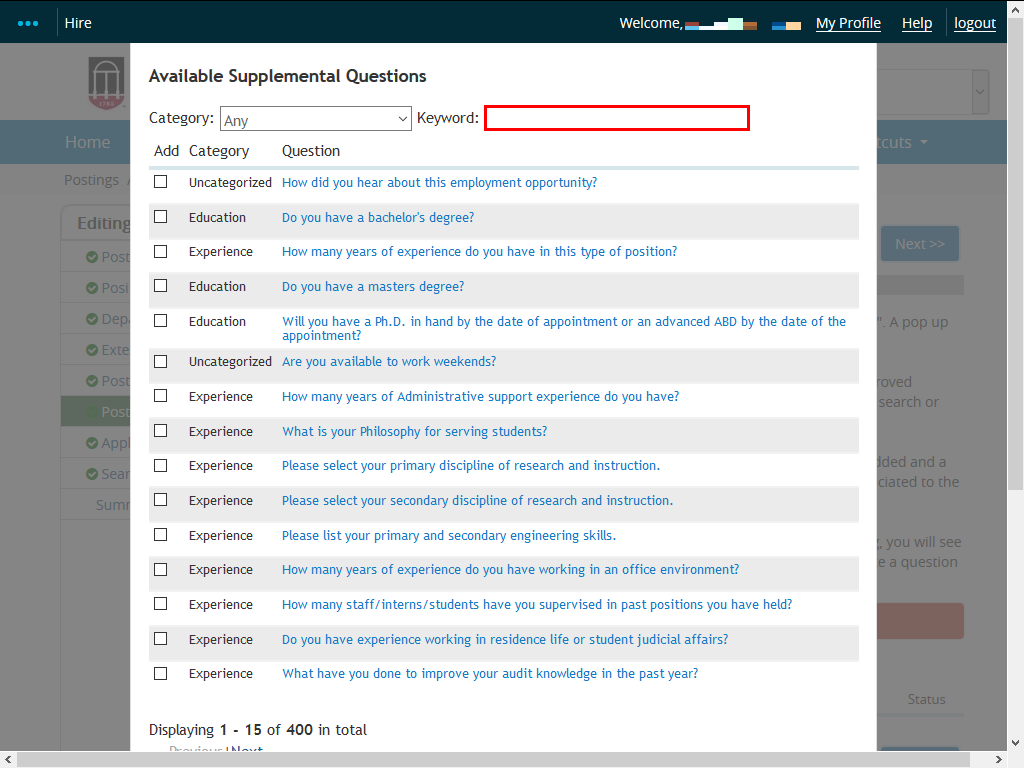
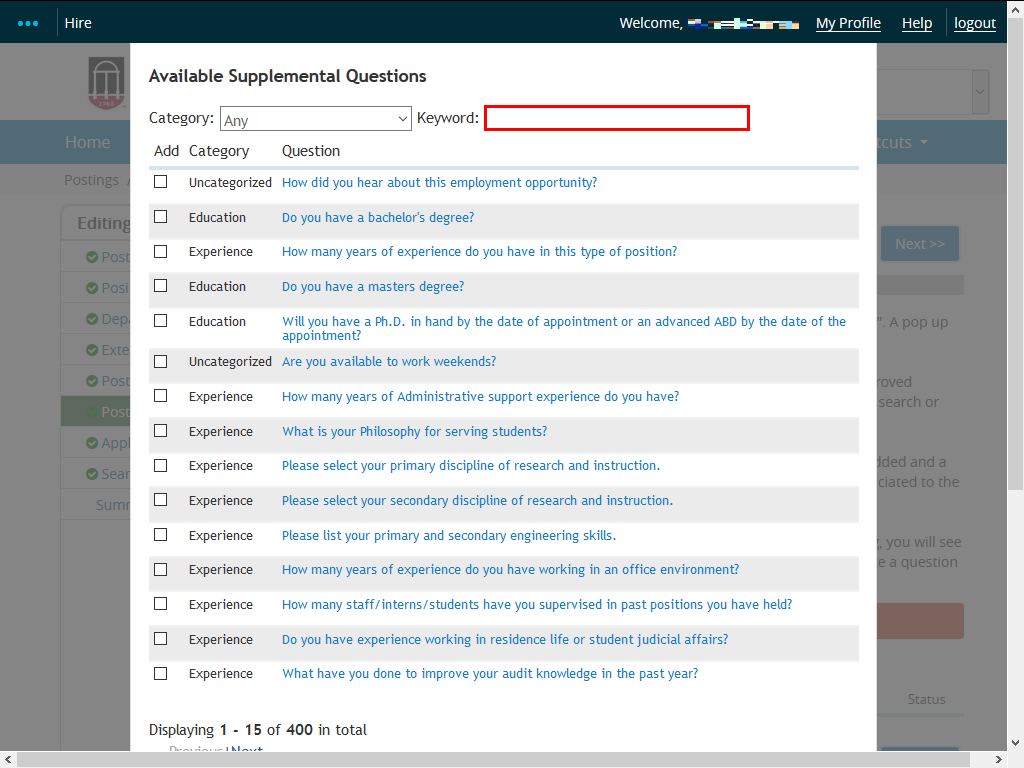
The Available Supplemental Questions window is displayed. You can search for specific questions by typing keywords in the Keyword: field.
|
|
 |
Enter "highest" into the Keyword: field.
|
|
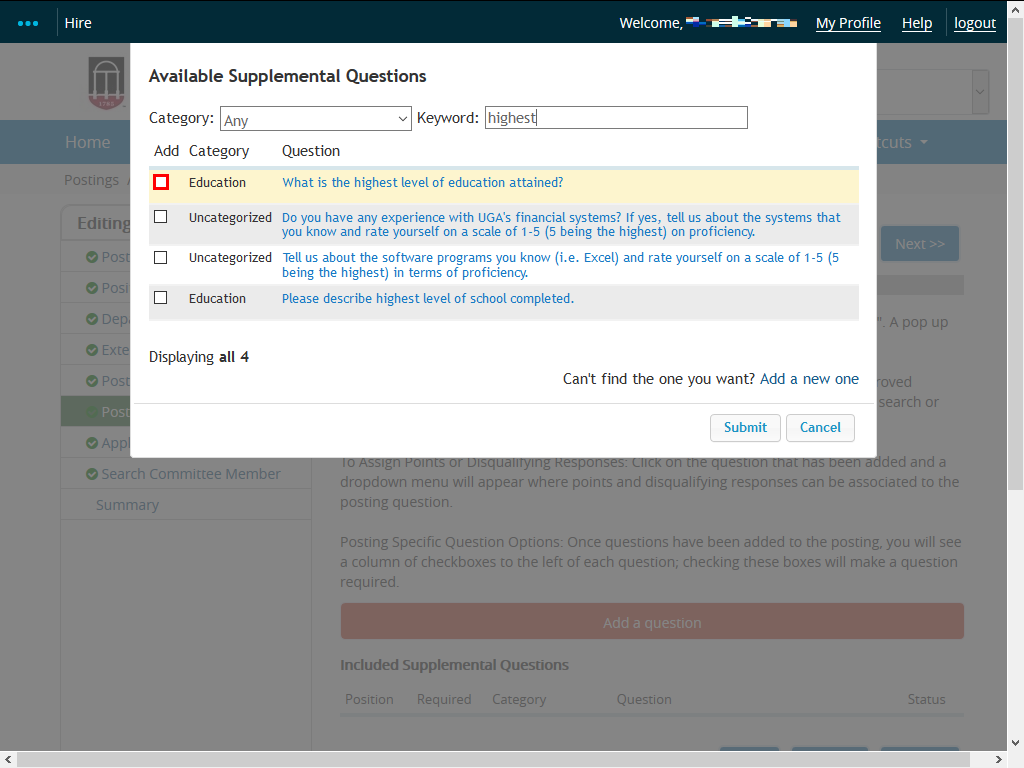 |
A list of questions specific to your search criteria is displayed.
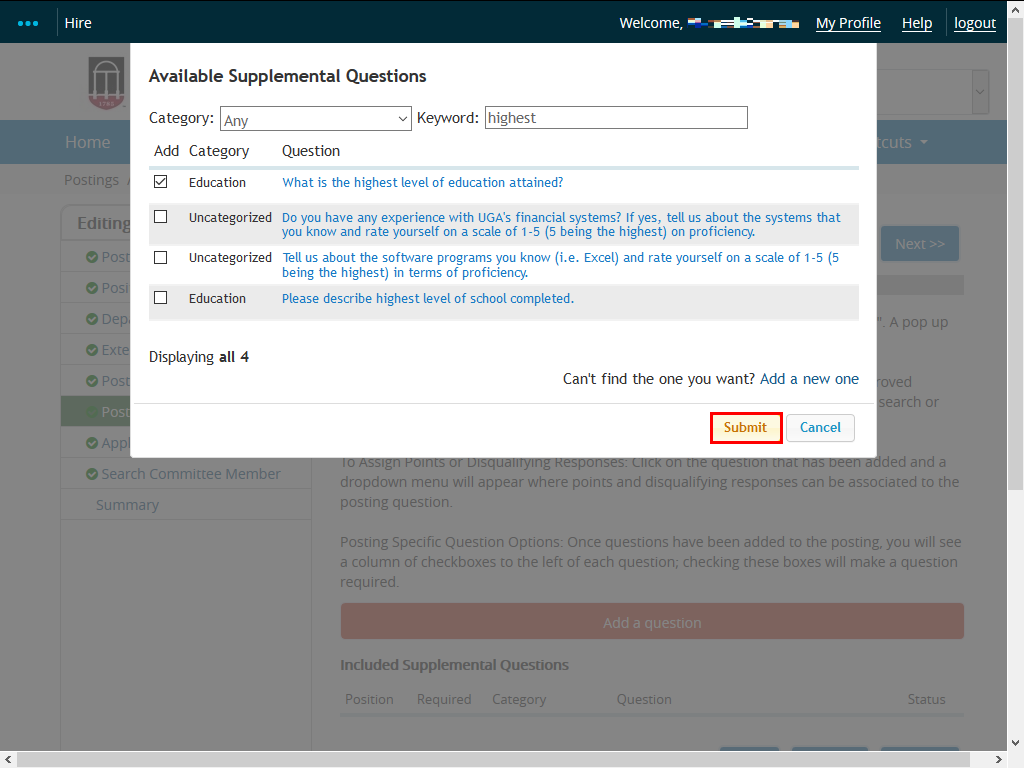
You can select specific questions to add to the posting by clicking the checkbox next to each desired question.
Example shown here: Click the What is the highest level of education attained? option.
|
|
 |
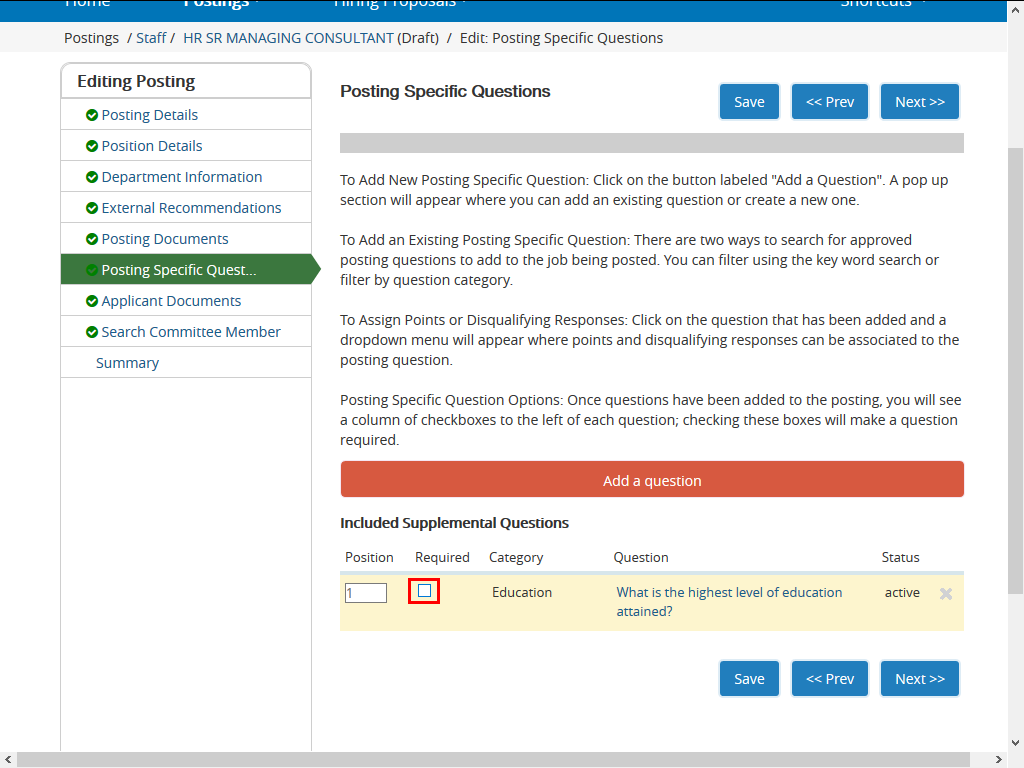
Once you have selected the question(s), click the Submit button.
|
|
 |
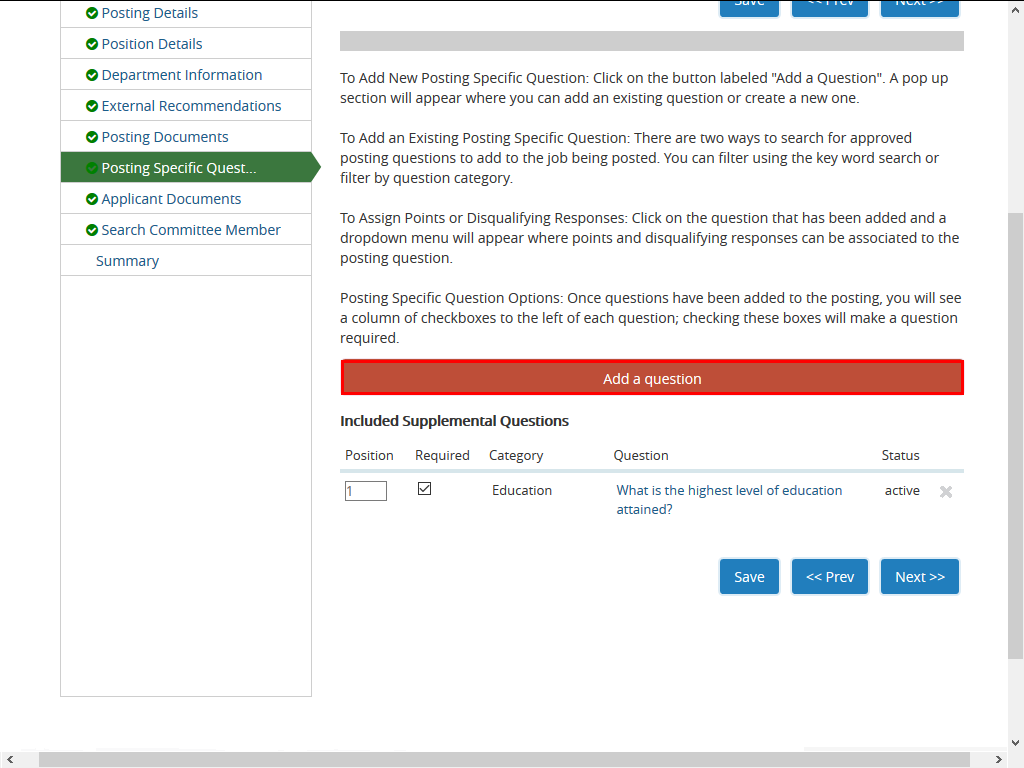
The Posting Specific Questions page is displayed again.
Click the Required option to add the question as a required item for the posting.
|
|
 |
To add another question, click the Add a question button.
|
|
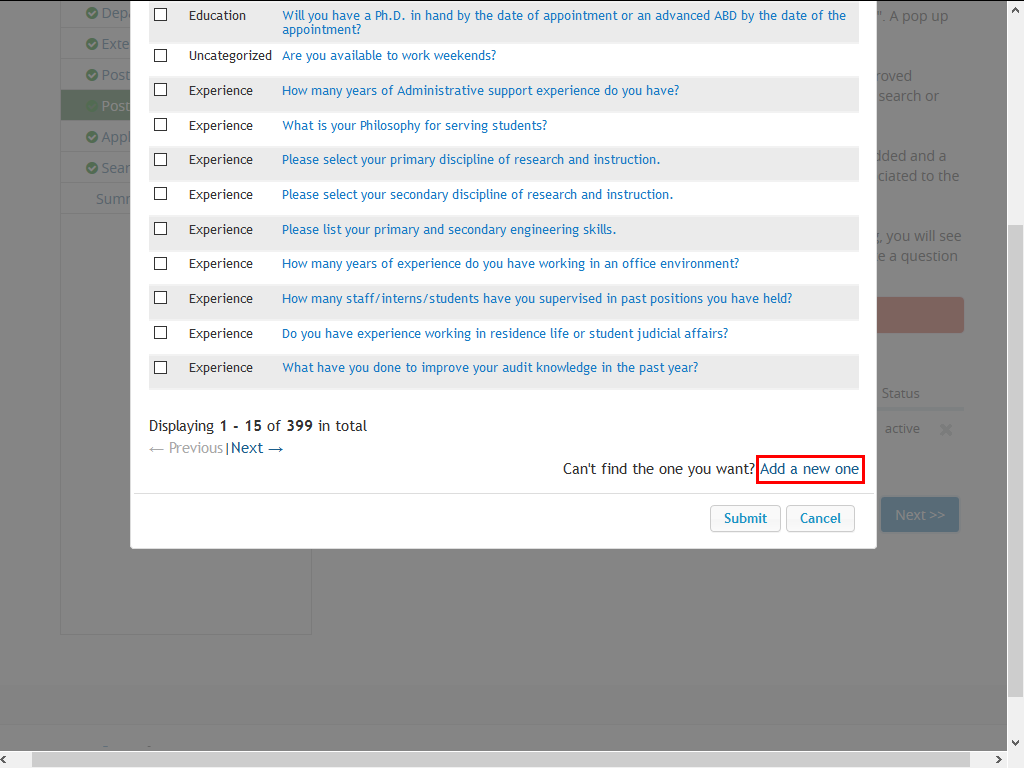 |
On the Available Supplemental Questions page, scroll down and click the Add a new one link.
|
|
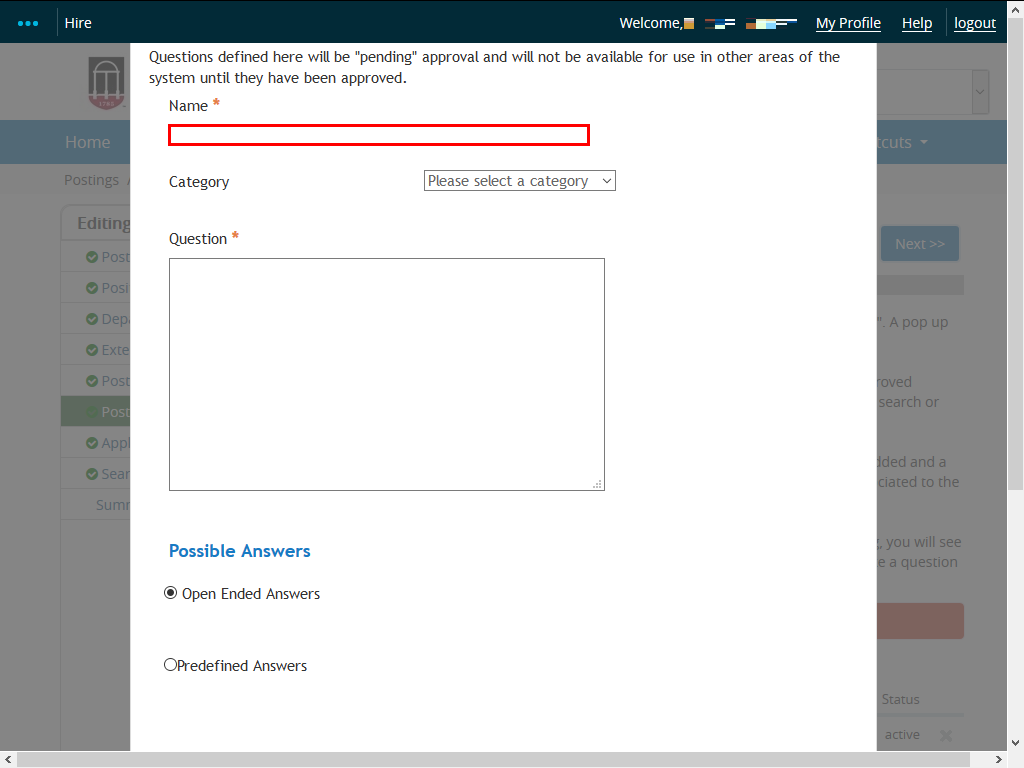 |
A new window is displayed for you to enter a new question to the specific posting.
Enter a Name for the question into the Name field.
Example shown here: Enter "Education".
|
|
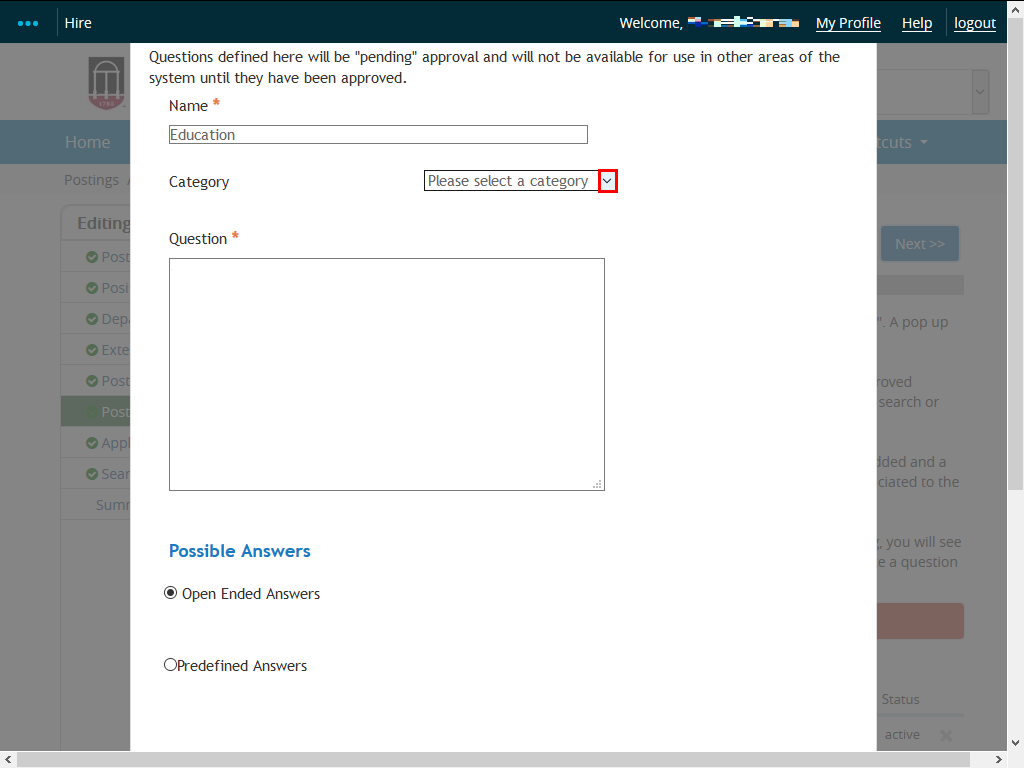 |
Click the Category drop-down list.
|
|
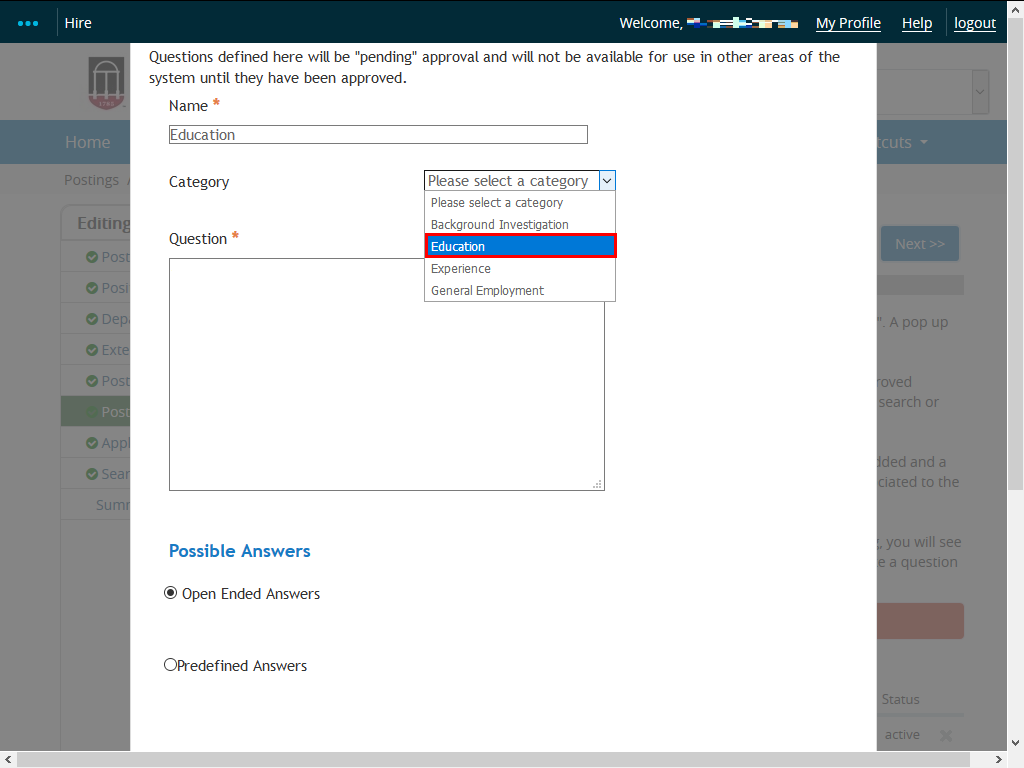 |
Click the appropriate option.
Example shown here: Click the Education list item.
|
|
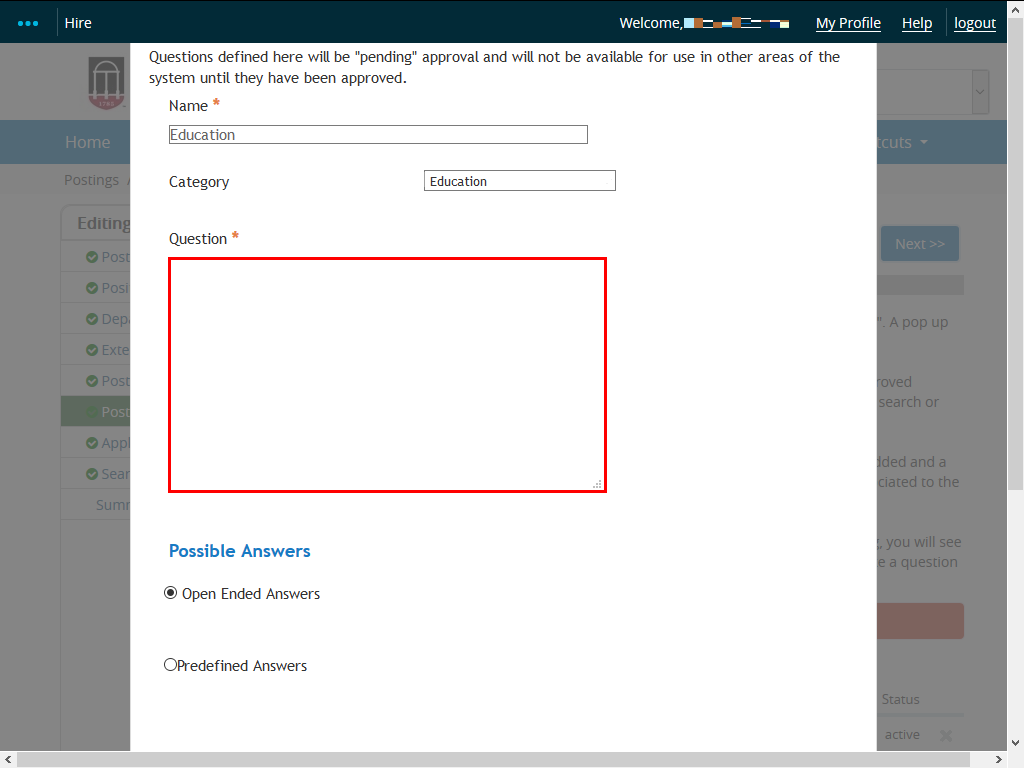 |
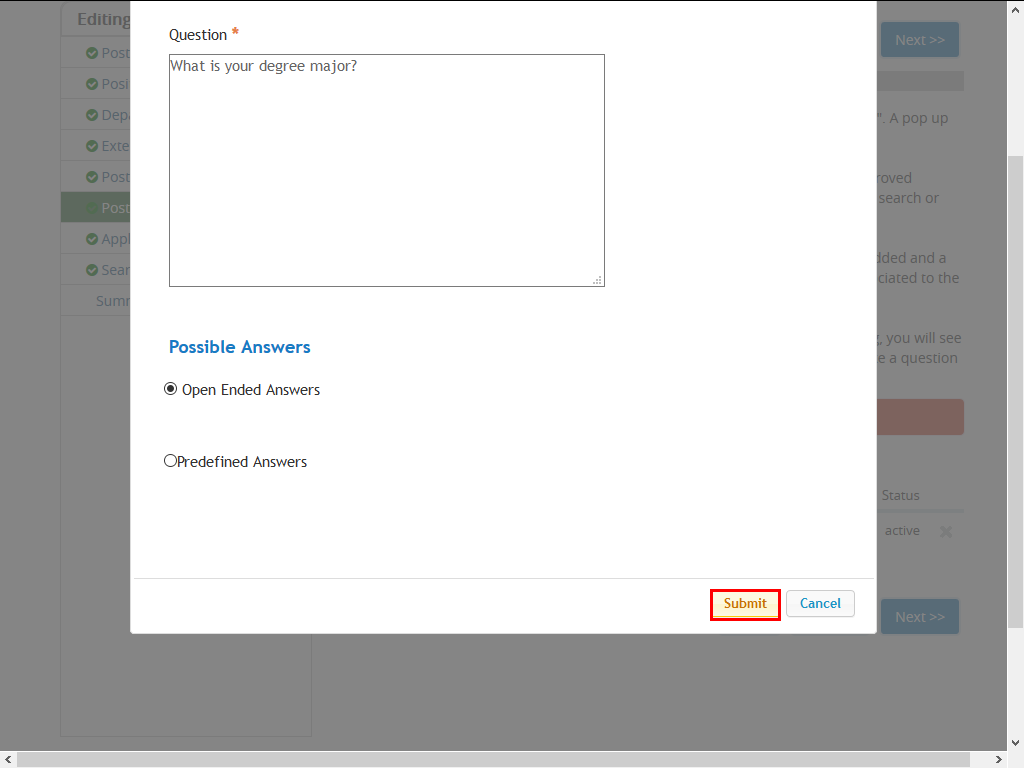
Enter appropriate information into the Question required field.
Example shown here: Enter "What is your degree major?" into the Question required field.
Note: Questions added here will go through an approval process before it can be available for use.
|
|
 |
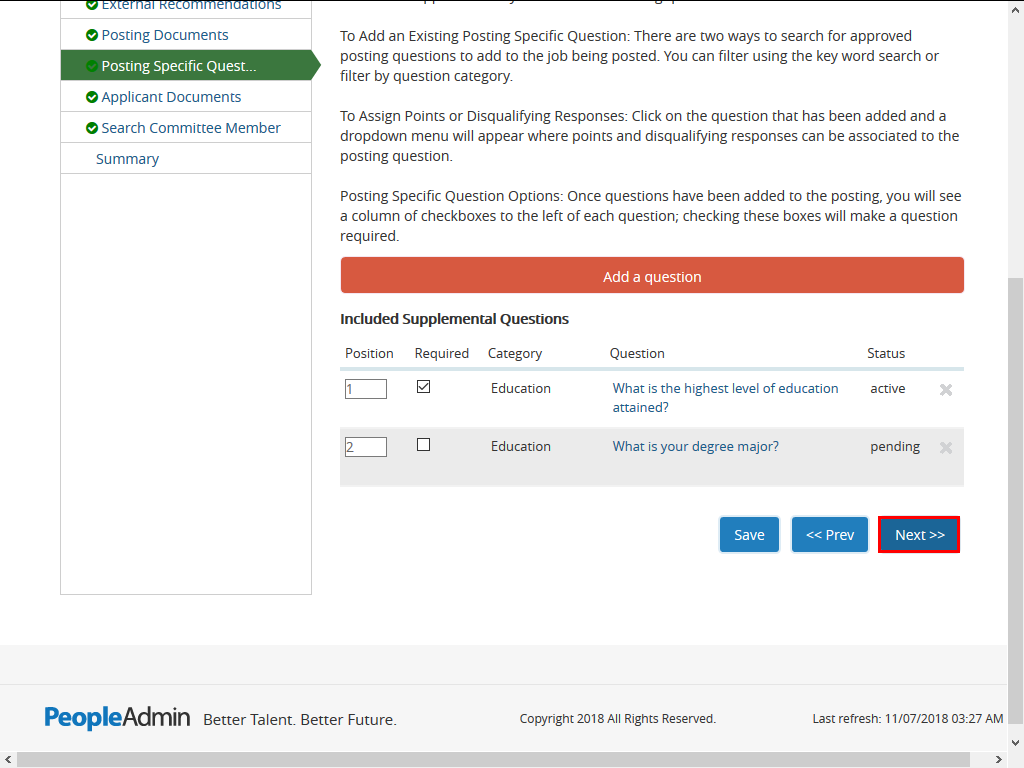
The Possible Answers field defaults to the Open Ended Answers option. You can change the options depending on the type of question.
Example shown here: Leave it as displayed.
Click the Submit button.
|
|
 |
Once you are done adding questions, click the Next >> button.
|
|
 |
|
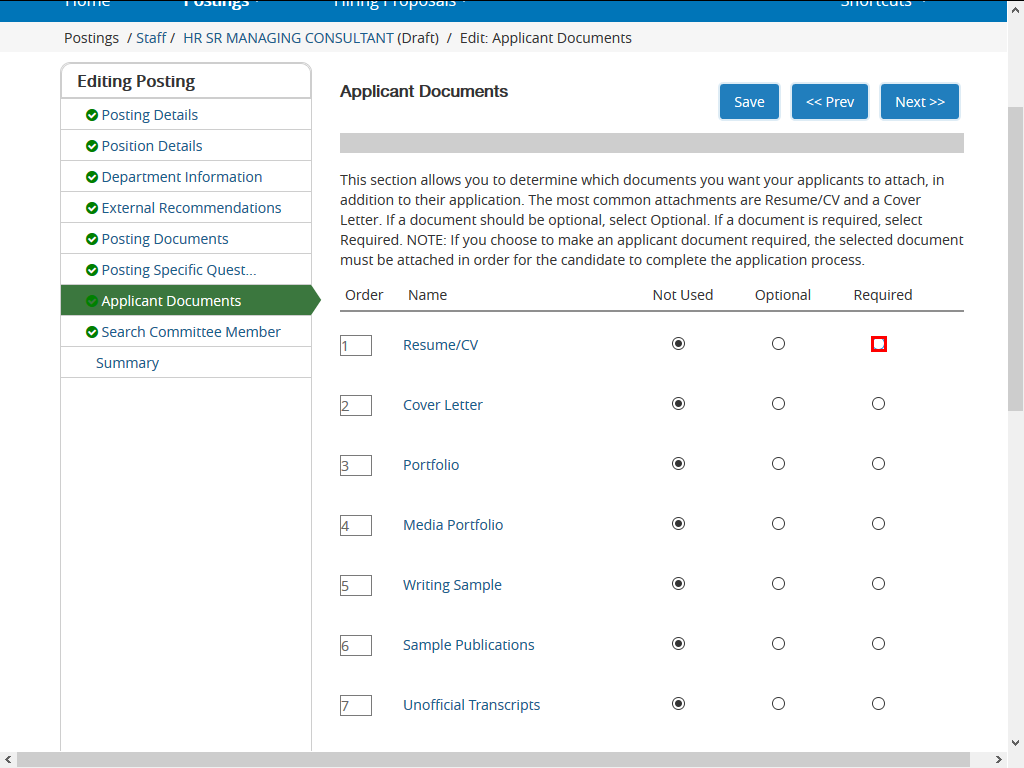
The Applicant Documents page is displayed.
Click the Required options for all the required documents for the position.
|
|
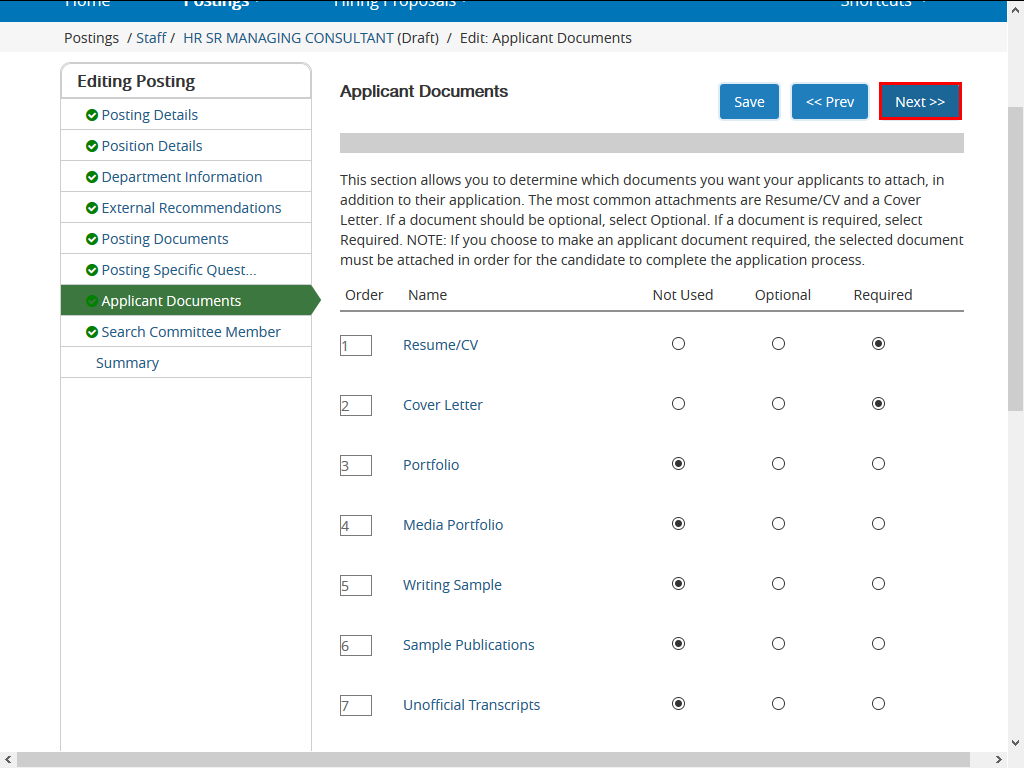 |
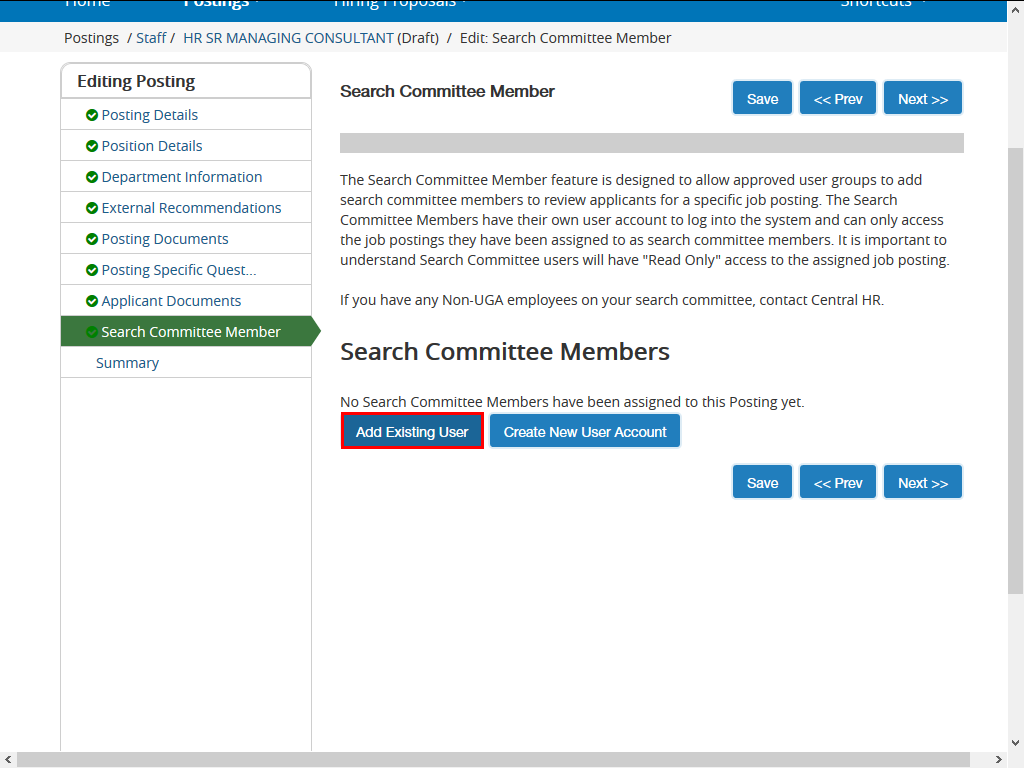
With the required documents selected, click the Next >> button.
|
|
 |
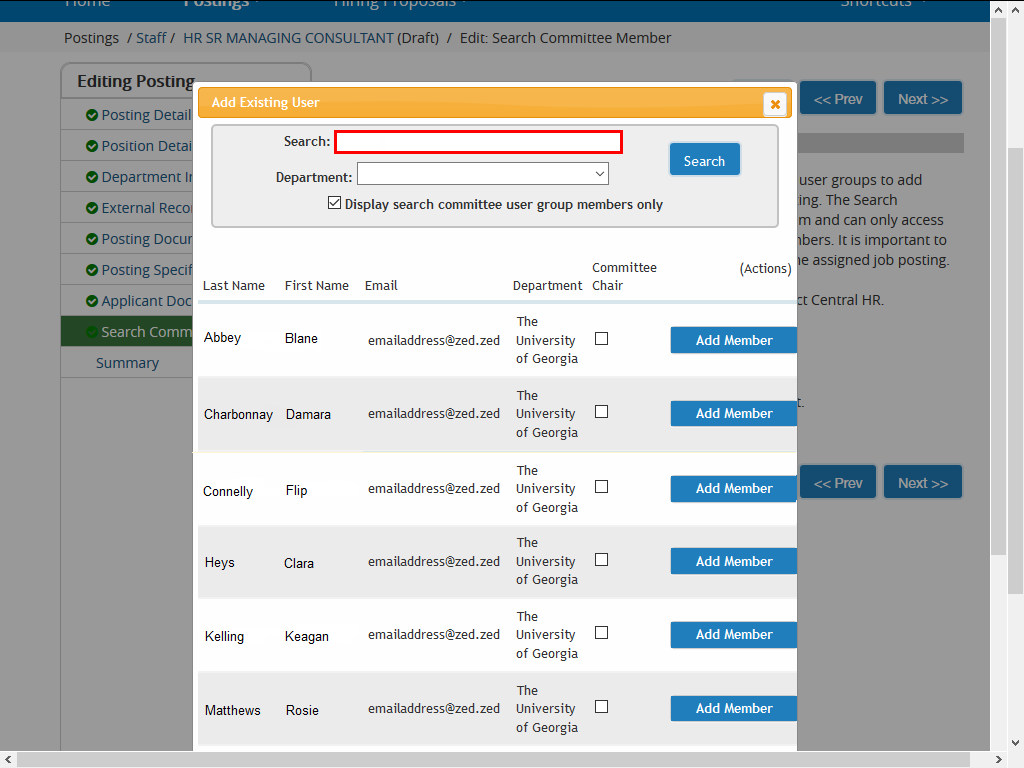
The Search Committee Member page is displayed.
Click the Add Existing User button.
|
|
 |
Enter appropriate information into the Search field.
Example shown here: Enter "Nickles" into the Search field.
|
|
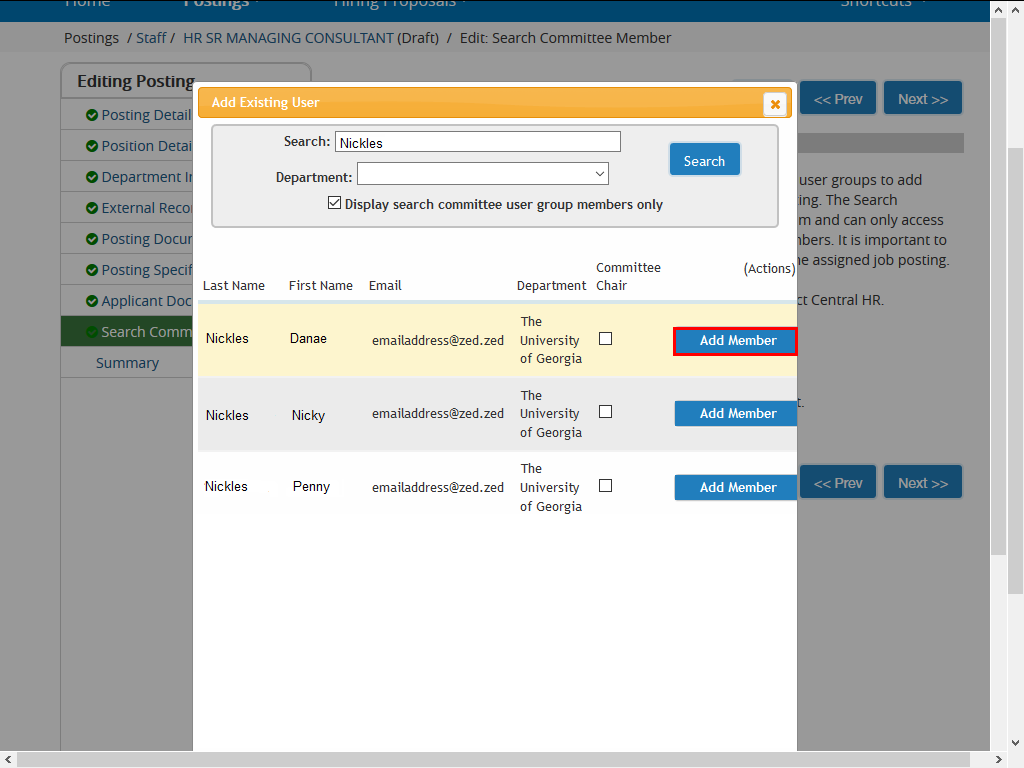 |
Click the Add Member button next to the correct name.
|
|
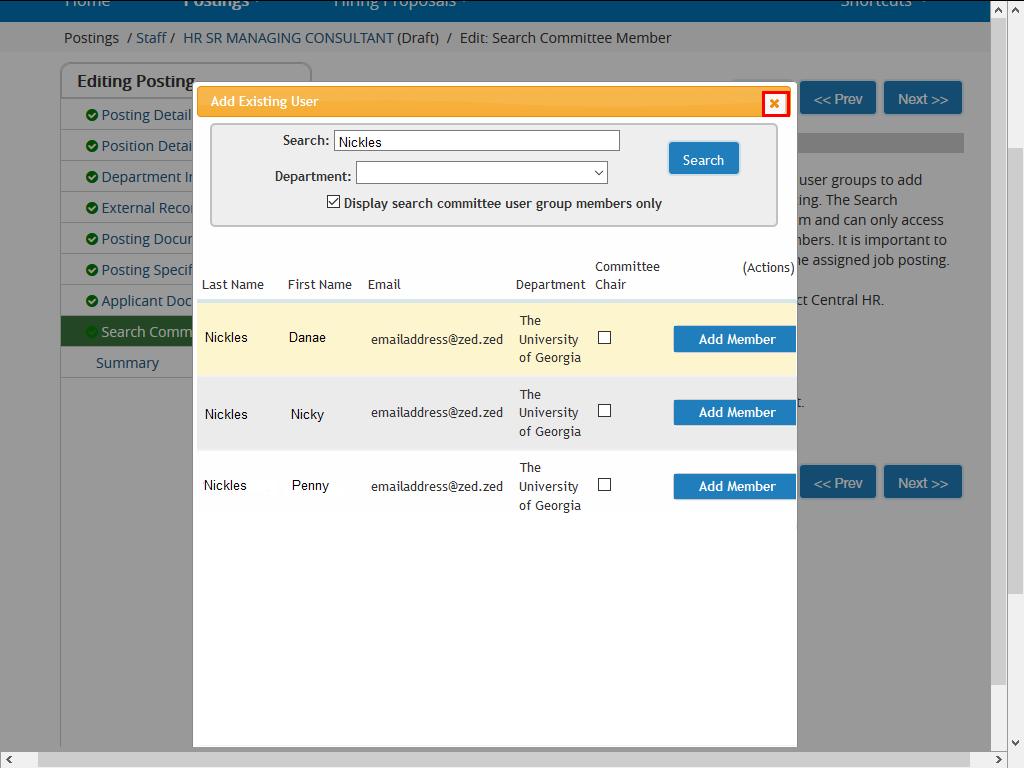 |
Once you have selected the member, click the Close button.
|
|
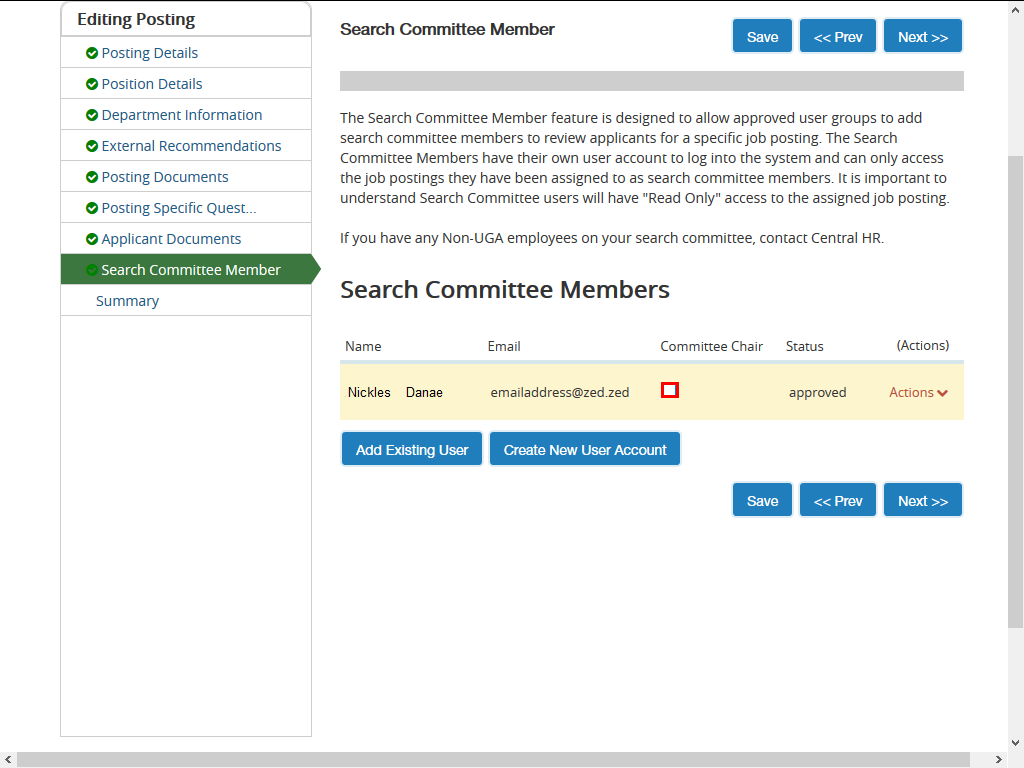 |
Click the Committee Chair option.
|
|
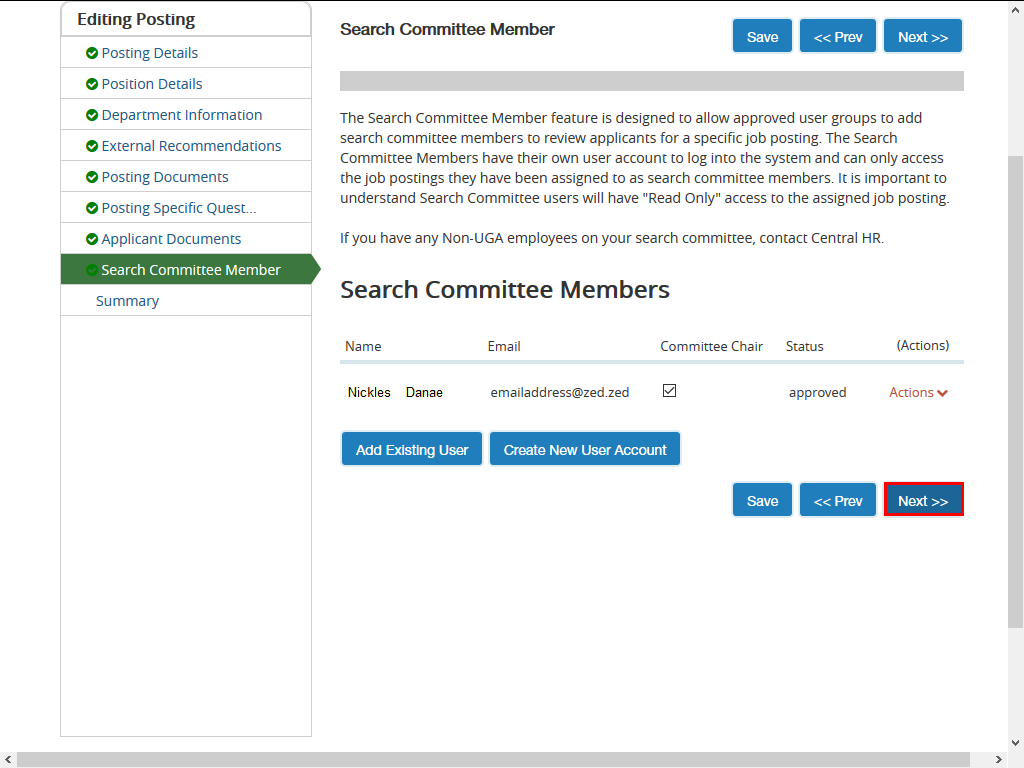 |
Click the Next >> button.
|
|
 |
|
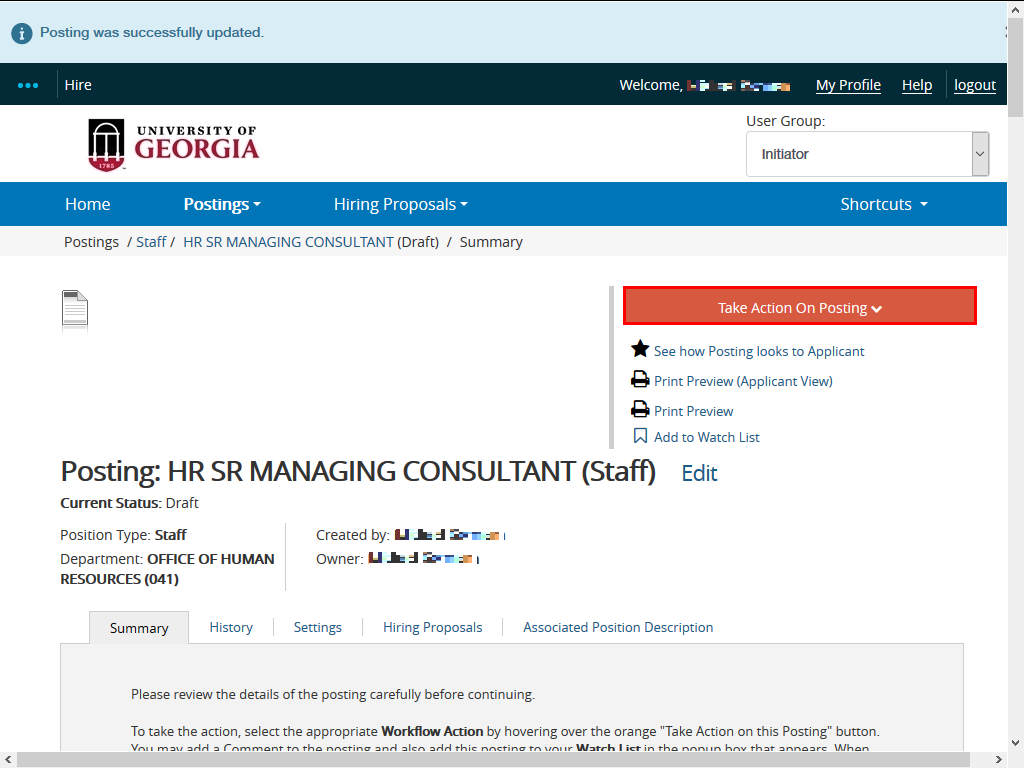
The new posting has been created. Click the drop-down button next to the Take Action On Posting field to move the position request to the appropriate next level in the workflow.
|
|
 |
|
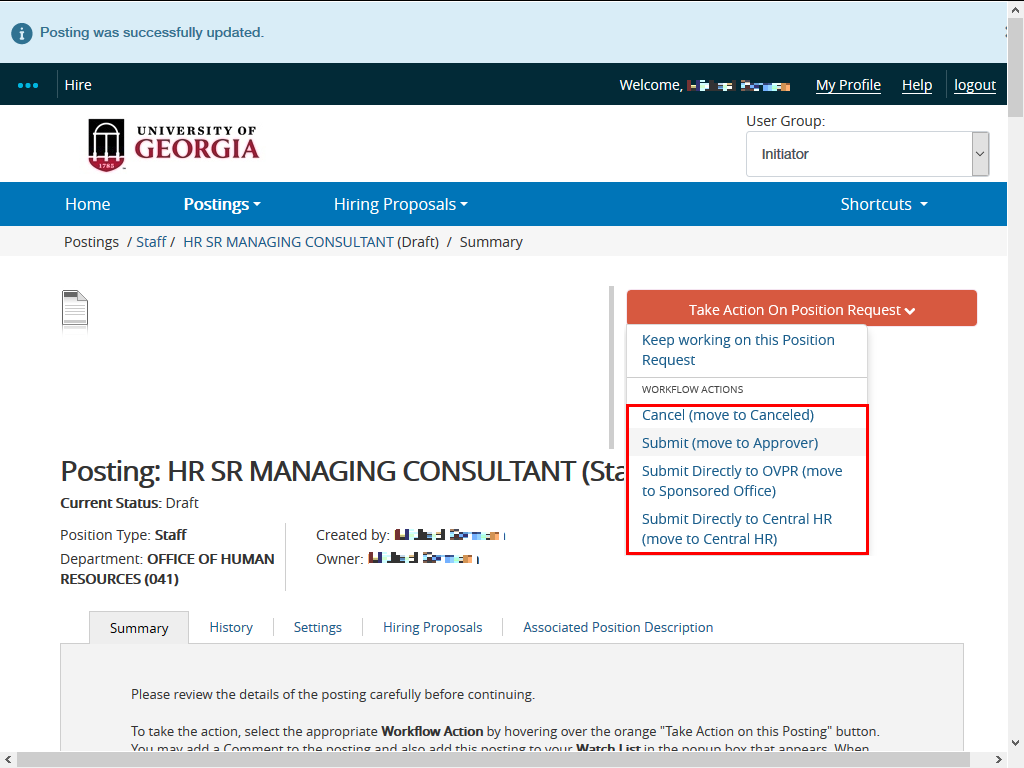
The available workflow options are displayed.
Please follow appropriate workflow submission process, e.g., Submit to Approver.
|
|