Overview
When an employee works through their lunch hour, payable time will need to be updated on the timesheet. Supervisors can make these updates to the employee's timesheet.
Associated SOPs
SOP_TL_010 Auto-Meal Deduction - Add Back
In this article, you will learn the steps to add meal time back to an auto meal deduction for an employee who has worked through their meal break as a time & absence approver in OneUSG Connect.
 |
First, log into OneUSG Connect.
From the Time Approver Self Service homepage in OneUSG Connect, click the Team Time tile.
|
|
 |
The Team Time page is displayed.
Click the Filter button to search for an employee(s).
|
|
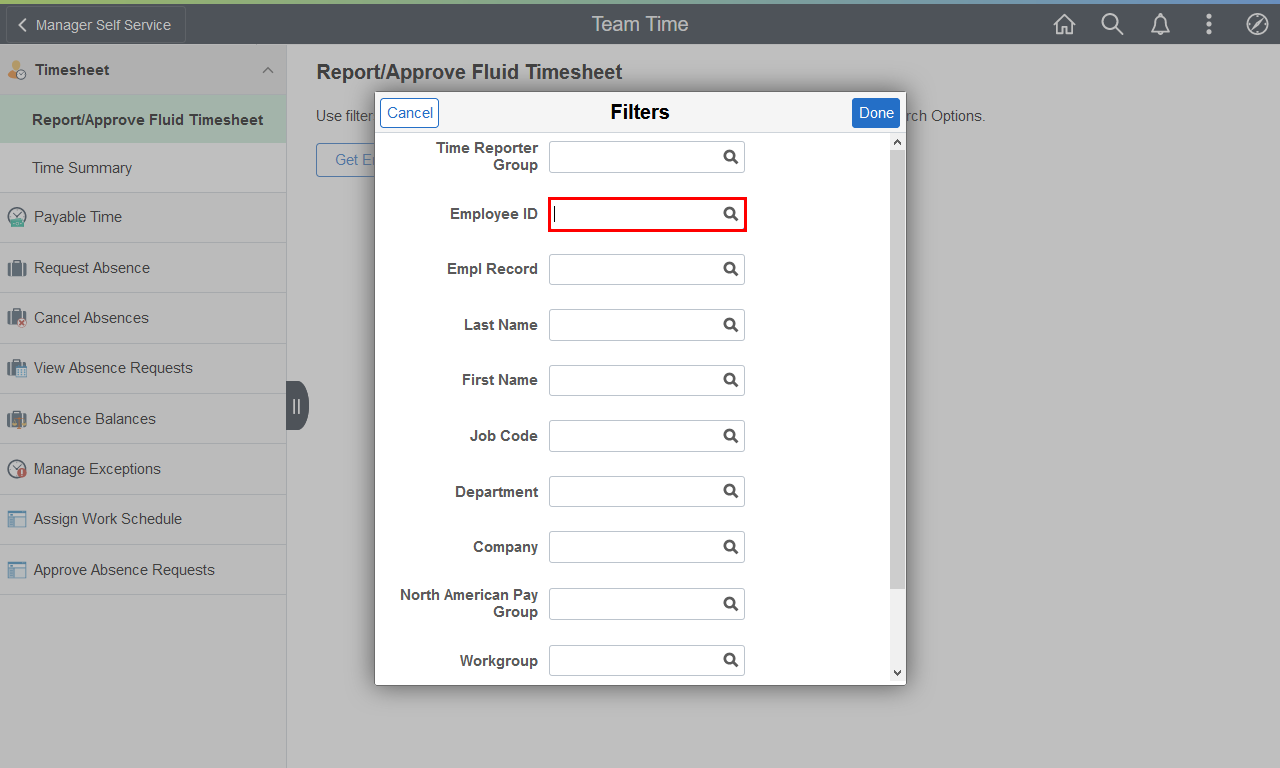 |
The Filters menu is displayed.
Enter the appropriate information in the available search field(s).
Example shown here: " 1234567 " in the Employee ID field.
|
|
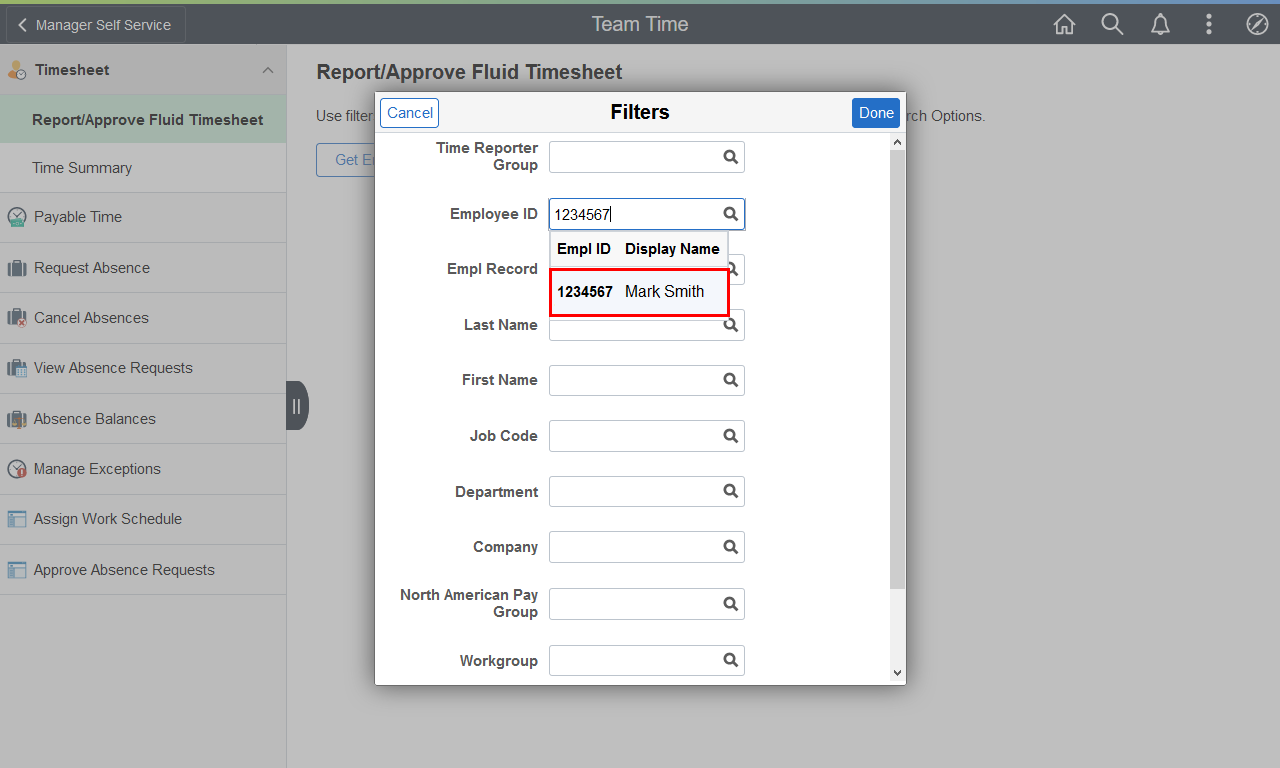 |
Select the appropriate employee from the search results.
Example shown here: " Mark Smith " in the Employee ID field.
|
|
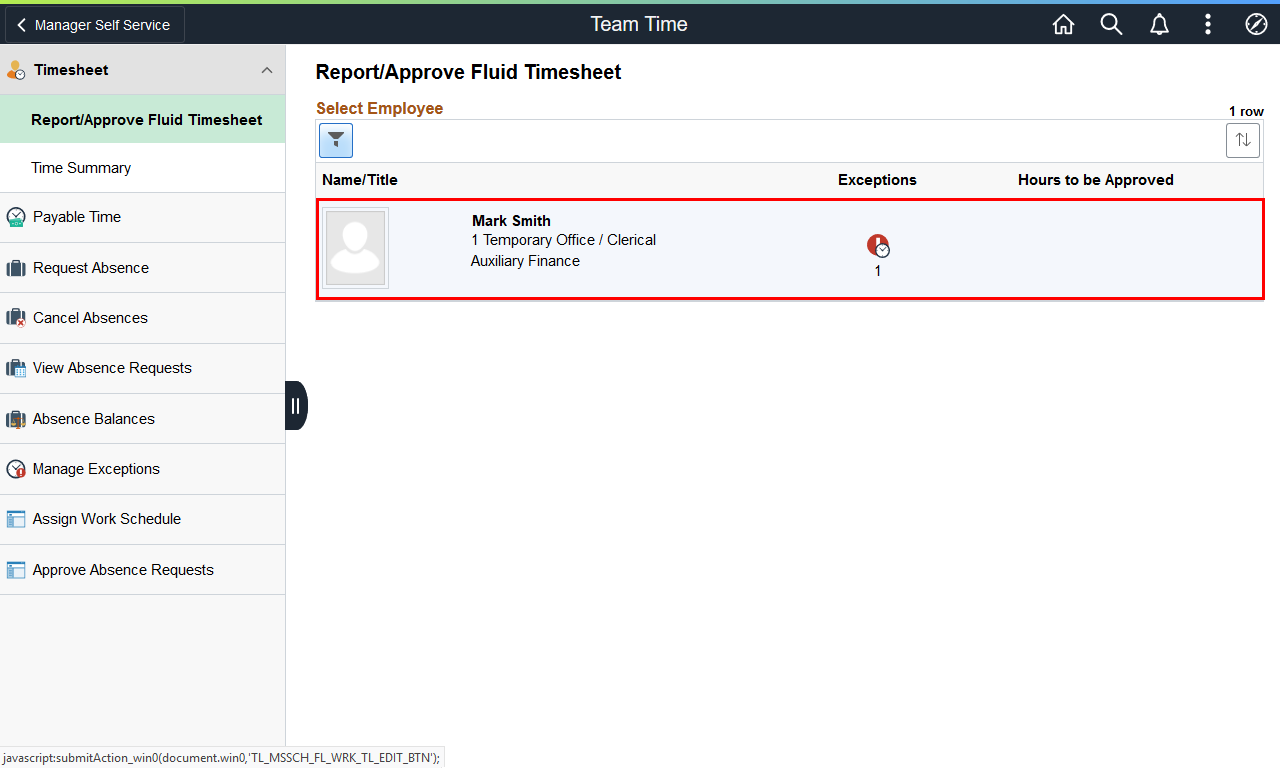 |
The Team Time page is displayed with the selected employee.
Select the appropriate employee from the Name/Title field.
Example shown here: Mark Smith from the Name/Title field.
|
|
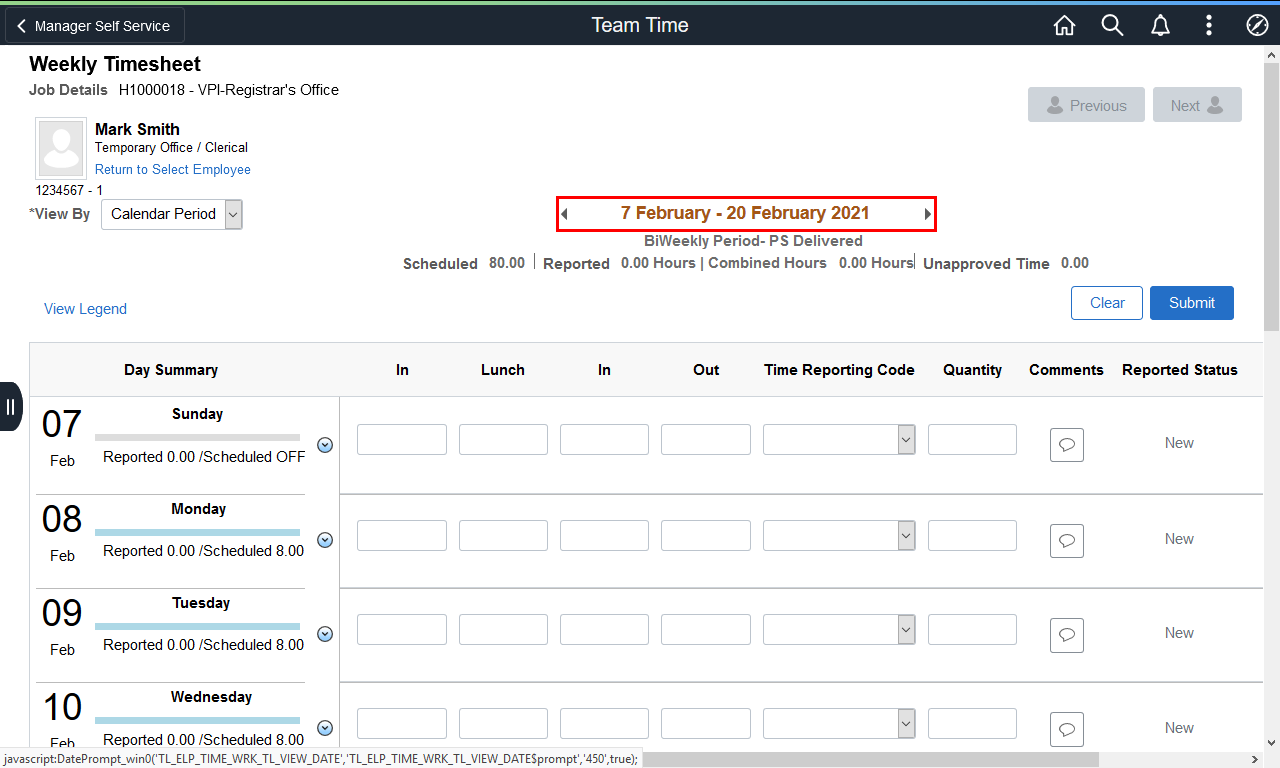 |
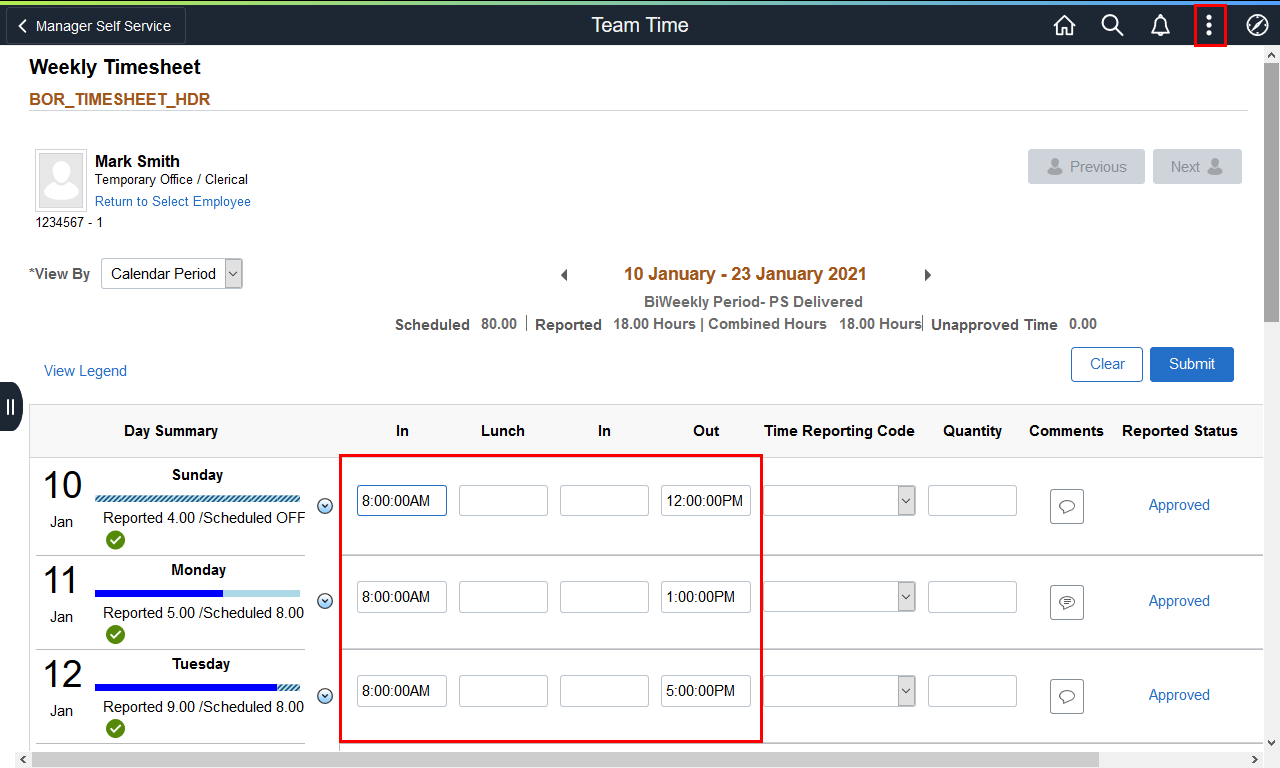
The Weekly Timesheet for the selected employee is displayed.
Use the arrows on either side of the pay period link or click the pay period link to select the appropriate dates.
|
|
 |
|
The timesheet is displayed with Reported hours for the selected pay period.
Note: Meal break deductions do not show in Reported Time.
To open a new window and view the Payable Time summary details and meal break deductions, click the Kebab menu in the top right corner of the screen.
|
|
 |
The kebab menu is displayed.
Click the New Window option.
|
|
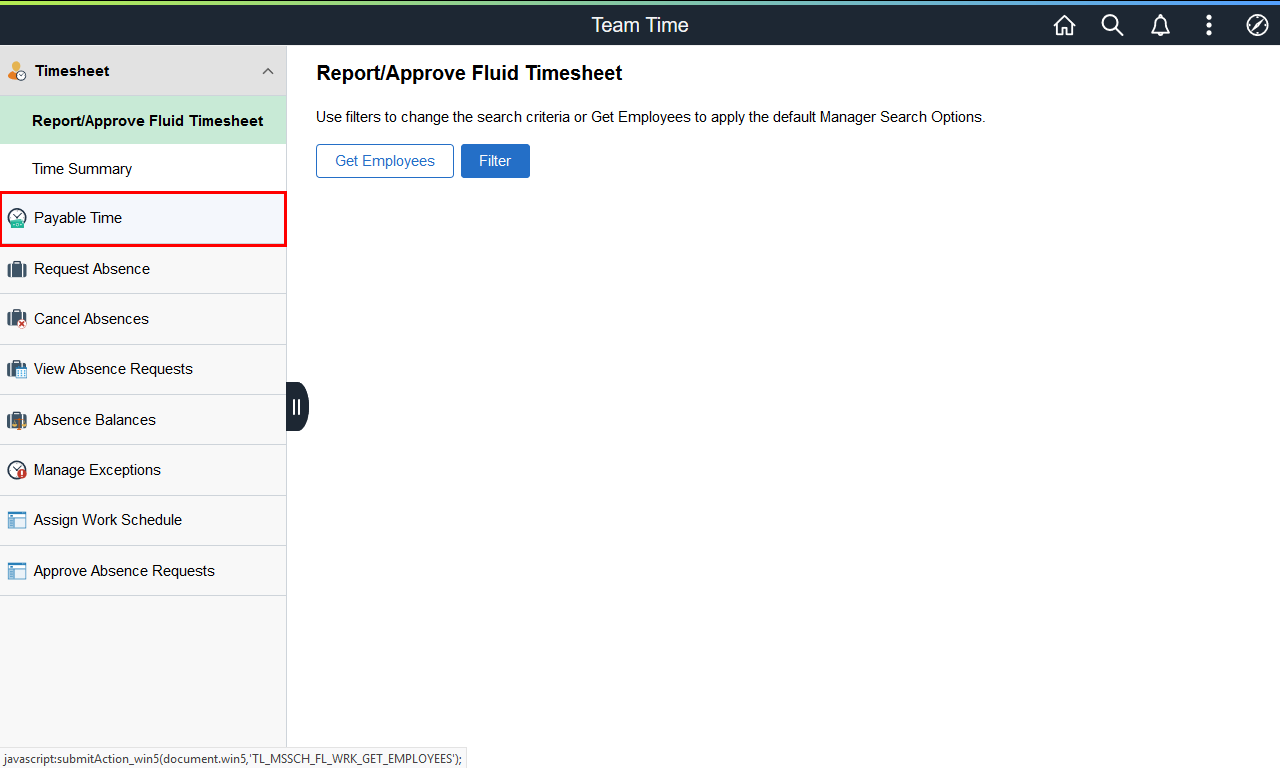 |
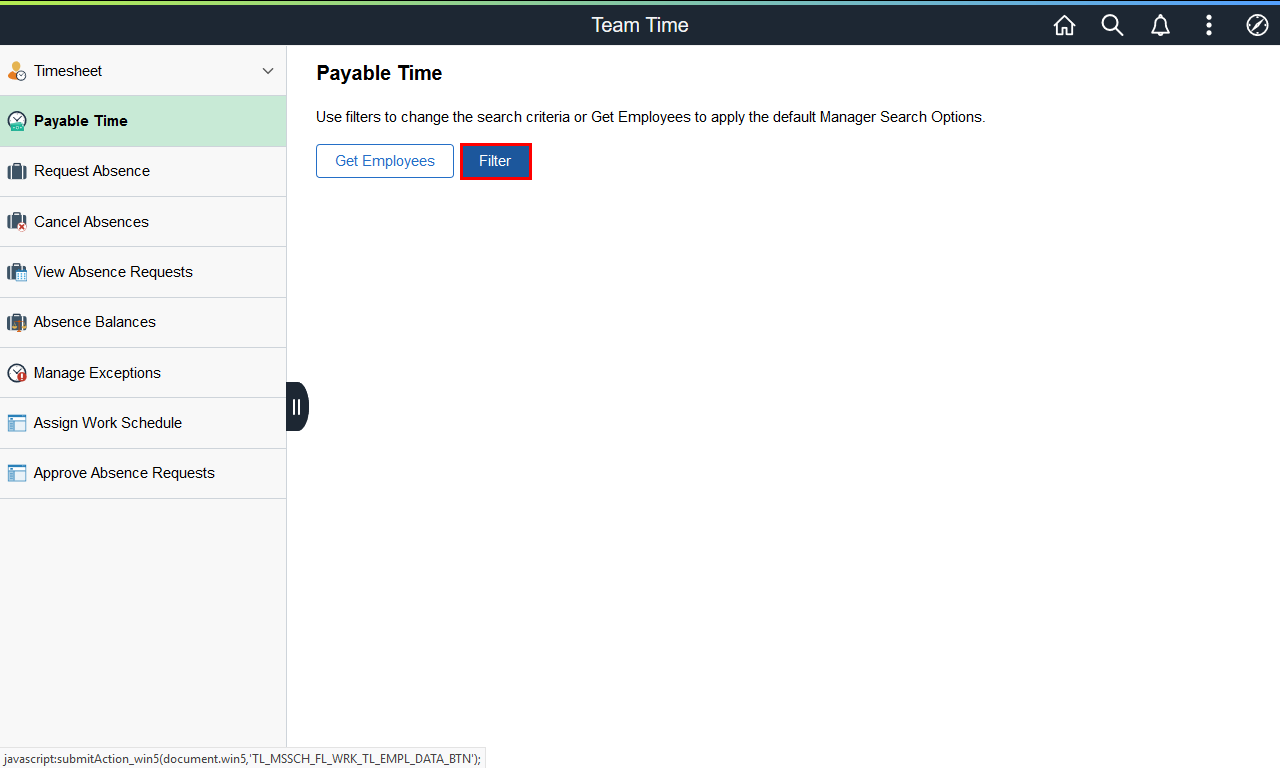
The Team Time page is displayed in a new browser tab.
Click the Payable Time link.
|
|
 |
Use the Filter button to select the same employee.
|
|
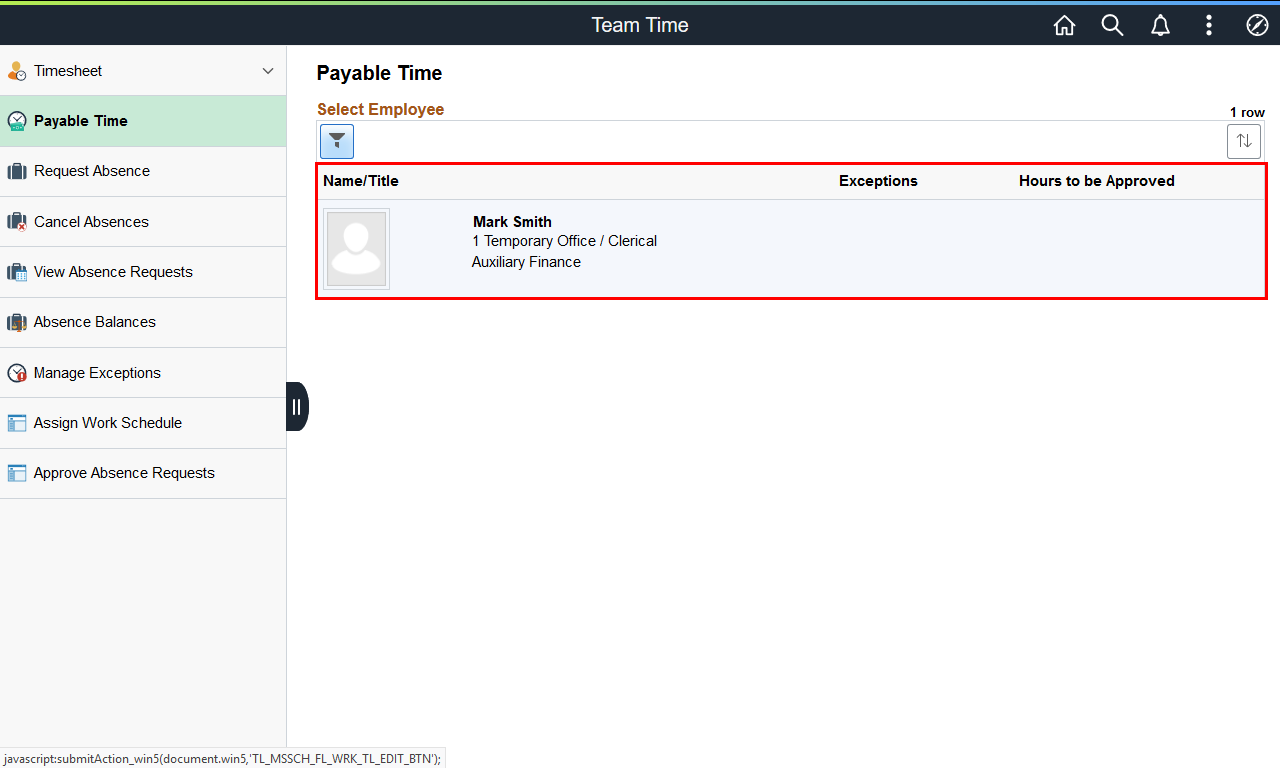 |
Select the appropriate employee from the Name/Title field.
Example shown here: Mark Smith from the Name/Title field.
|
|
 |
|
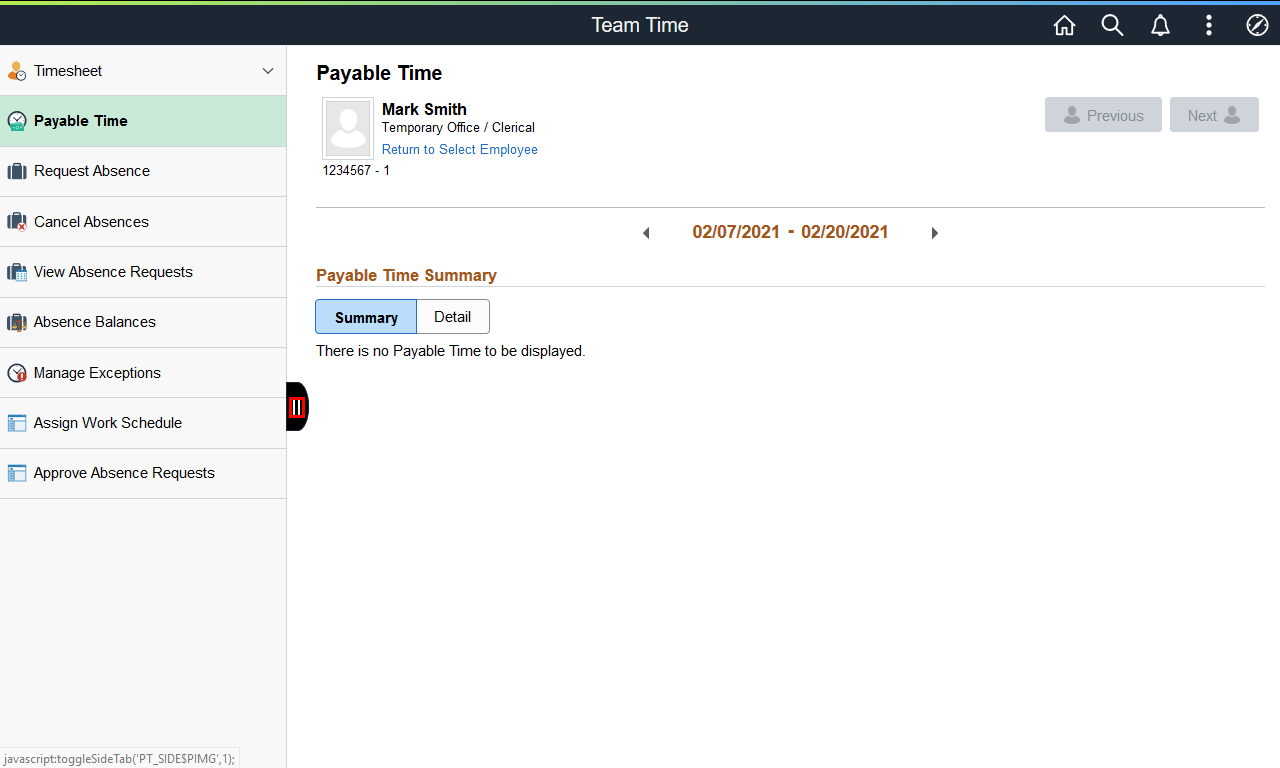
To expand the work area, click the Collapse menu button.
|
|
![Payable Time page displayed with the [<] previous period arrow highlighted](https://uga.teamdynamix.com/TDClient/3109/FandA/Shared/FileOpen?AttachmentID=14ee0165-119b-4718-a40b-3e4acfe9b191&ItemID=150480&ItemComponent=26&IsInline=0) |
The Payable Time page is displayed.
Use the arrows in the Week banner to select the appropriate pay period.
Example shown here: [<] previous period arrow.
|
|
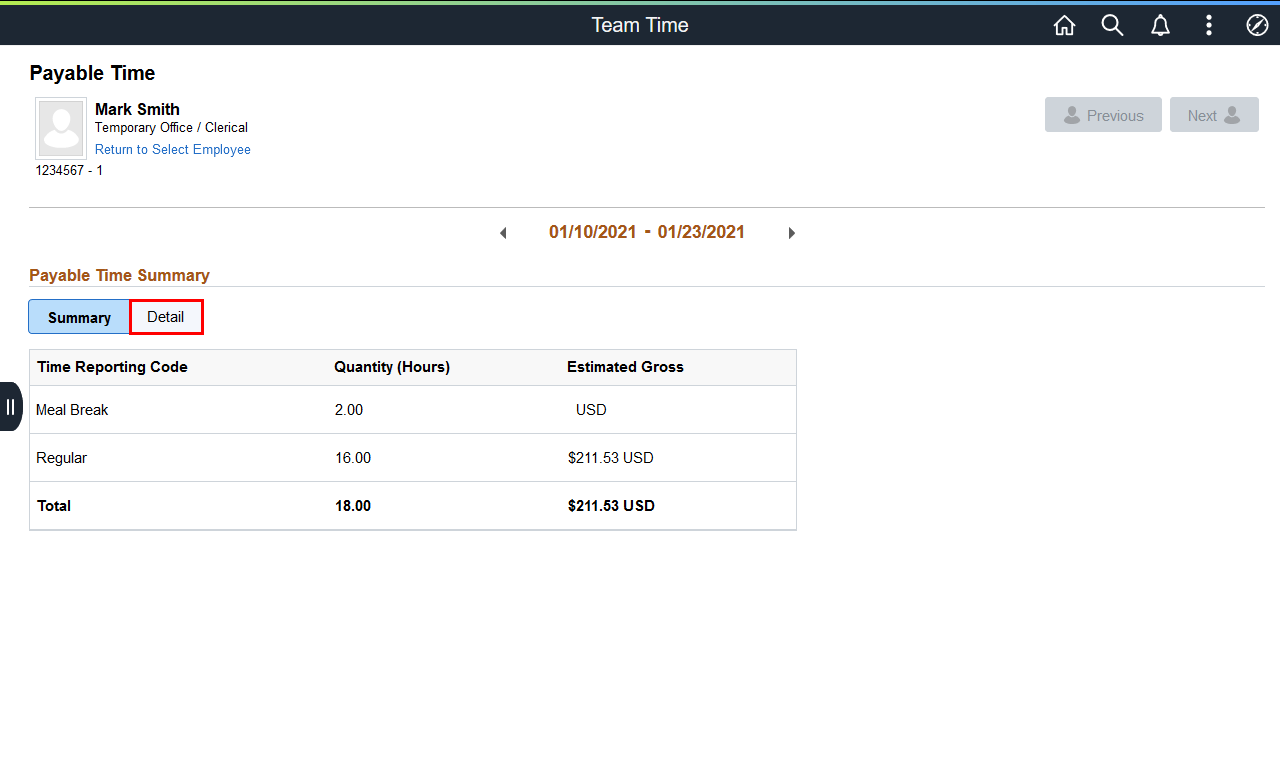 |
The Payable Time Summary for the selected dates is displayed.
To view meal break deductions, click the Detail tab.
|
|
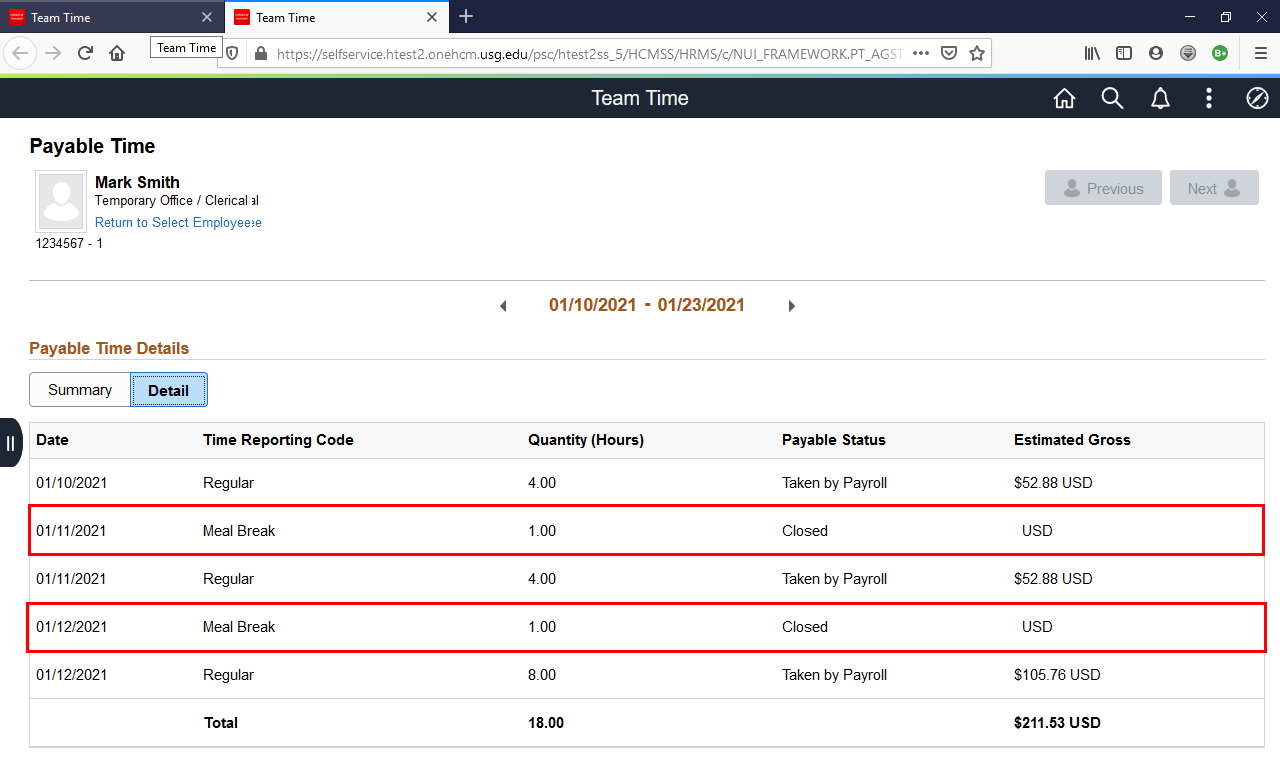 |
The expanded Payable Time Details are displayed with Meal Break hours deducted.
Note: Meal Breaks MAY automatically be deducted based on the employee’s setup. Meal deductions are applied only to punch time, not elapsed time.
To determine if an employee has an automatic meal deduction in place, the supervisor can run the Time and Absence Enrolled Query.
|
|
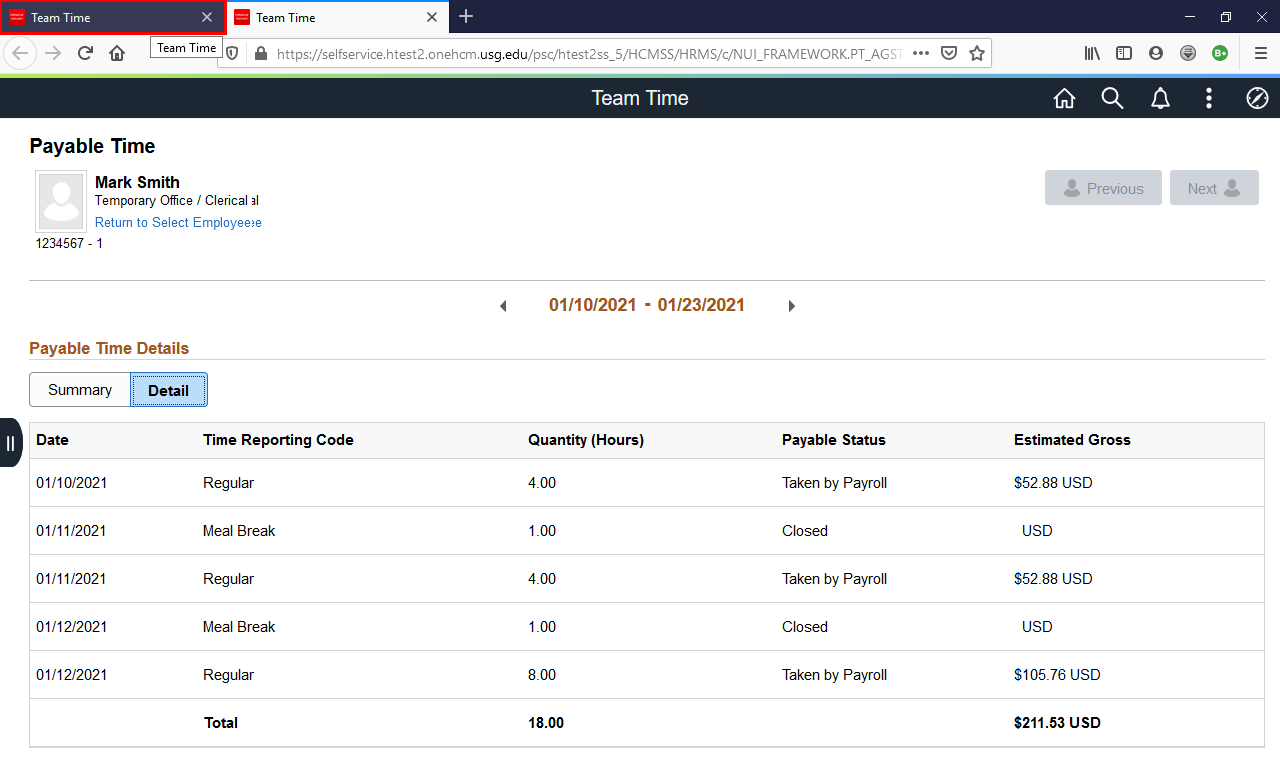 |
To enter the appropriate meal break hours, click the Team Time tab in the top left corner of the screen.
|
|
![Weekly Timesheet displayed with the [+] Add button highlighted](https://uga.teamdynamix.com/TDClient/3109/FandA/Shared/FileOpen?AttachmentID=f4fce587-1e8f-47f9-baa4-b23a4263e12f&ItemID=150480&ItemComponent=26&IsInline=0) |
To enter the meal break hours worked, click the Add Row (+) icon for the appropriate date.
|
|
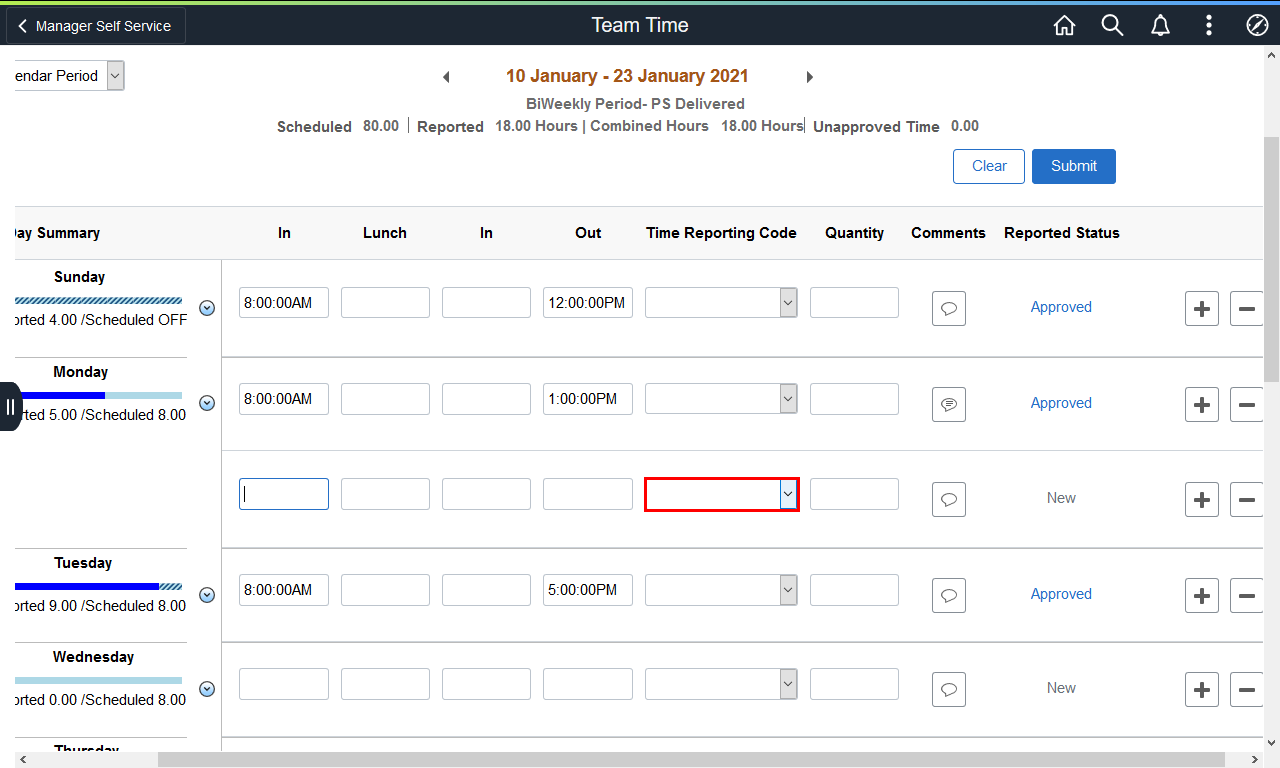 |
A new row is added.
Click the Time Reporting Code drop-down list.
|
|
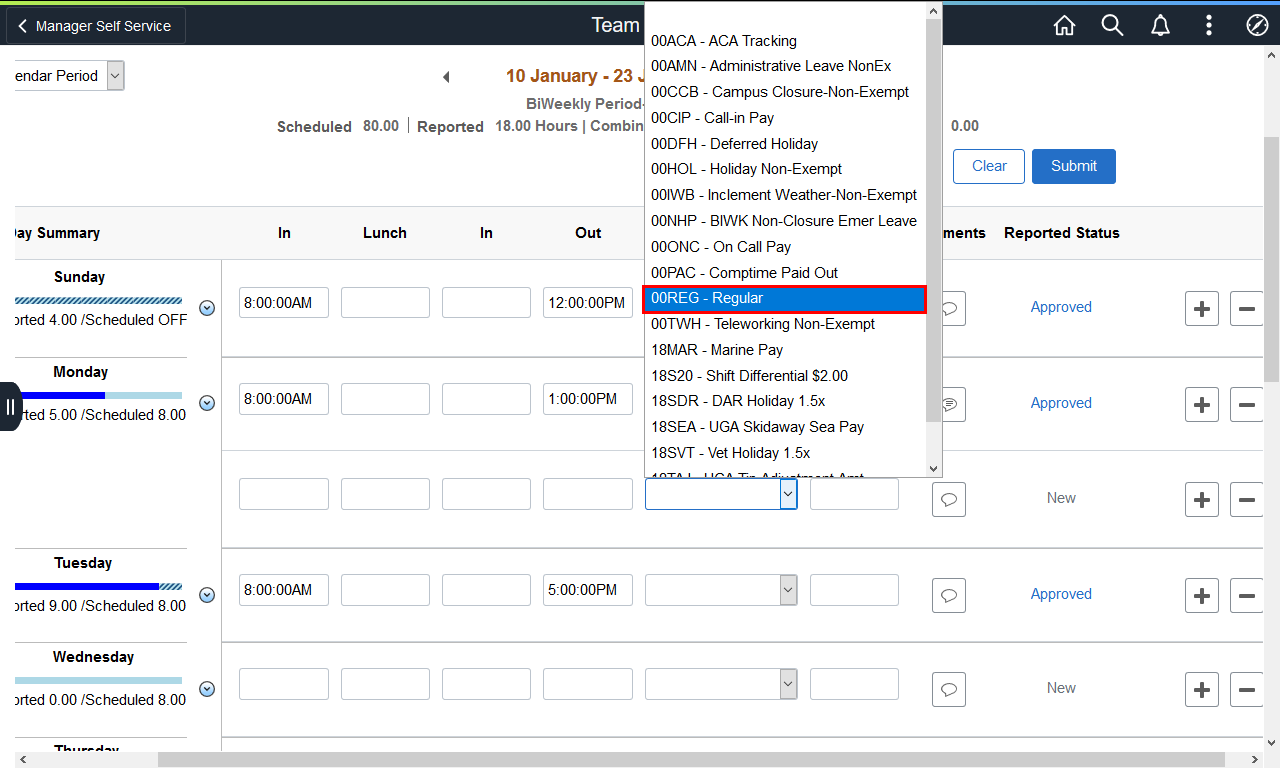 |
Click the 00REG - Regular option.
|
|
 |
Enter the appropriate meal break hours worked into the Quantity field.
Note : Not all meal breaks are 1.00 hour. When entering time worked during meal breaks match the quantity to the payable time deduction.
Example shown here: 1.00 in the Quantity field.
|
|
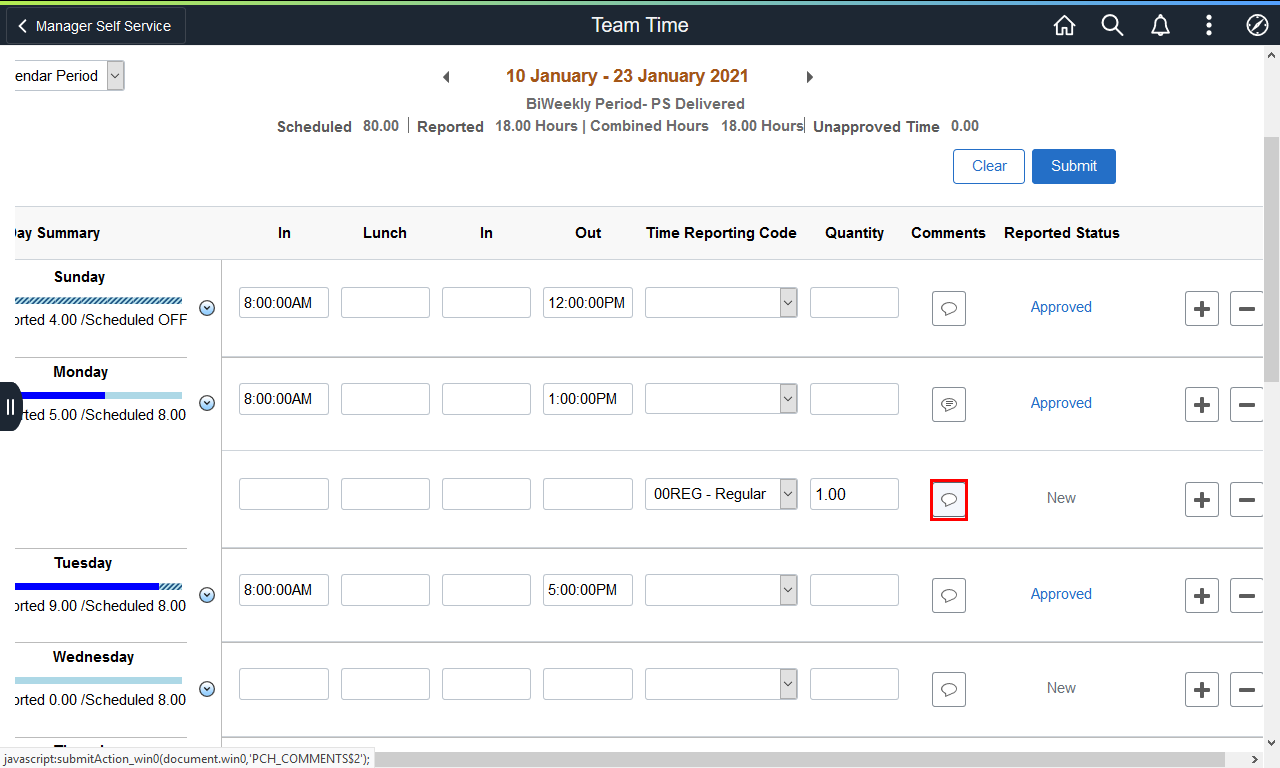 |
A comment should be added about the time c orrection.
Click the Add Comments button in the added row.
|
|
 |
|
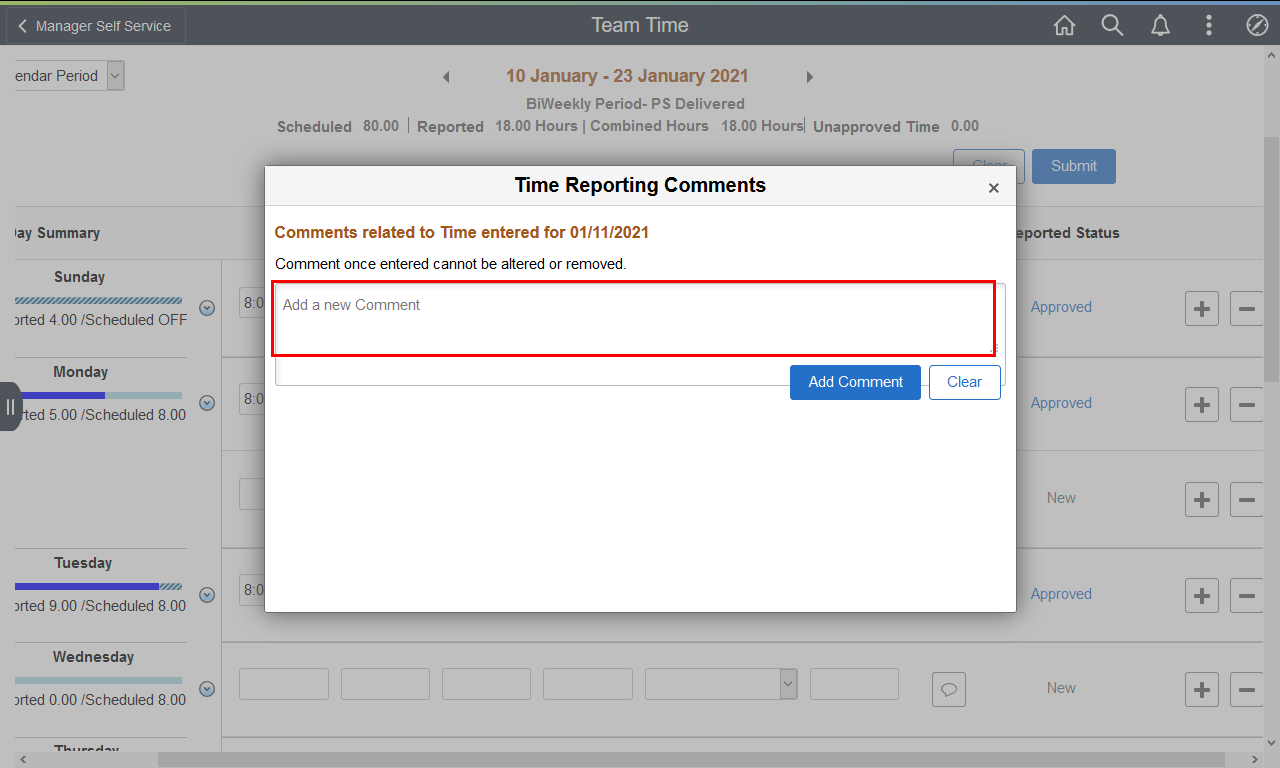
The Time Reporting Comments page is displayed.
Enter an explanation for adding the meal break hours in the Add a new Comment field.
|
|
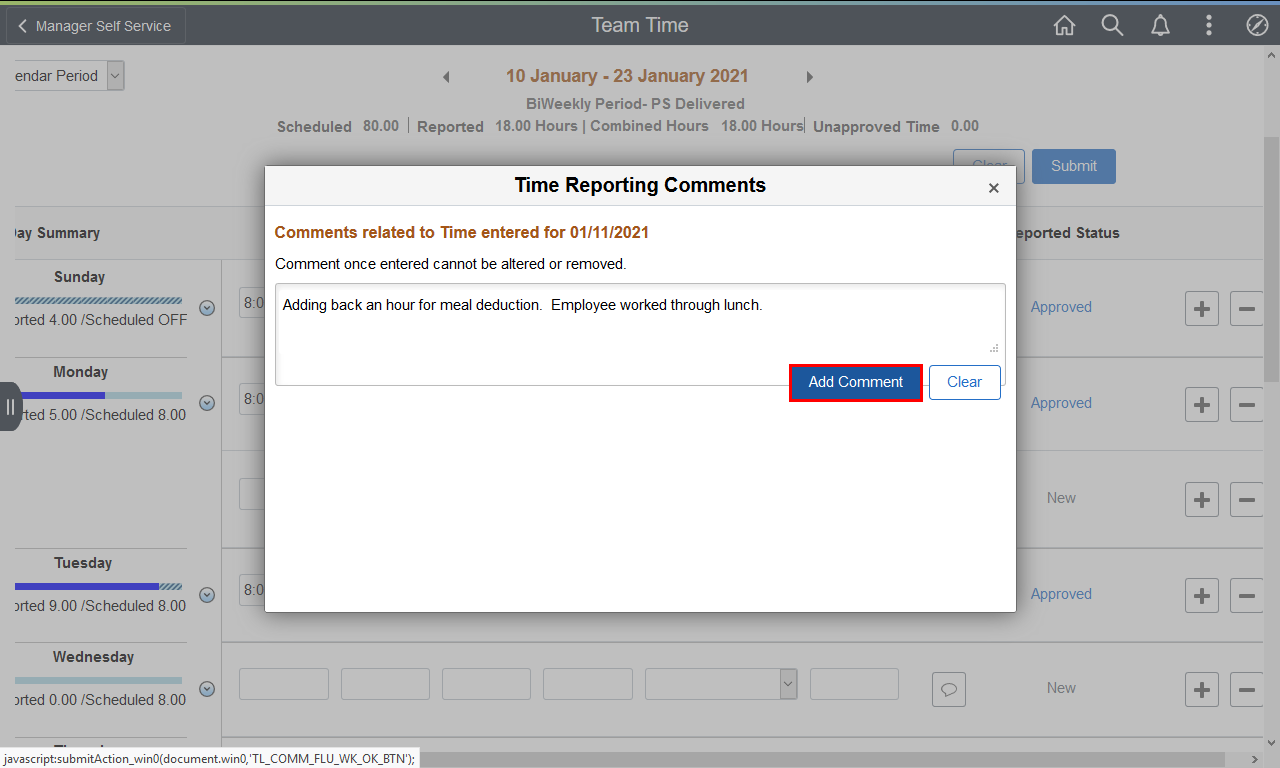 |
The added comment is displayed.
Click the Add Comment button.
|
|
![Time Reporting Comments page displayed with the Close [x] button highlighted](https://uga.teamdynamix.com/TDClient/3109/FandA/Shared/FileOpen?AttachmentID=856399c3-d2f2-4f77-bd1e-5107fc49cc51&ItemID=150480&ItemComponent=26&IsInline=0) |
The comment is displayed under the Add a new Comment field.
Click the Close (Esc) button.
|
|
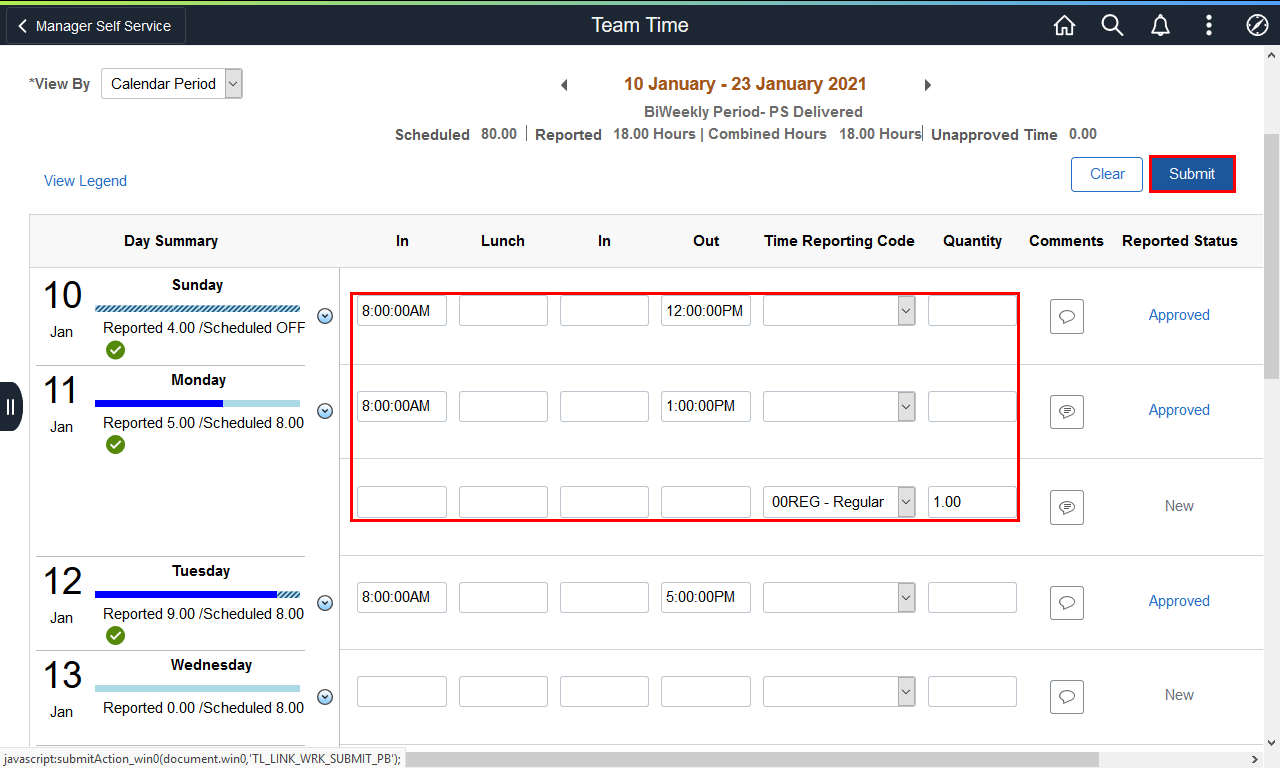 |
With the appropriate hours and comments entered, click the Submit button.
|
|
 |
|
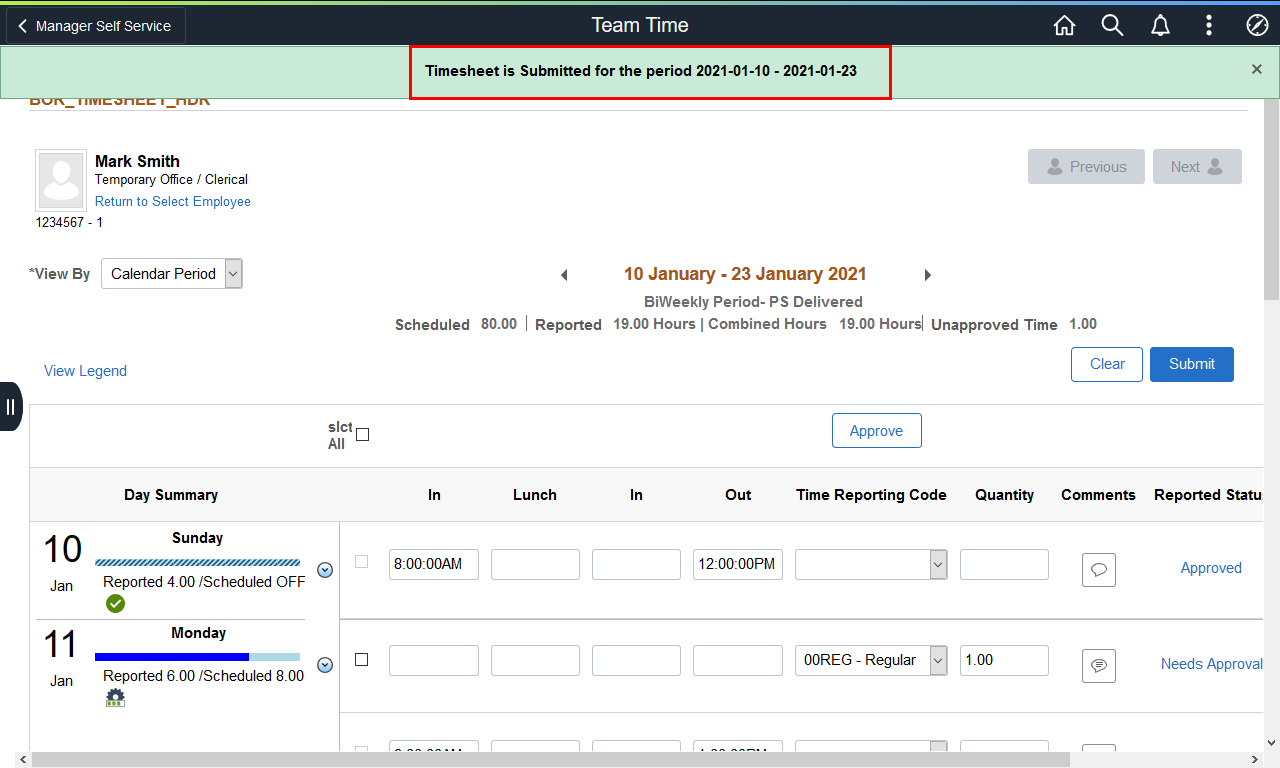
The timesheet is submitted, and a confirmation message is displayed.
|
|