Creating an Intra-University Charge for Employee Travel
Summary
In this article, you will learn how to enter an intra-university charge for employee lodging.
Body
Overview
You may need to create an Intra-University Charge for employee travel charges for an employee from an off-campus unit that comes to Athens and stays at the Georgia Center or other on-campus lodging facility to participate in an interview and/or meetings. This also applies to employees from Athens or the surrounding area who travel to an off-campus location, such as Skidaway, and stays in their lodging facilities.
When the payment/charge is made, the system recognizes the employee travel account codes (641xxx) and will open a field for an Open Item Key. You will enter the Employee ID of the person who traveled into that field. This will also be available when you create a journal entry to move employee travel from one chartstring to another for an entry that originated in the GL. The entry of the Employee ID into the Open Item Key field allows UGA to properly report the employee travel on the Continuous Audit Travel Report and TIGA (Transparency in Government Act) Report at the end of the fiscal year.
If invoices include travel expenses for more than one employee, you will need to do a separate line for each employee in order to identify the employee ID of each traveler and the amount that should be applied to each employee.
Supporting documentation must be attached to all General Ledger Journals and should reflect the entry being made. A good rule of thumb is to include an electronic copy of what was used to create the journal entry. For intra-university charges (tickets), invoices should be attached that equal the revenue amount being credited. For correcting/moving a transaction, provide supporting documentation that shows where the transaction originally posted. Remember to be concise with journal entries and combine documents when reasonable; reviewing fewer documents can be helpful for your approvers! Documents included are also available during auditing and historical review. Examples of supporting documentation:
- UGA_GL_LEDGER_DETAIL query results can be included to show what transaction is being corrected/moved.
- Any analysis/spreadsheet that was used to determine the amounts included in the journal entry.
- Invoices and agreements for Intra-University charges.
In this article, you will learn how to enter an intra-university charge for employee lodging.
In this example, you will record an invoice for an employee stay at The Georgia Center.
 |
First, log into OneUSG Connect
Click the Employee Self Service dropdown button to activate the menu.
|
|
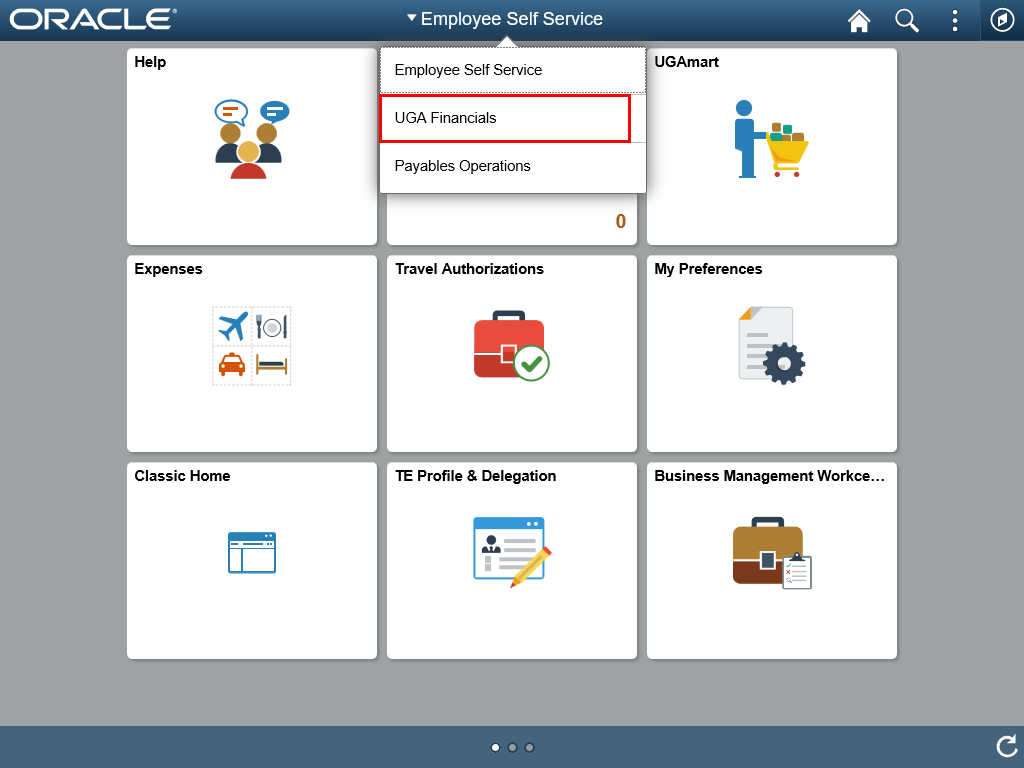 |
| Select the UGA Financials option.
|
|
 |
|
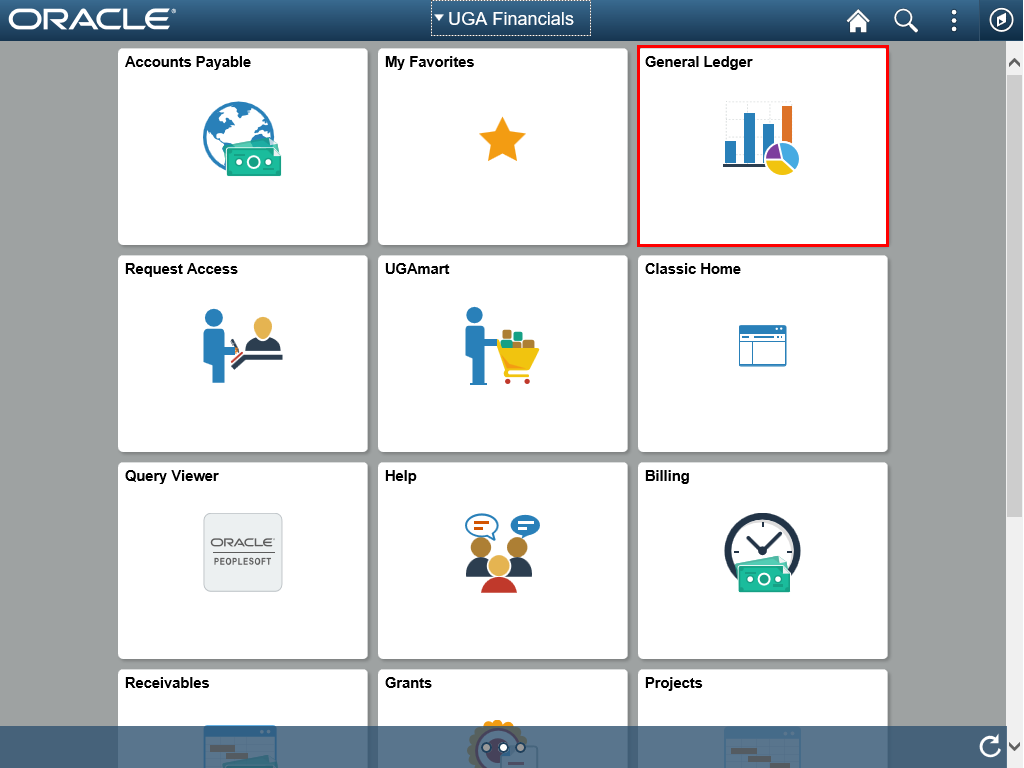
The UGA Financials homepage is displayed.
Click the General Ledger tile.
|
|
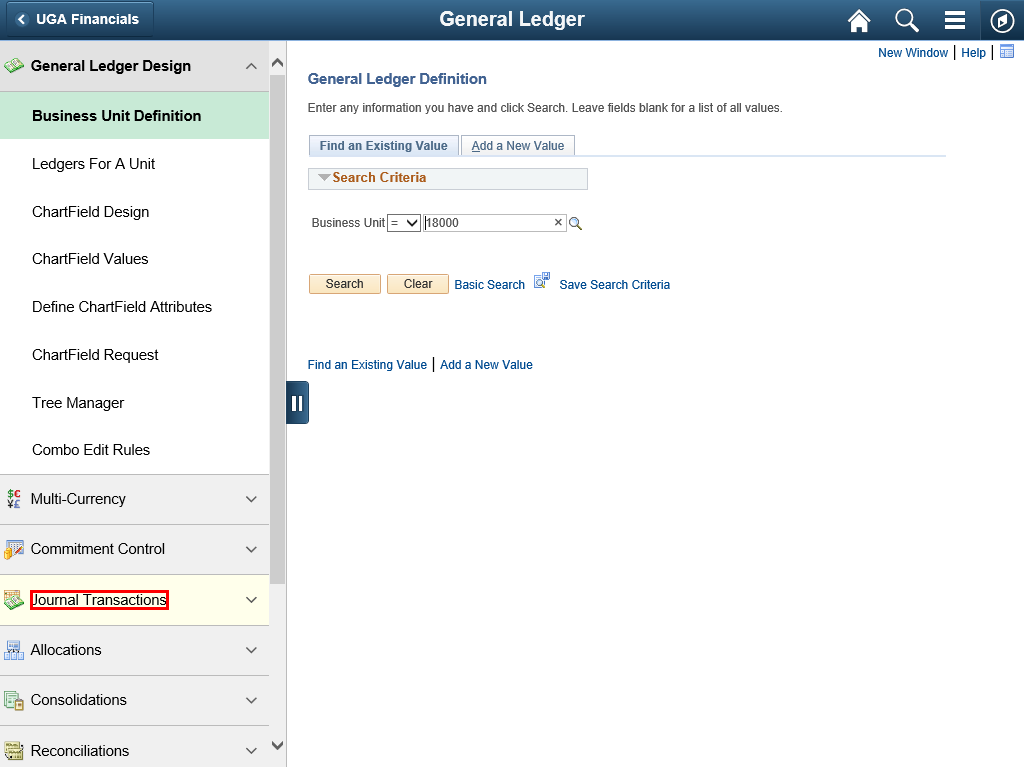 |
Click the Journal Transactions option. Intra-University charges are entered as Journal transactions.
|
|
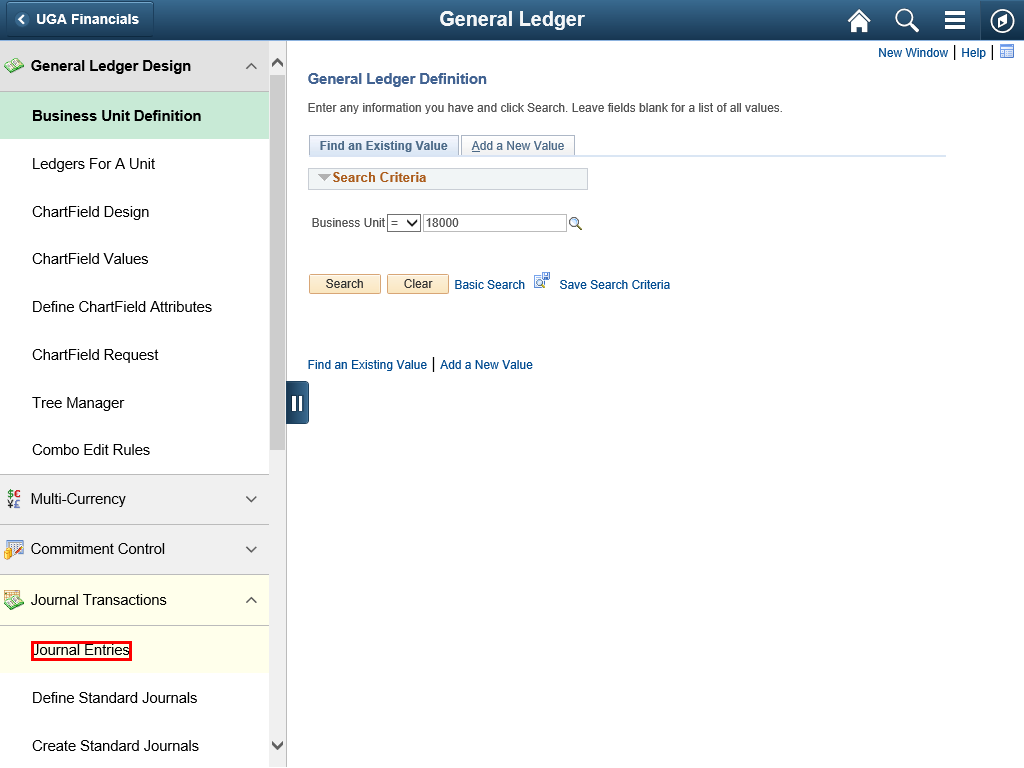 |
| Click the Journal Entries option.
|
|
 |
| Close the side bar with the || tab.
|
|
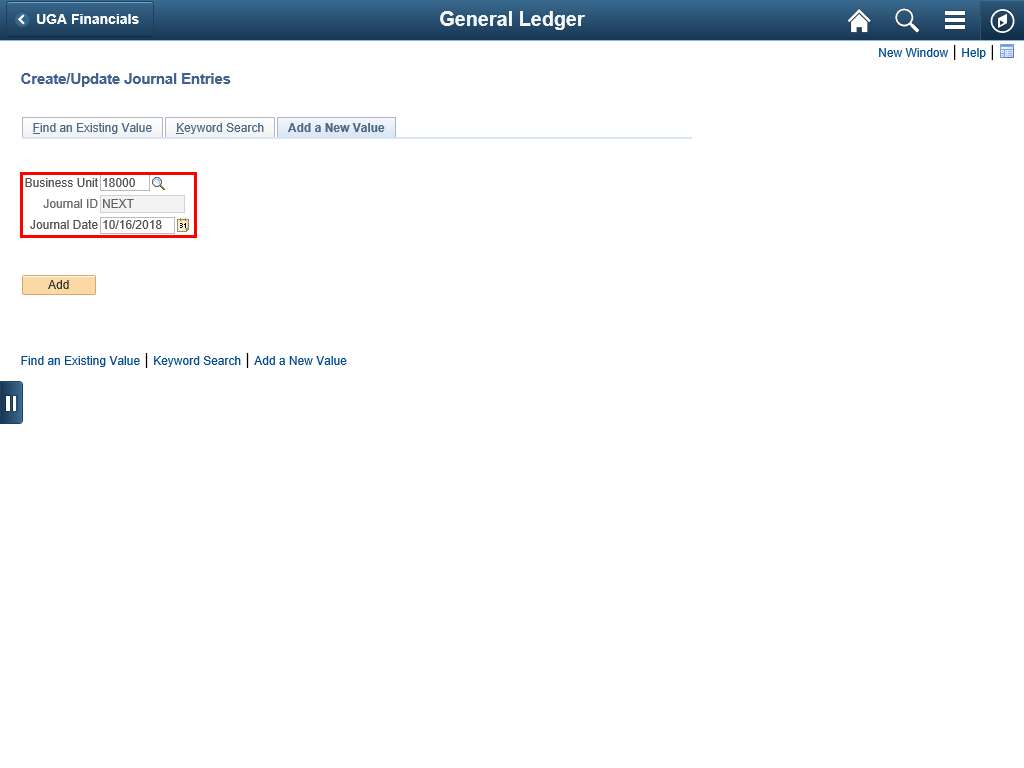 |
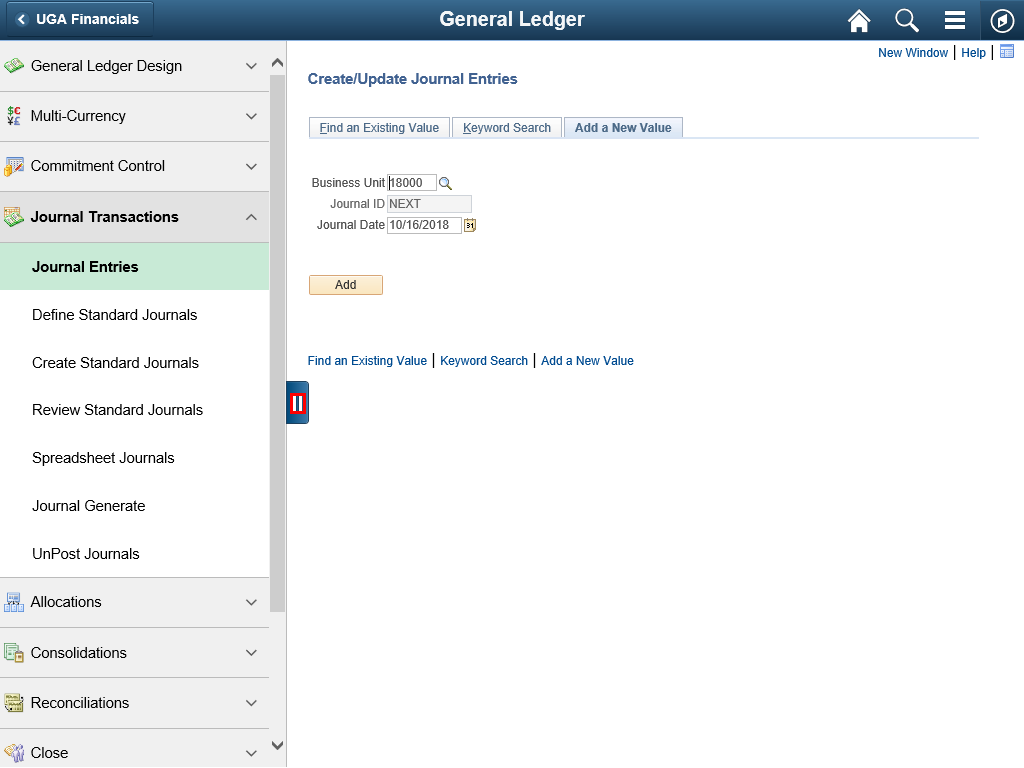
The Create/Update Journal Entries page is displayed.
When adding a new journal transaction, the default values are displayed. The only value you might change is the Journal Date.
The Journal Date determines in which period (month) the transaction will be posted.
|
|
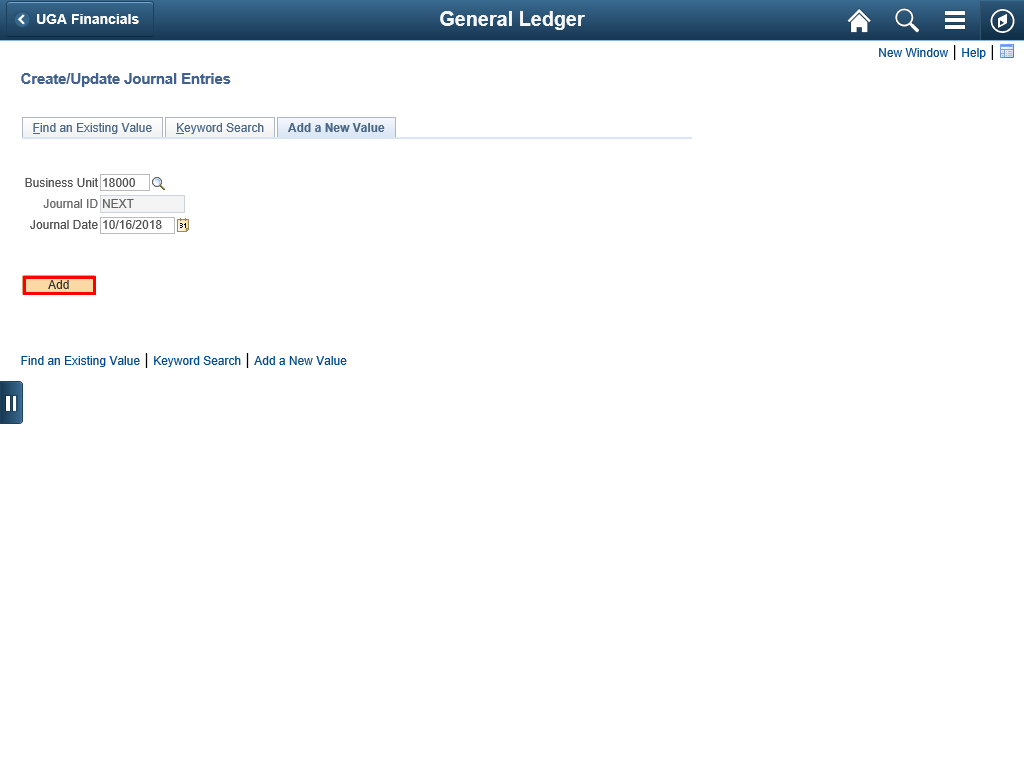 |
| Click the Add button.
|
|
 |
|
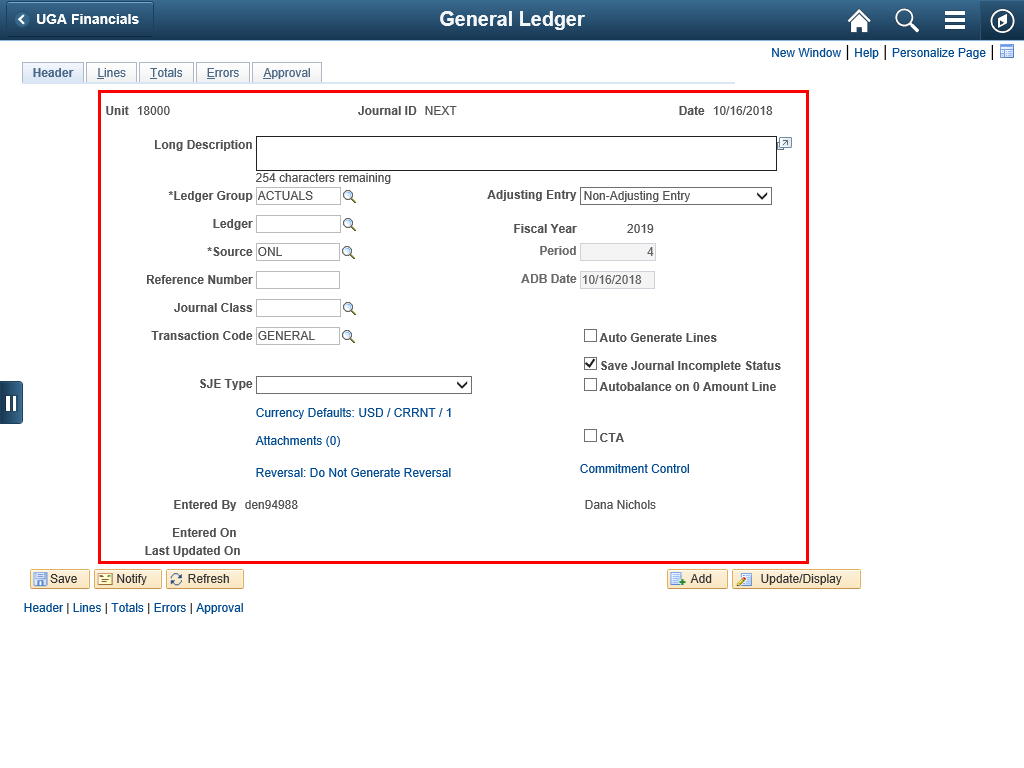
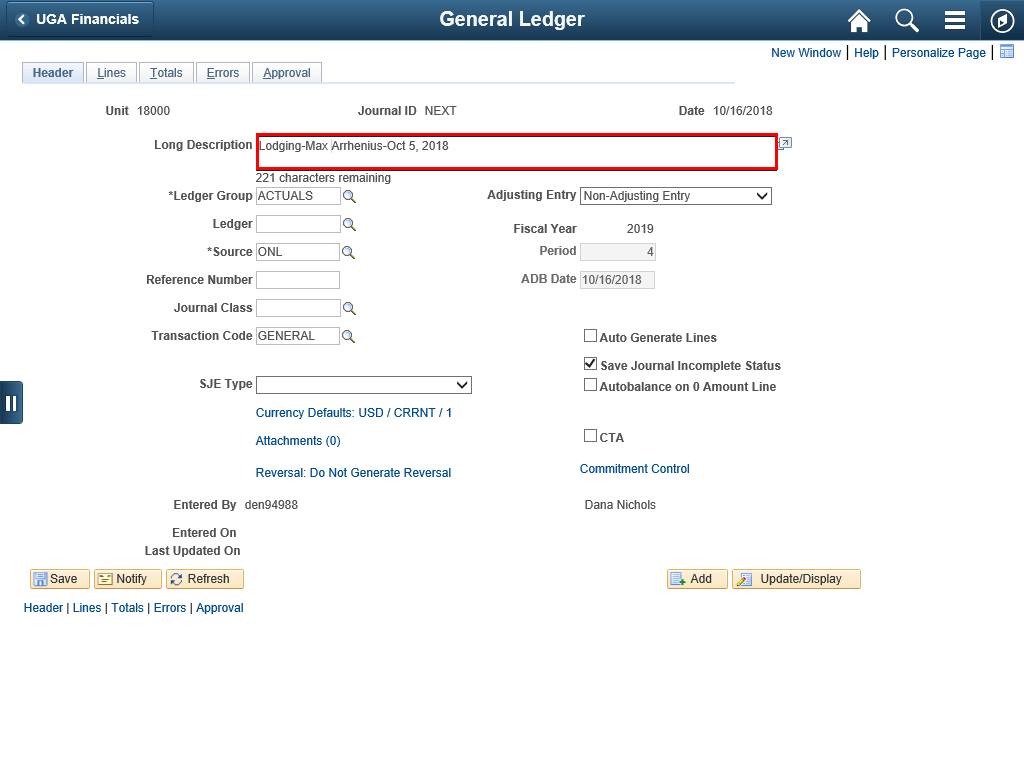
The Header page is displayed. Use this page to add general information about the journal and to add attachments.
|
|
 |
|
The Long Description field allows you to enter up to 254 characters to give a full description of what the transaction represents.
|
|
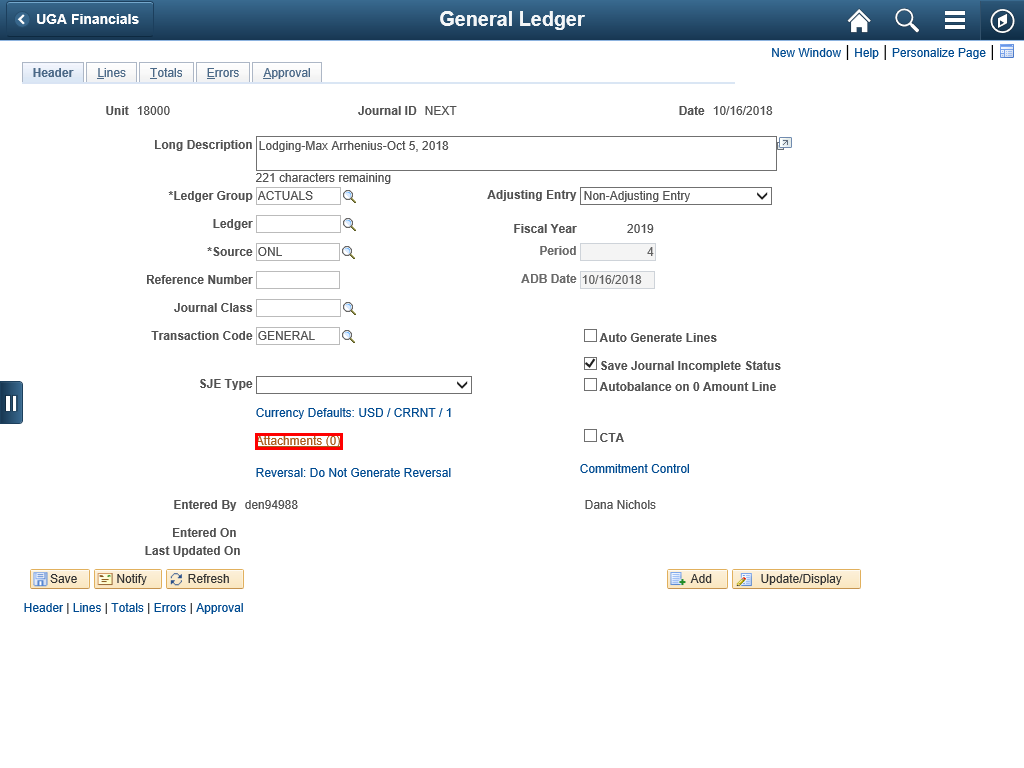 |
| Click the Add Attachment button to upload additional documents.
|
|
 |
|
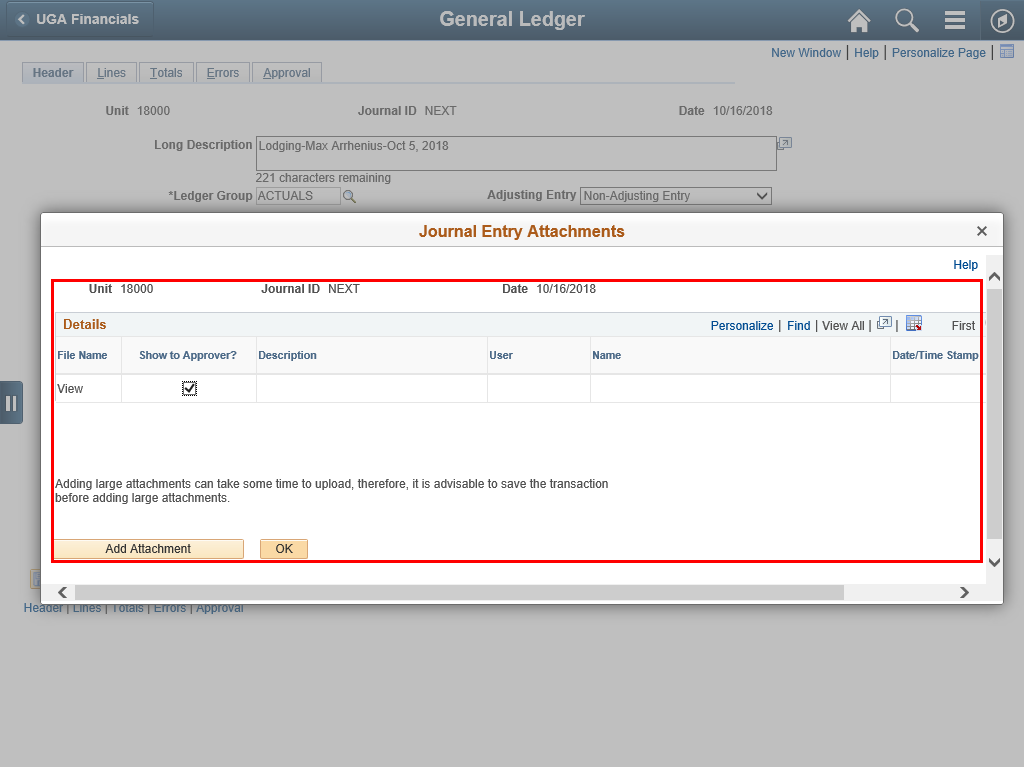
For intra-university charges, use the controls on the Journal Entry Attachment page to upload a copy of the invoice for the services. You can add other documents, if needed.
|
|
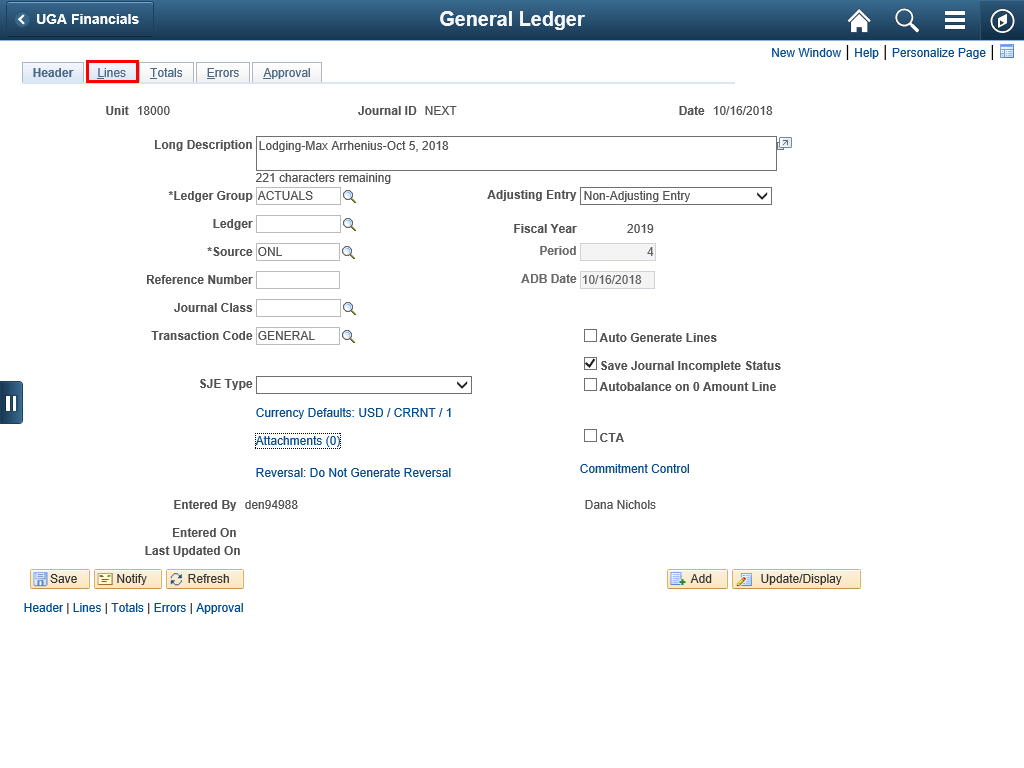 |
You are now ready to enter the chartstrings to be charged.
|
|
 |
|
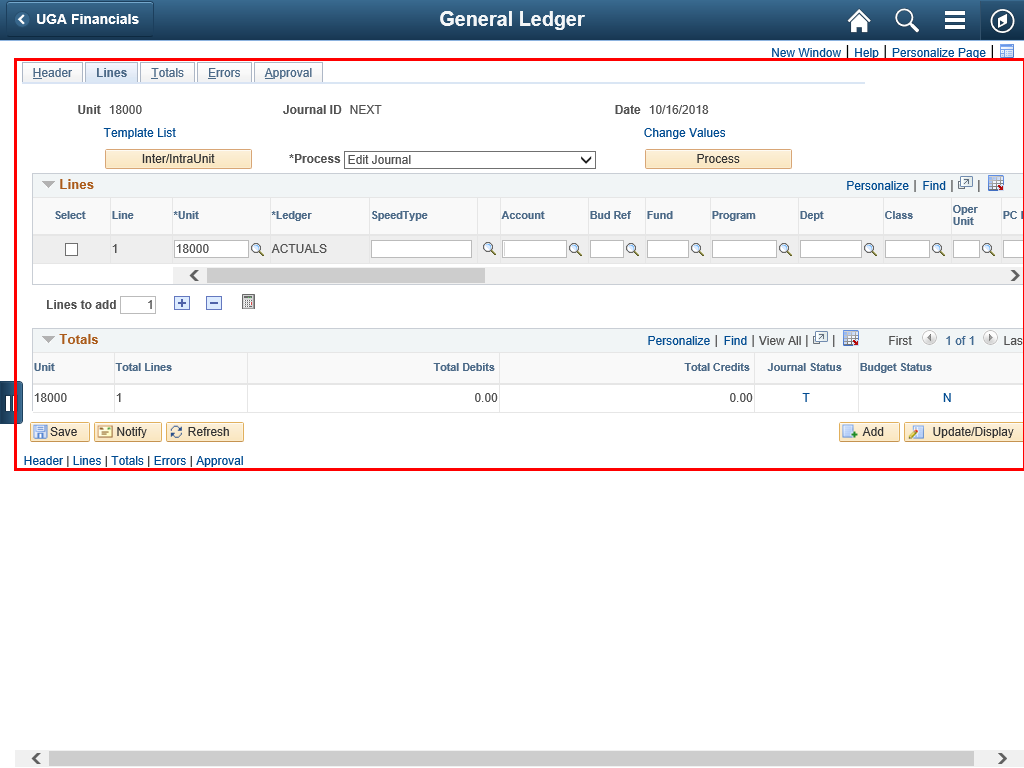
The Lines page is used to enter the accounting information for the transaction.
|
|
 |
|
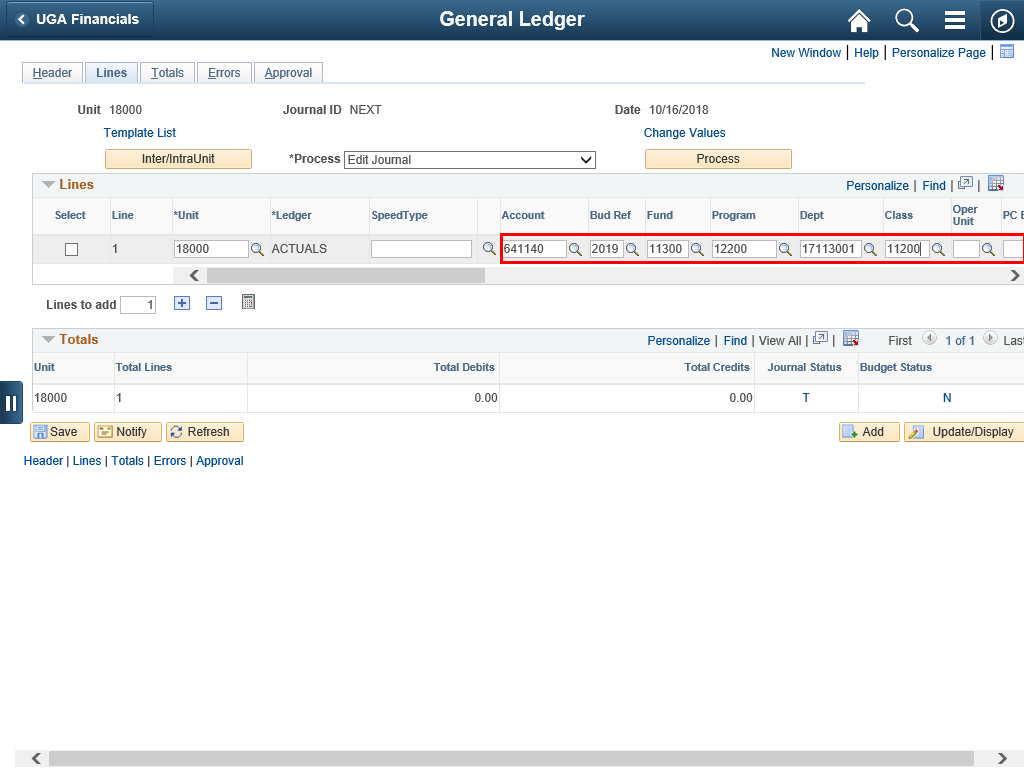
Enter the Chartstring values to receive the charge.
|
|
 |
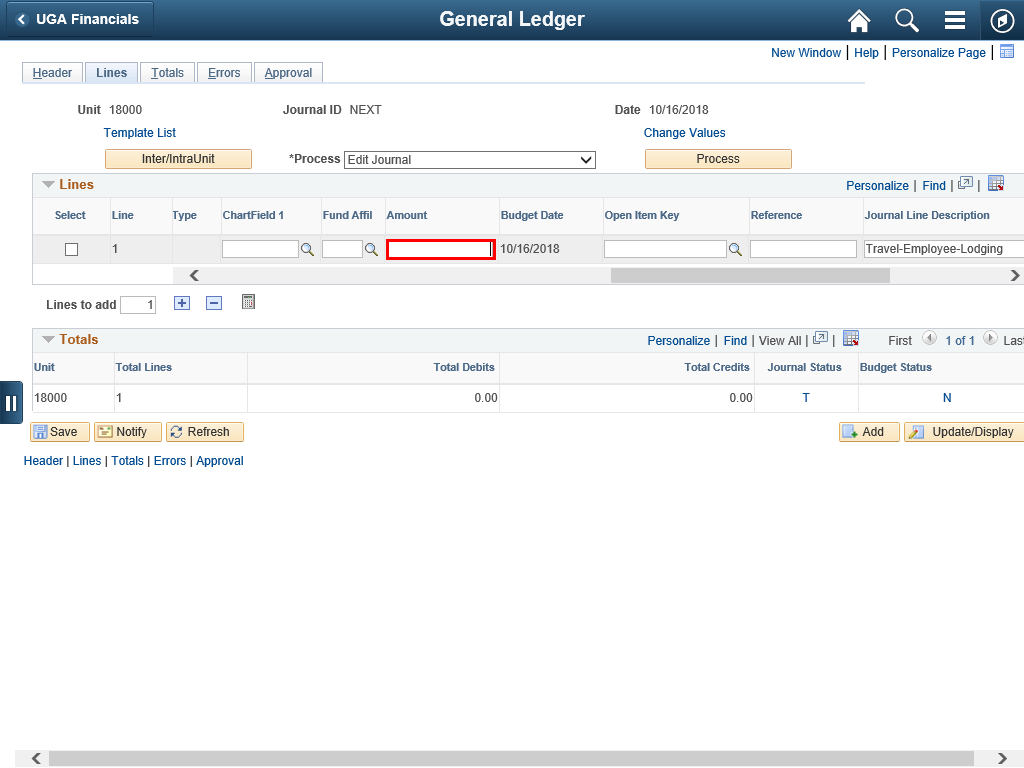
Click the scrollbar to go to the right to enter the amounts and reference information.
|
|
 |
|
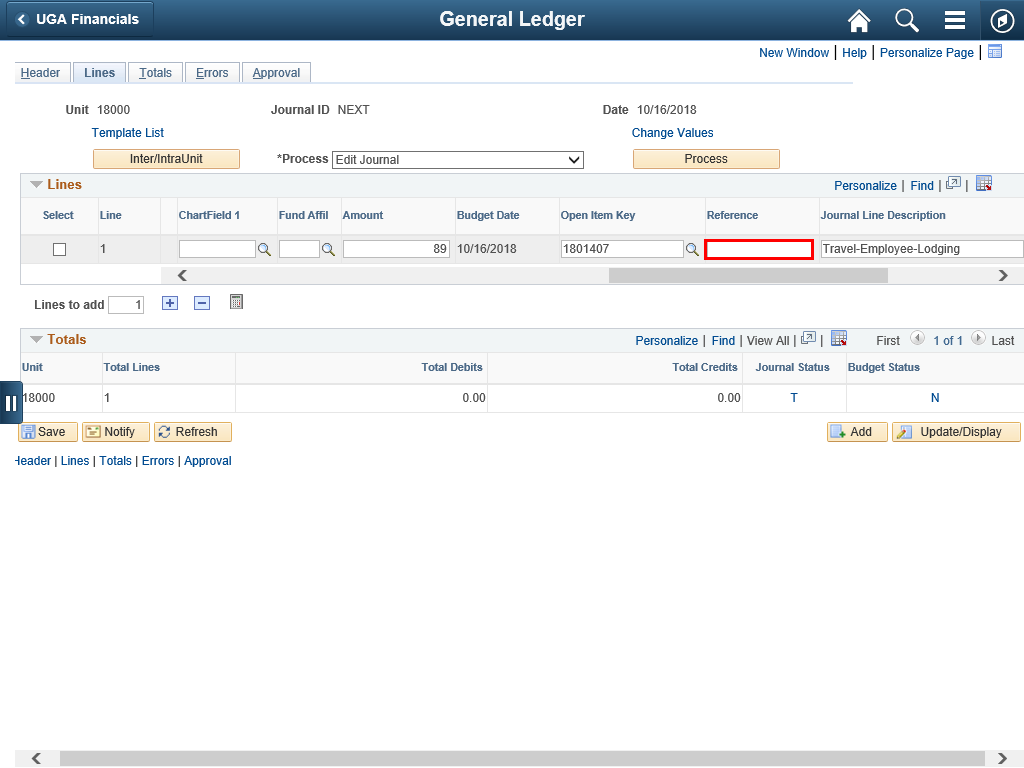
Enter the amount to be charged into the Amount field.
|
|
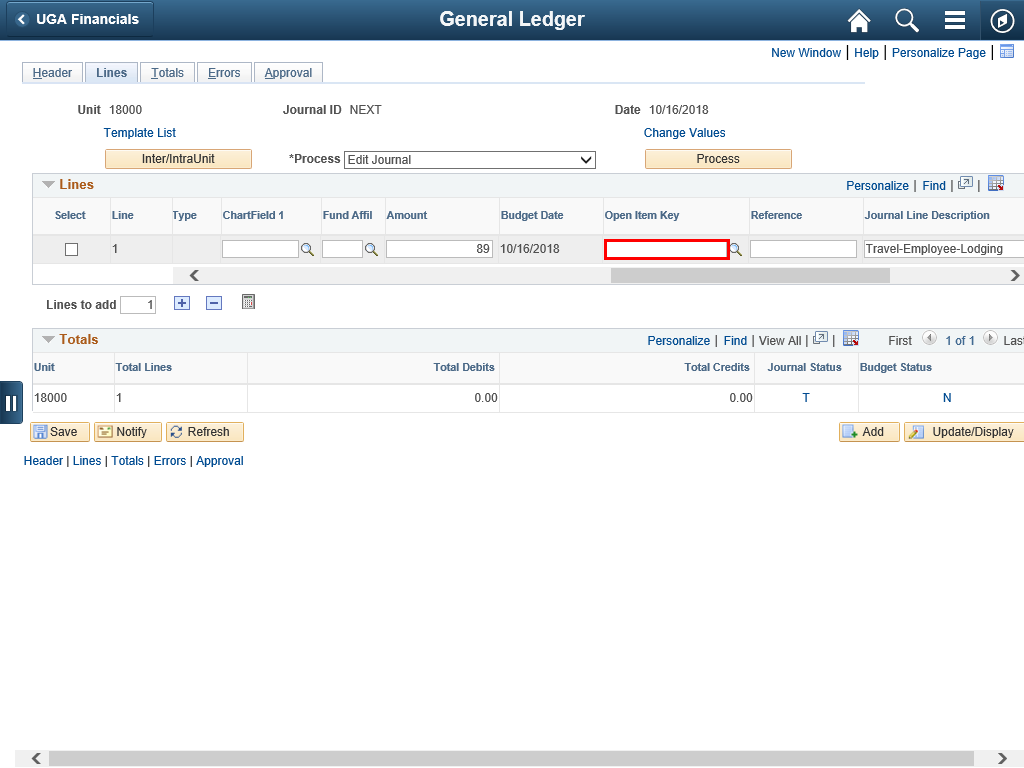 |
Since the account used in the chartstring was an employee group travel account (641xxx), an Open Item Key field is opened on the row.
Note: Non-employee travel uses a different set of accounts (651xxx) and the Open Item Key field will not open.
Enter the employee's ID into the Open Item Key field.
Example shown here: Enter "1801407".
|
|
 |
Enter the invoice number or other document number into the Reference field.
Example shown here: Enter "INV2000".
|
|
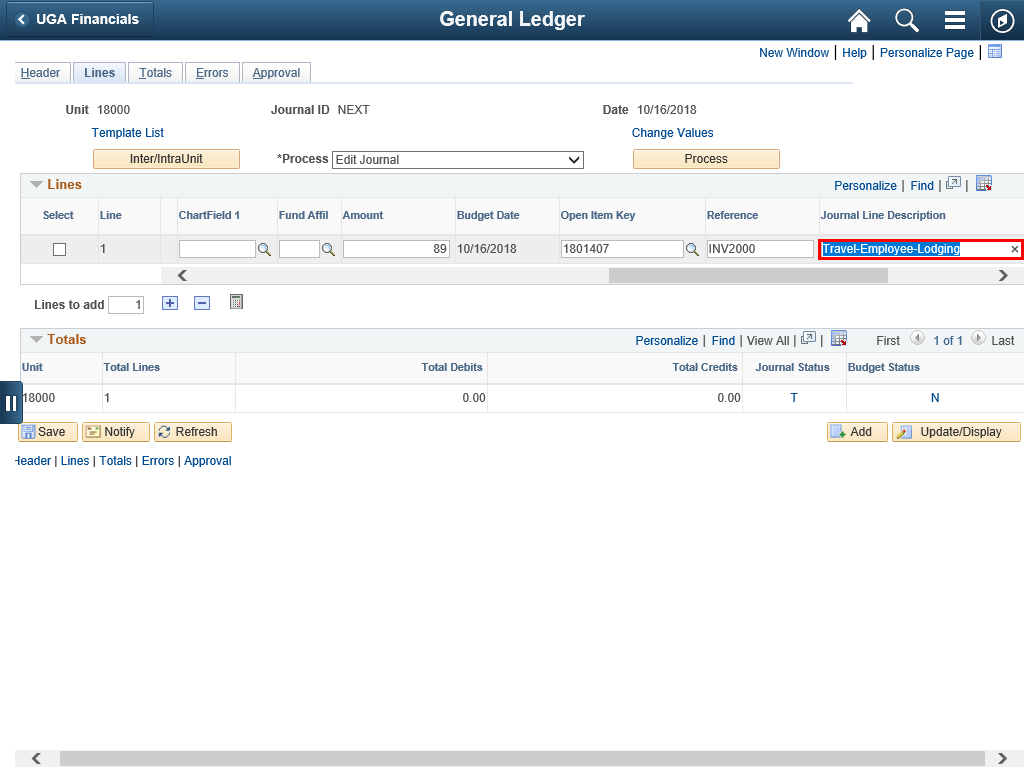 |
Enter a description of the transaction into the Journal Line Description field. This should include the vendor, the purpose and the date.
Example shown here: Enter "GaCtr-Lodging-Oct2018".
|
|
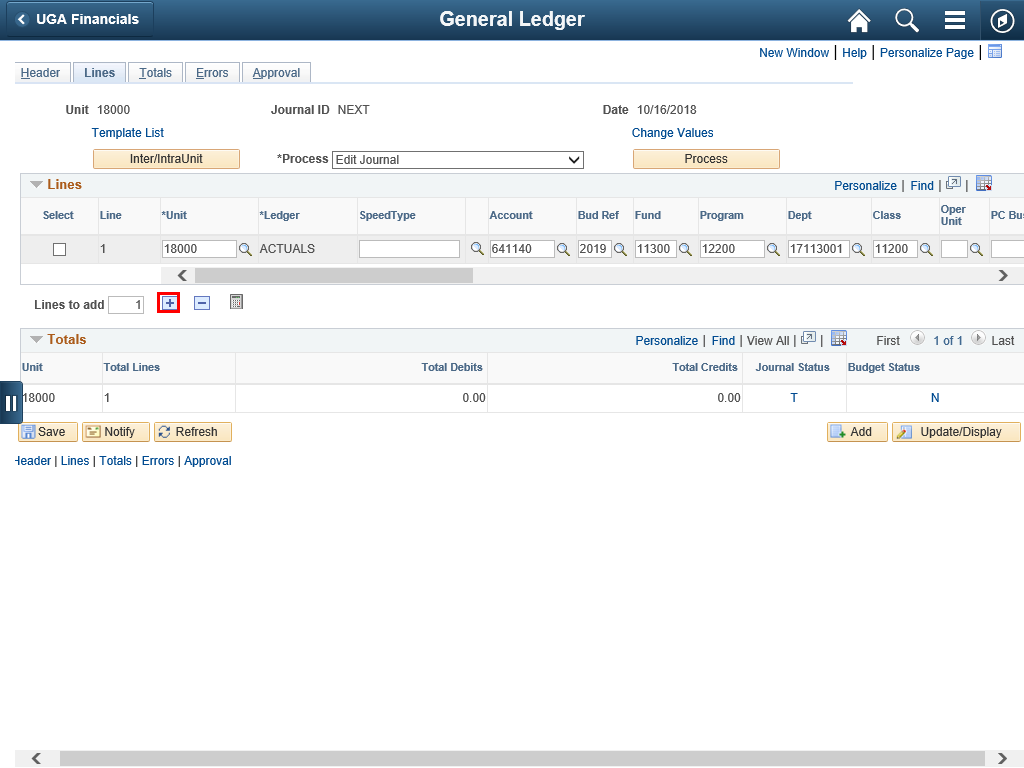 |
Add the second line for the transaction. The Lines to add field already shows that you will add one line.
|
|
 |
|
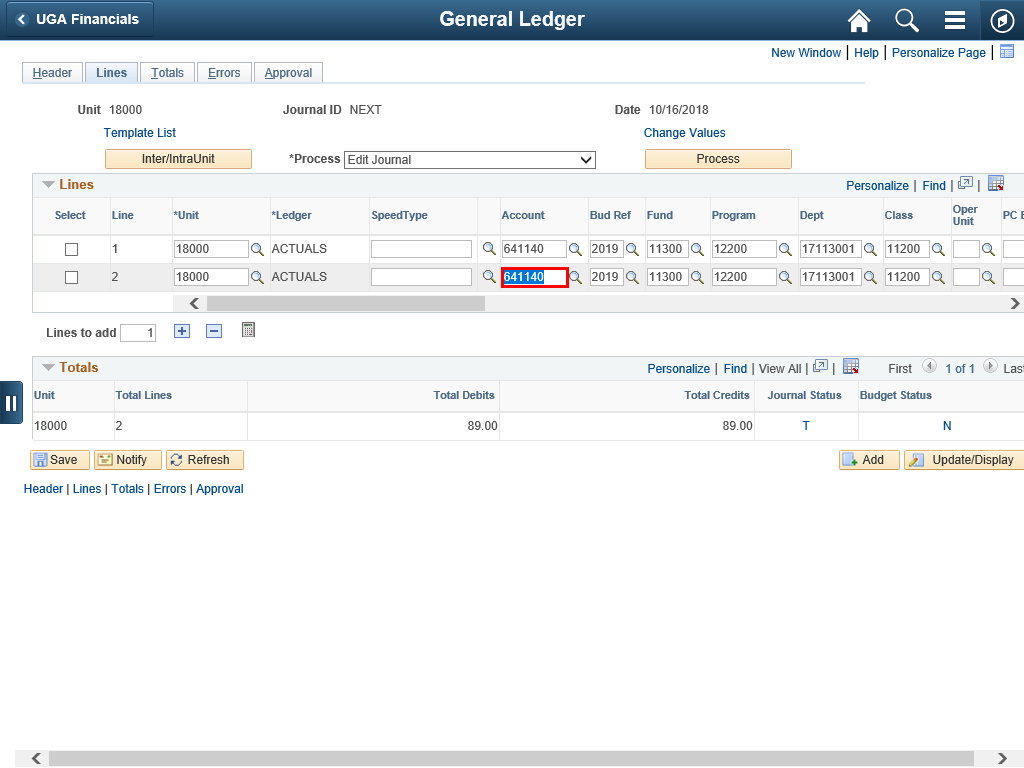
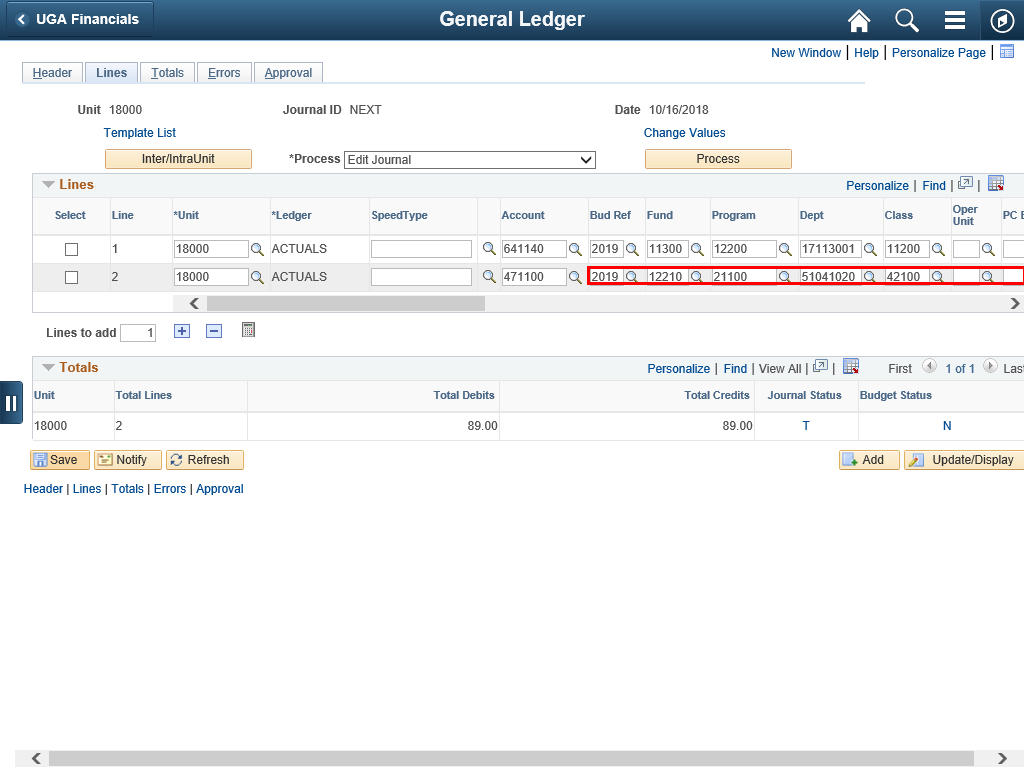
The Revenue side of an Intra-University transaction uses Account 471100 for all funds
Enter "471100" into the Account field.
|
|
 |
|
Make other changes to the chartstring and amounts, as needed.
|
|
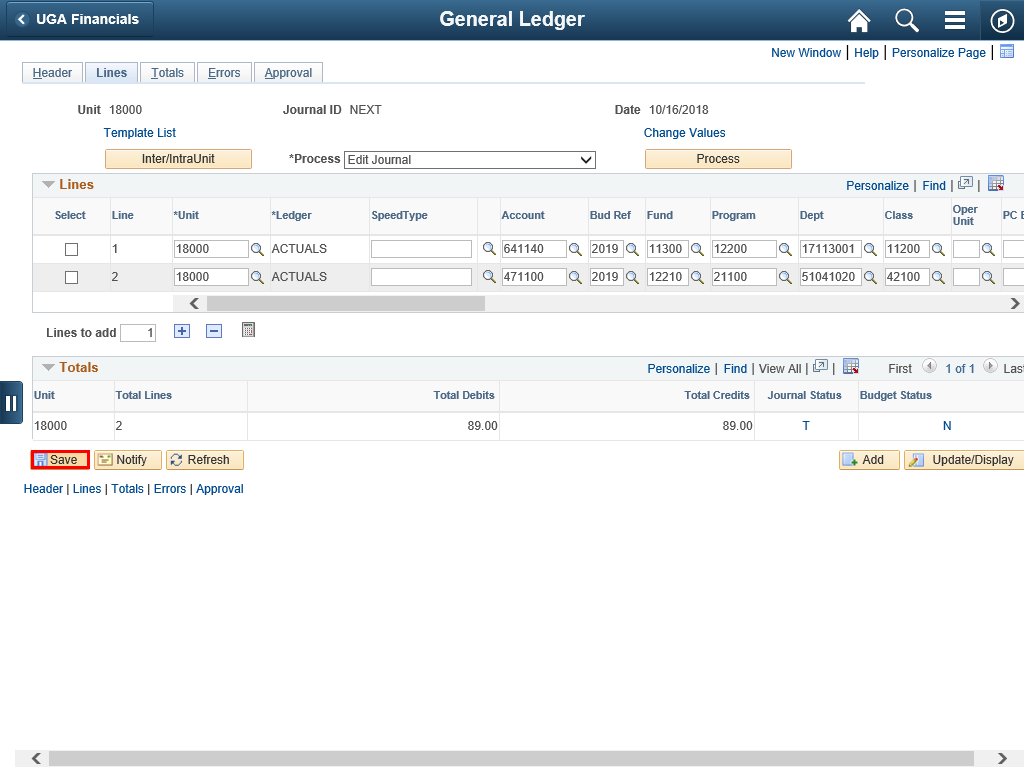 |
Save the journal by clicking the Save button.
|
|
 |
|
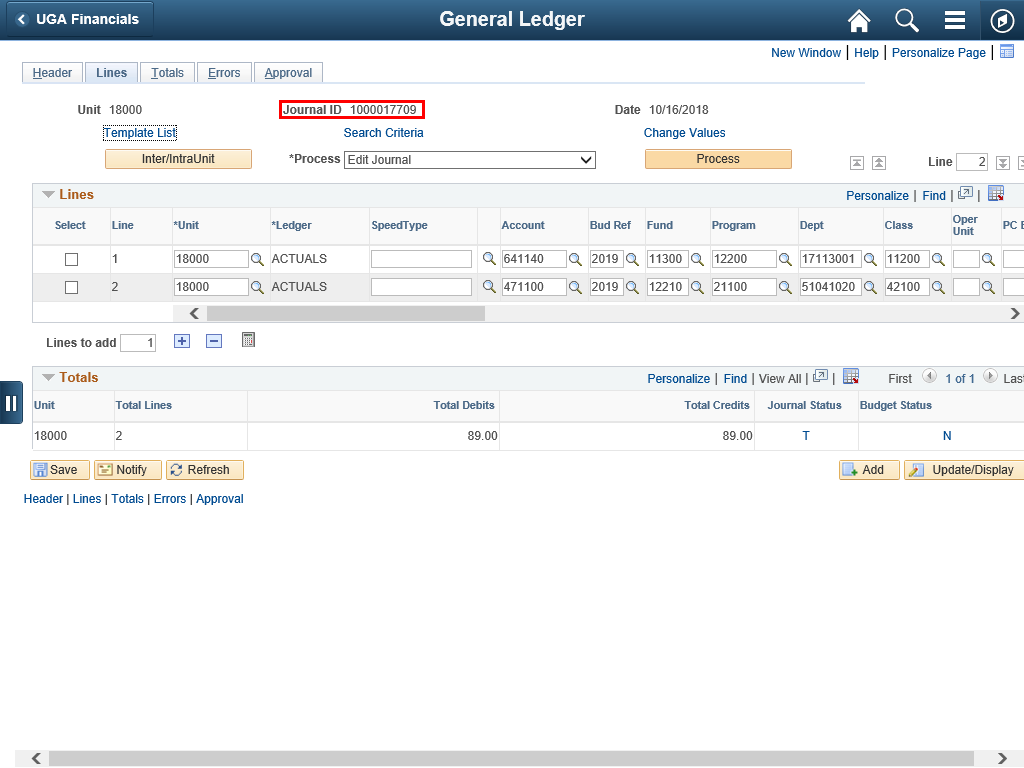
A journal ID is assigned to the transaction.
|
|
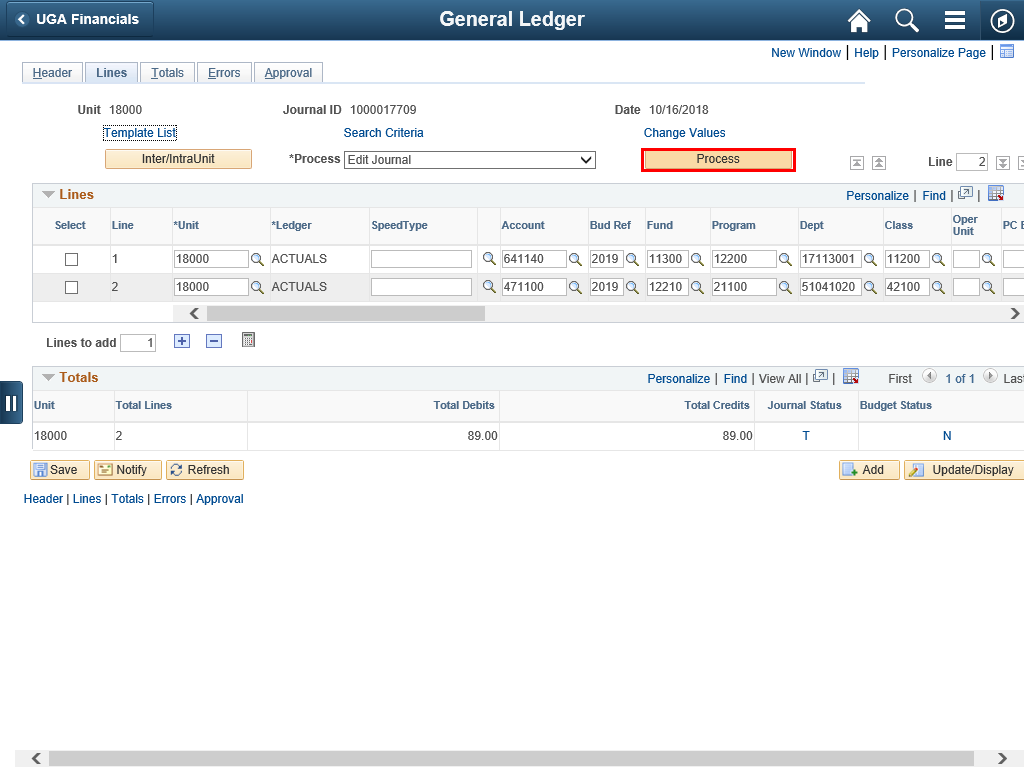 |
The next step is to Edit the Journal to make sure that the ChartFields are valid and that there is sufficient budget.
Edit Journal should be the default process.
|
|
 |
Close the system message by clicking the OK button.
|
|
 |
|
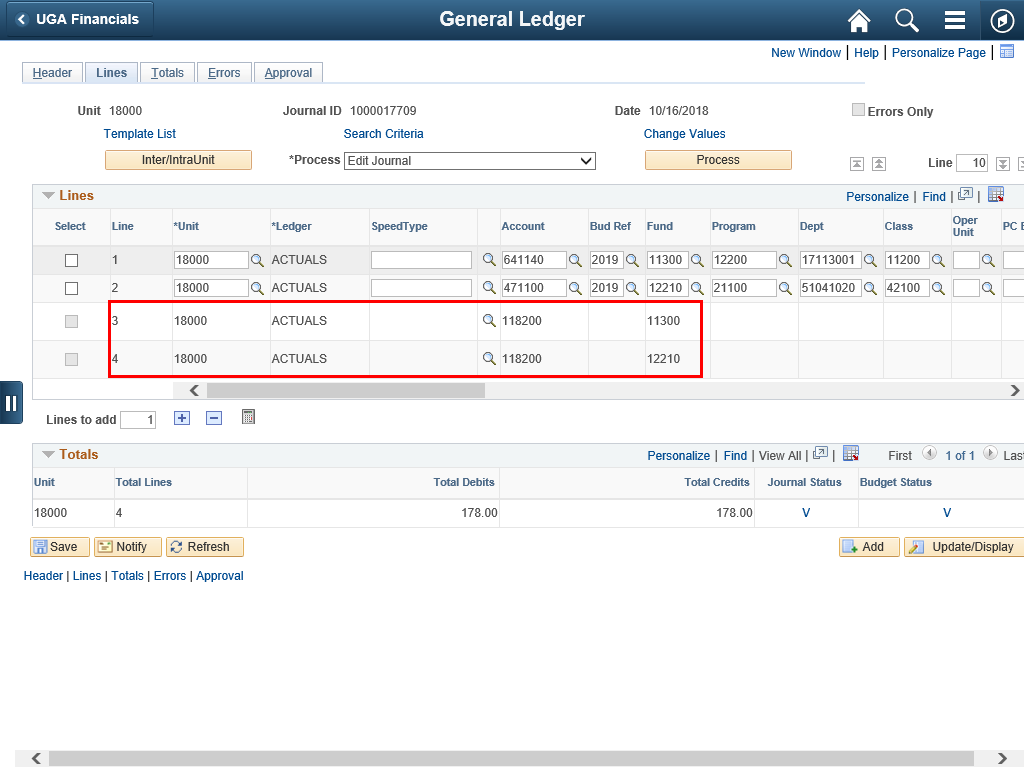
After the Edit Journal process, two additional lines are added to the journal.
These "control lines" appear when you cross between funds. They are system generated lines used to keep Funds in balance. They will always be at the end of the journal.
The Account Code for each line is 118200 and the fund lists the same funds that were already entered.
|
|
 |
|
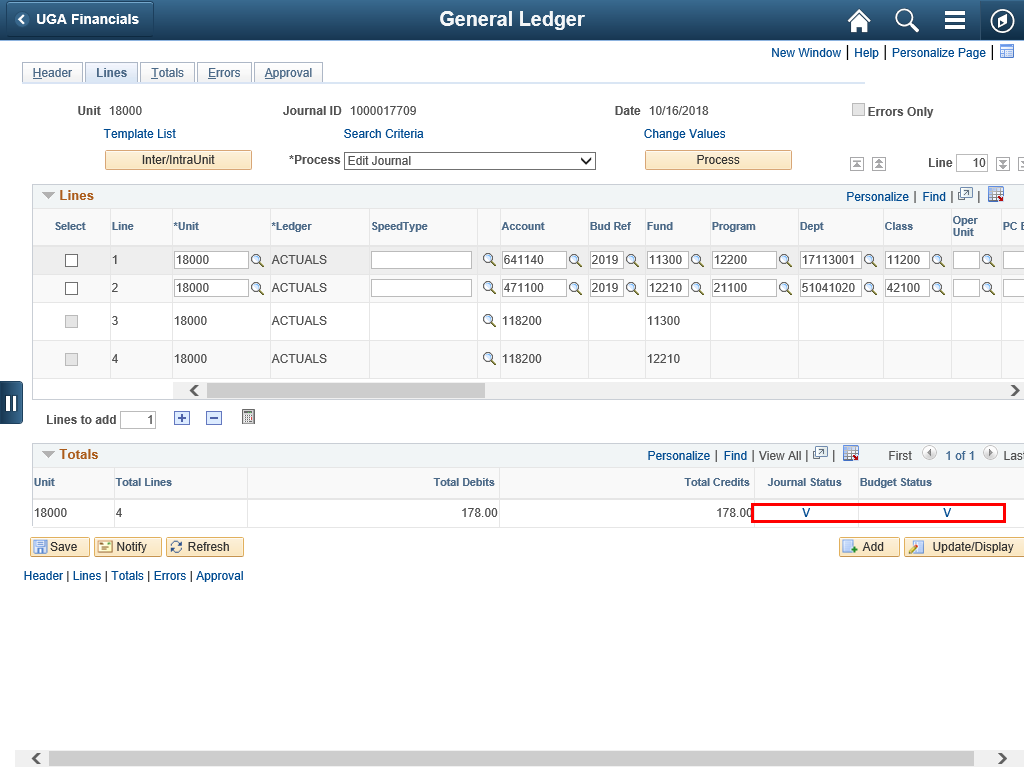
When the Journal Status and the Budget Status are both Valid (V), you are ready to submit the journal for approval.
|
|
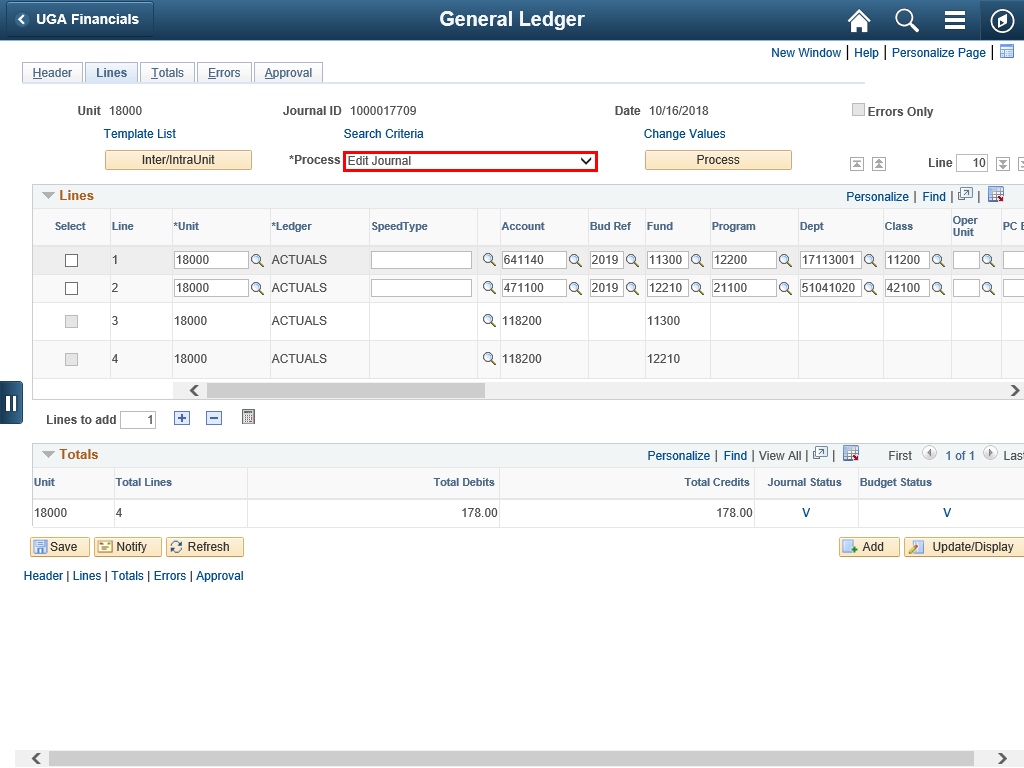 |
| Click the Edit Journal drop-down menu to view choices.
|
|
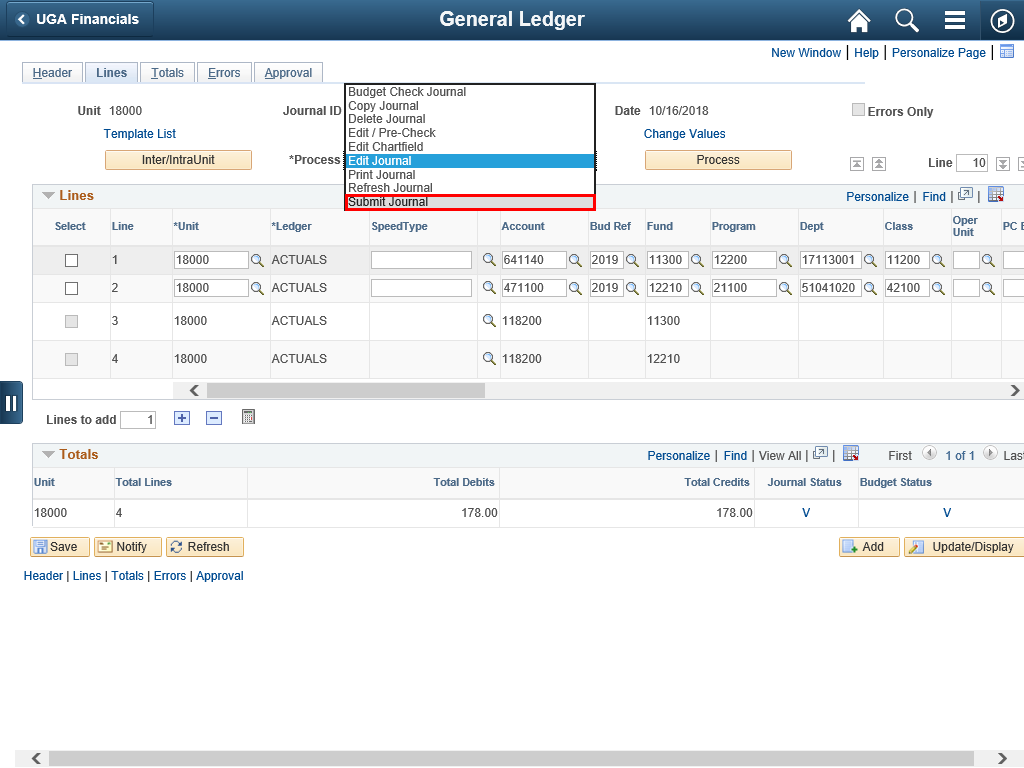 |
| Select the Submit Journal option.
|
|
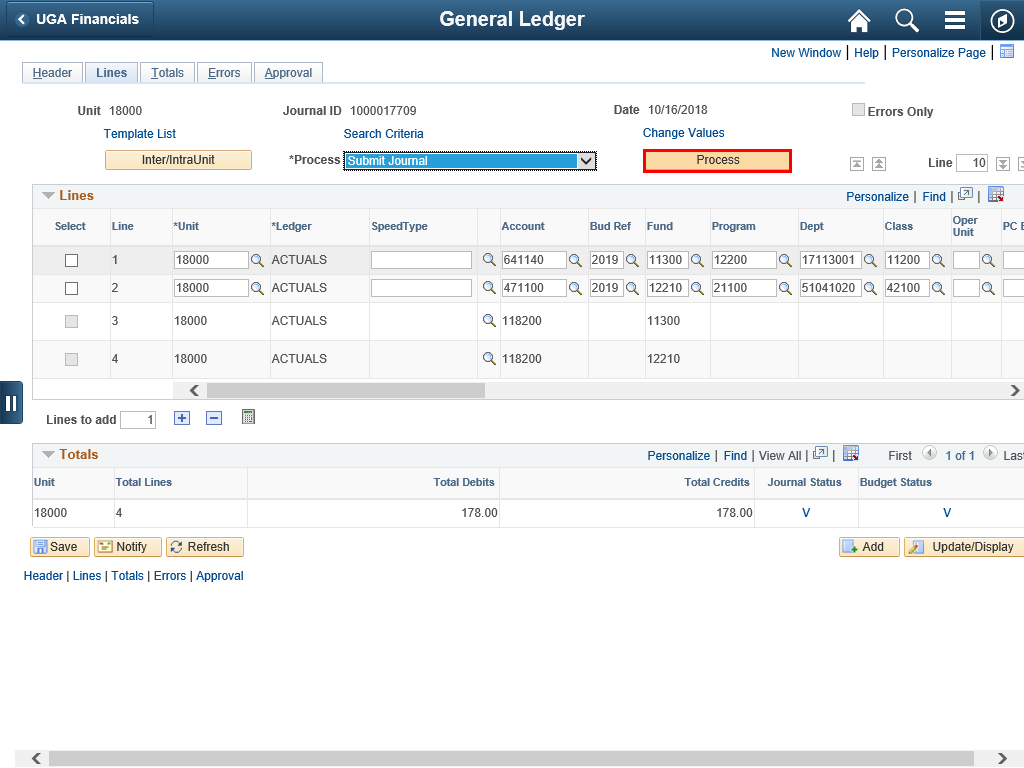 |
| Click the Process button to submit the journal for approval.
|
|
 |
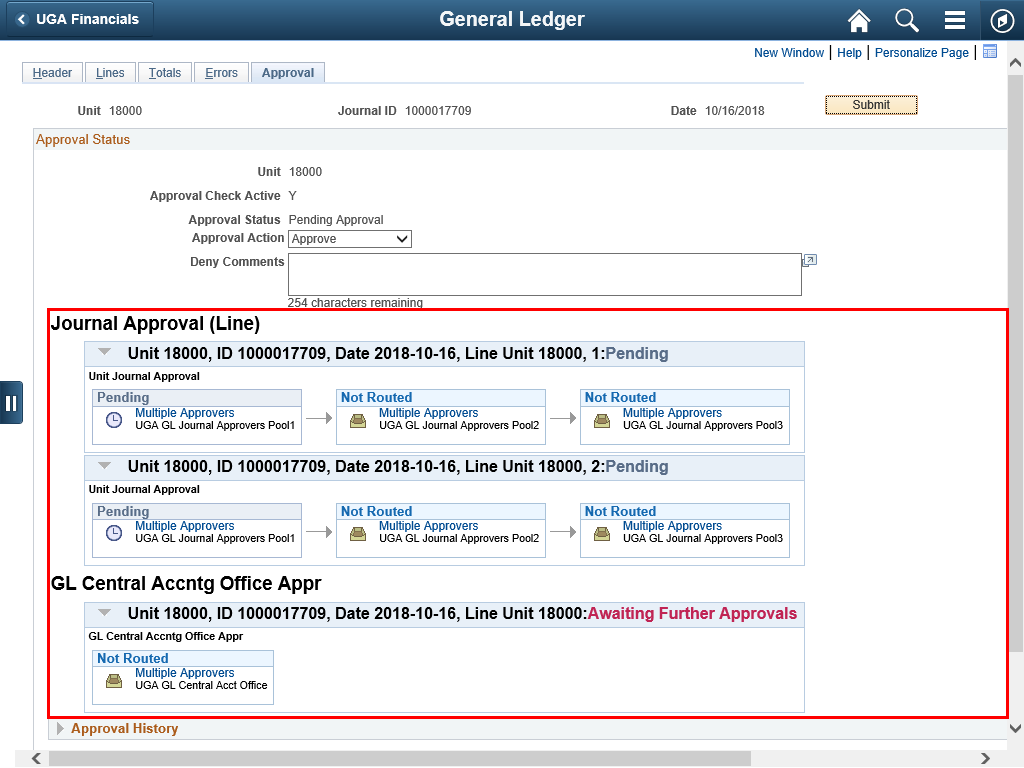
Once the journal has been submitted, you can review the approval workflow.
|
|
 |
|
The Journal Approval (Line) workflow is displayed. You can see who needs to approve, and who has already approved. You can also read any comments that have been submitted.
|
|
Details
Details
Article ID:
149904
Created
Sat 9/24/22 11:28 PM
Modified
Sun 4/5/26 9:23 PM