Crediting a Bill and Rebilling
Summary
In this article, you will learn the steps to credit a bill and rebill the correct amount.
Body
Overview
In this article, you will credit a bill and rebill the bill with a new amount. If the original invoice has incorrect information, you can adjust the entire bill by using the Adjust Entire Bill function.
For a bill to be adjusted, the bill must have been finalized and have a status of INV (Invoiced).
In this article, you will learn the steps to credit a bill and rebill the correct amount.
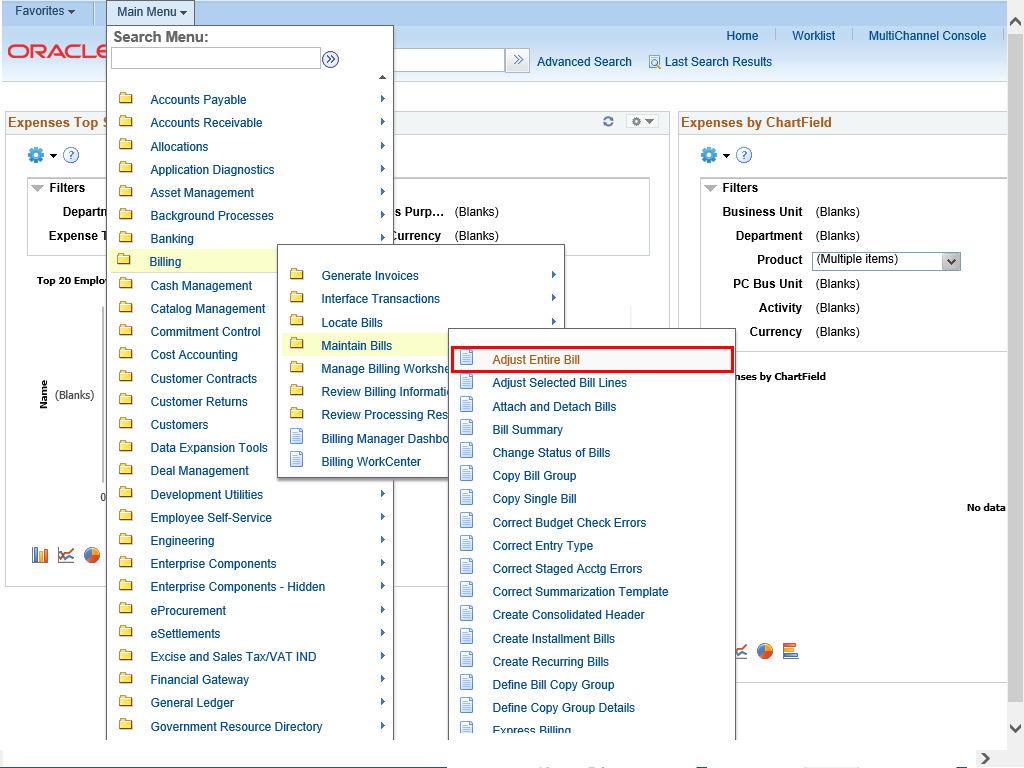 |
To navigate to the Adjust Entire Bill page, select:
Main Menu > Billing > Maintain Bills > Adjust Entire Bill
Click the Adjust Entire Bill link.
|
|
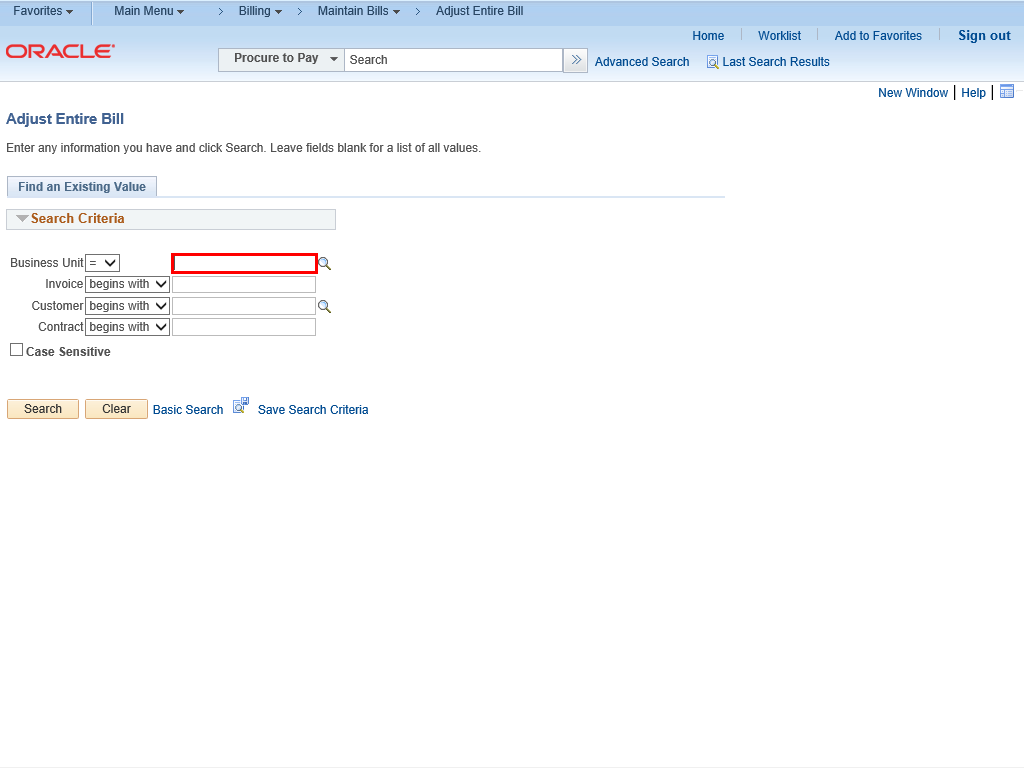 |
The Adjust Entire Bill search page is displayed.
Enter appropriate information into the Business Unit field.
Example shown here: "18003".
|
|
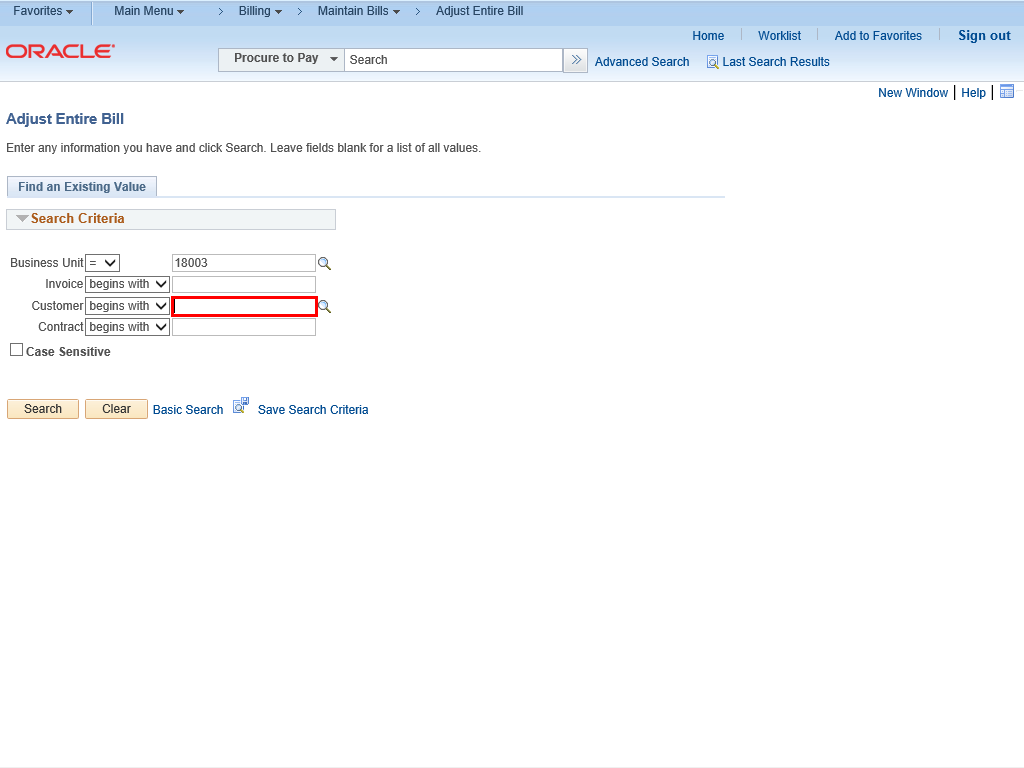 |
You can narrow your search results by searching for a customer.
To search through the registered customers list, click the lookup magnifying glass next to the Customer field.
|
|
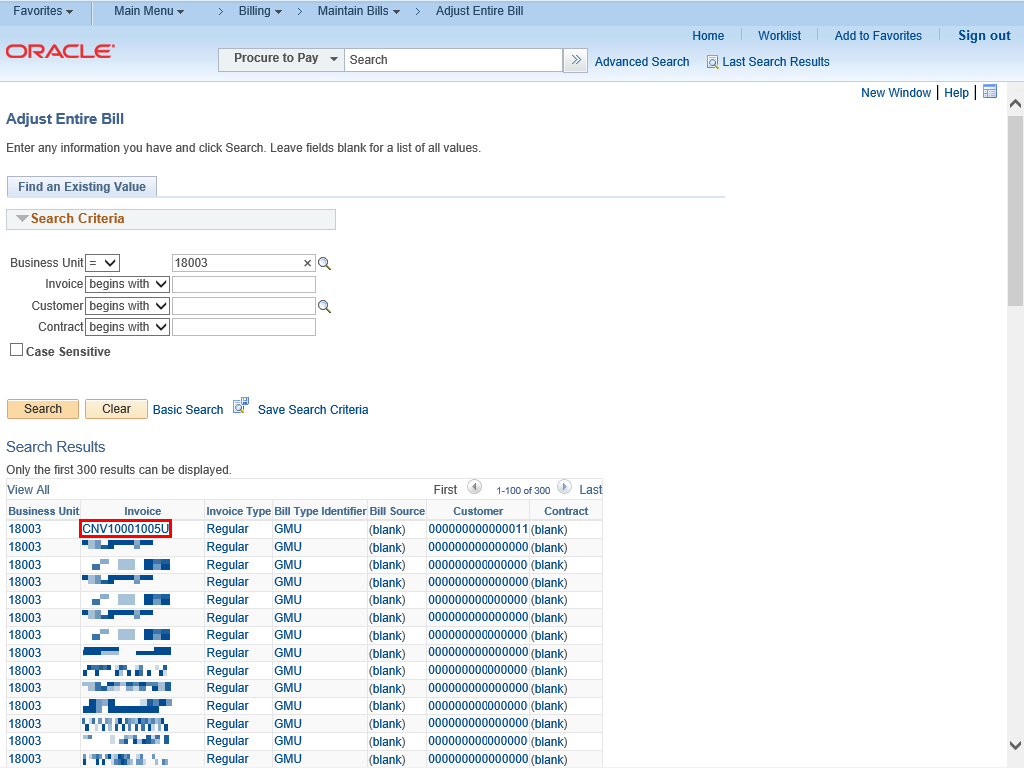 |
Your Search Results are displayed beneath the Search Criteria.
Click the appropriate Invoice link.
Example shown here: CNV10001005U link.
|
|
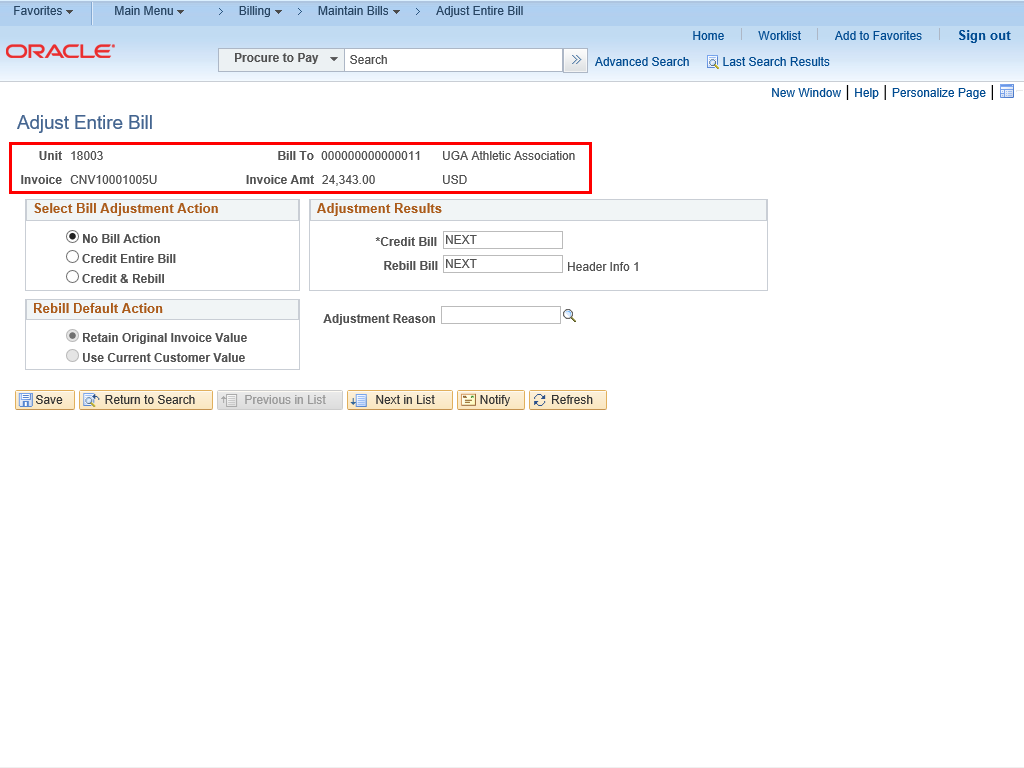 |
The Adjust Entire Bill page is displayed. The top section of the page displays the Business Unit, Customer and Invoice information.
|
|
 |
The Select Bill Adjustment Action section provides the Adjustment Actions available for this process.
To select the Bill Adjustment Action, click the button to the left of the Credit & Rebill action.
|
|
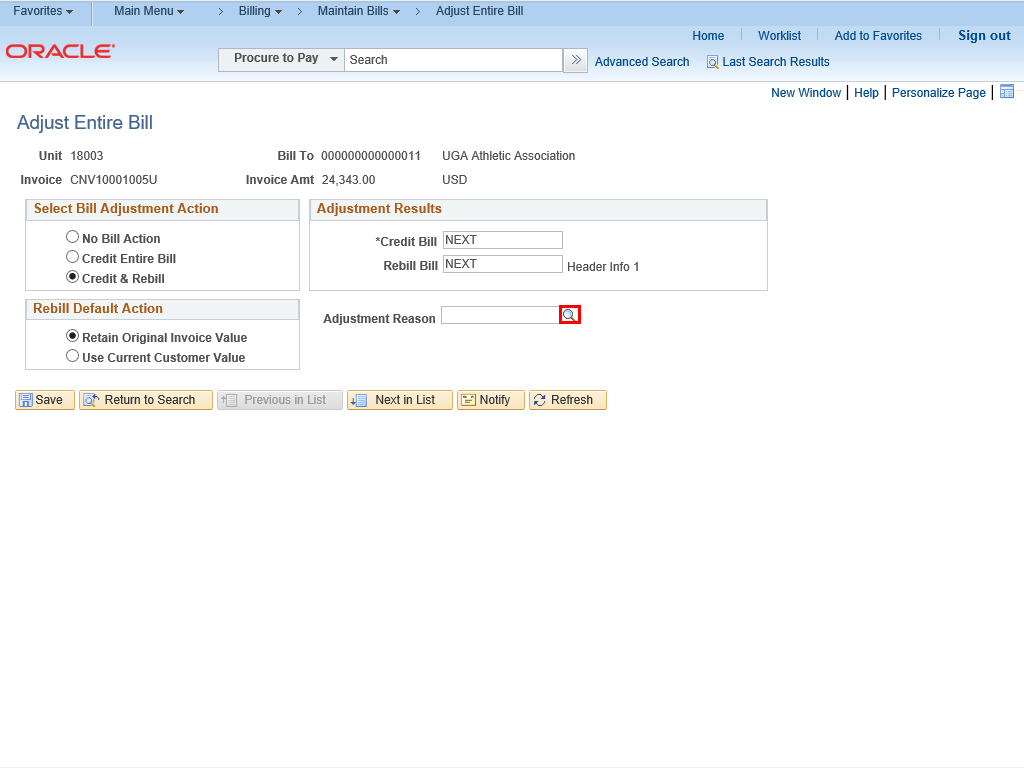 |
An Adjustment Reason needs to be entered.
To select the Adjustment Reason, click the lookup magnifying glass next to the Adjustment Reason field.
|
|
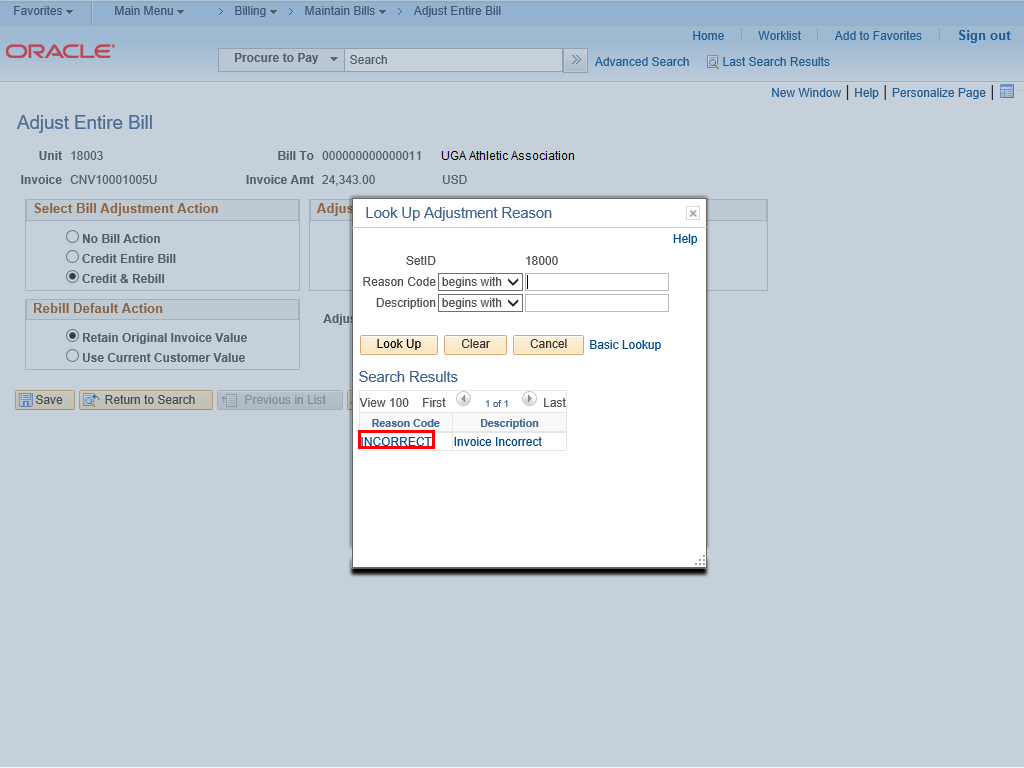 |
The Look Up Adjustment Reason window is displayed.
Click the INCORRECT link.
|
|
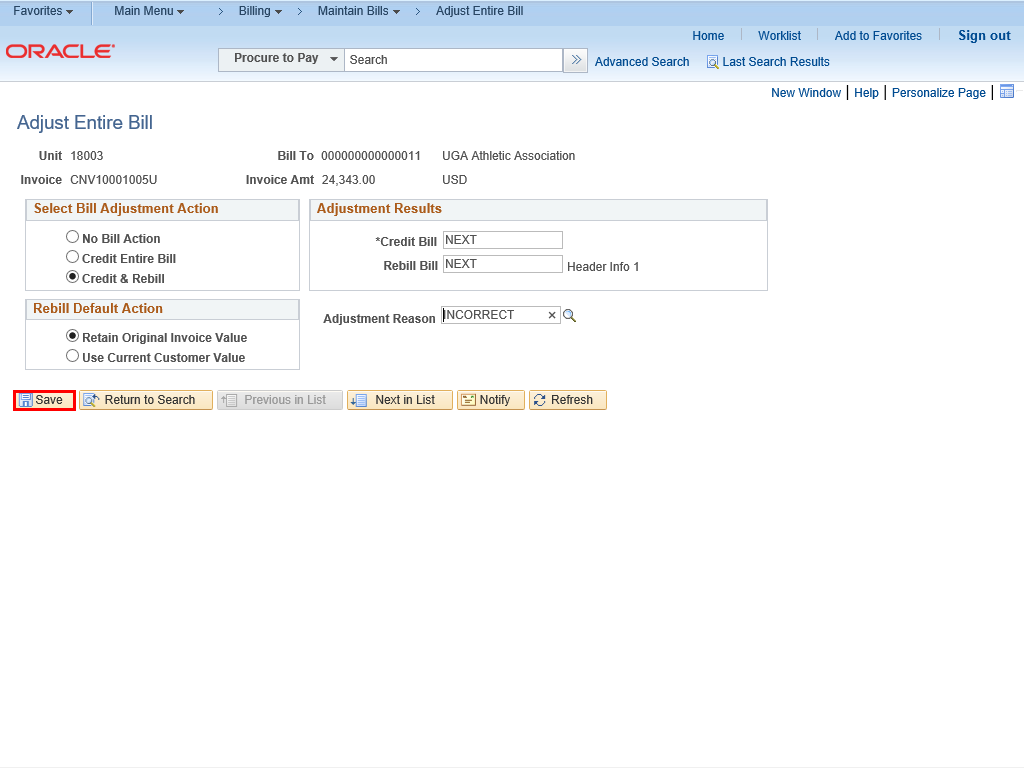 |
| Click the Save button.
|
|
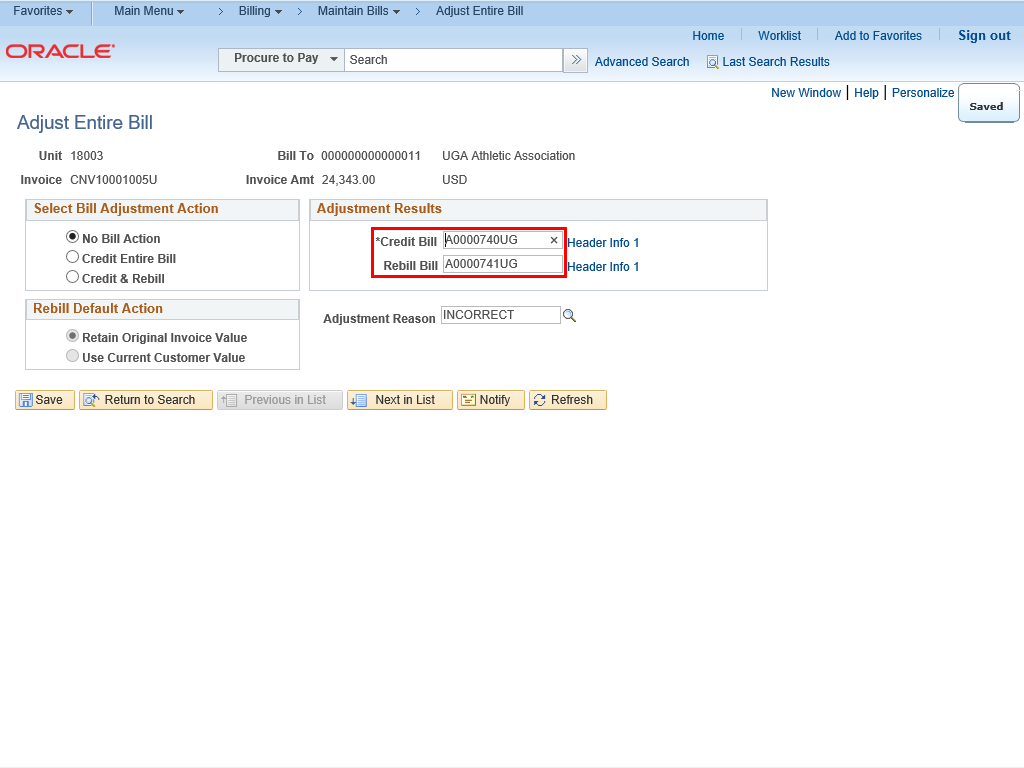 |
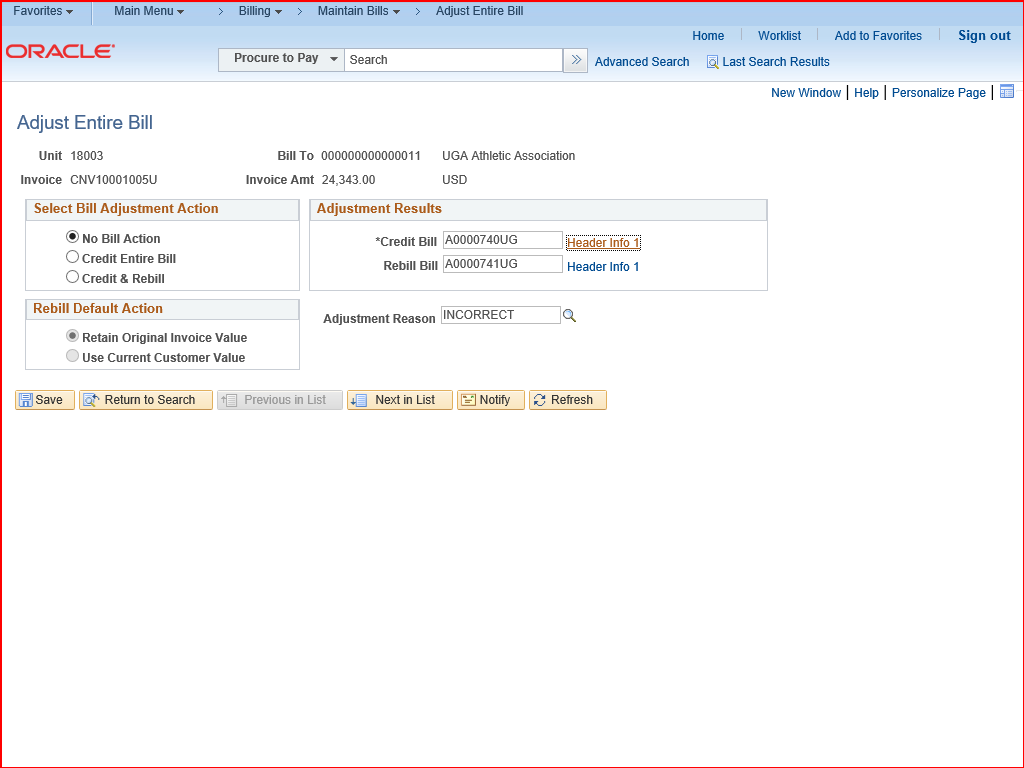
The Credit Bill and Rebill Bill fields are updated with new invoice numbers.
|
|
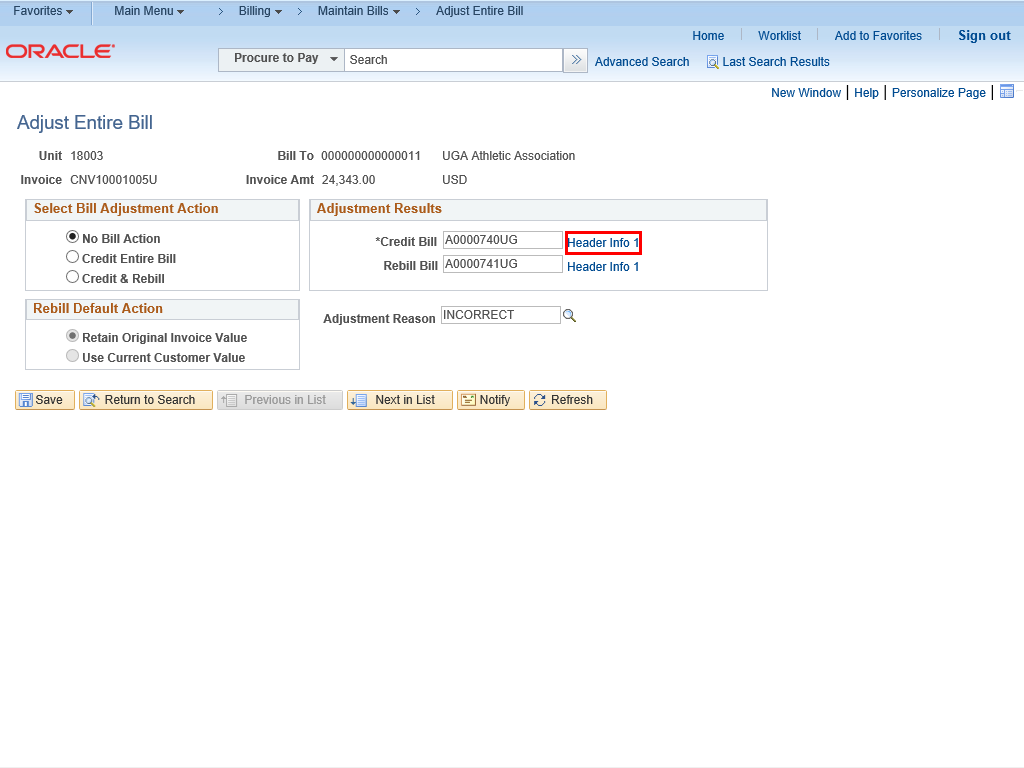 |
The Header Info 1 link is highlighted to indicate you can click on the link to view the bill details.
Click the Header Info 1 link next to the Credit Bill field.
|
|
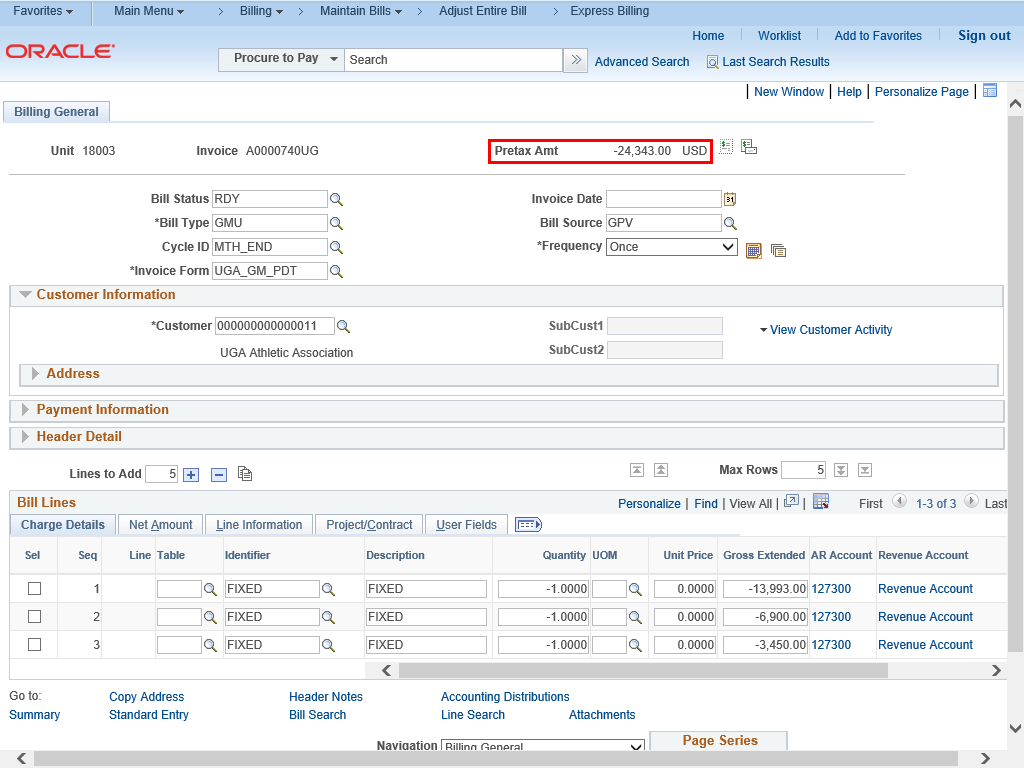 |
The Header Info 1 tab displays the negative adjusted amount.
|
|
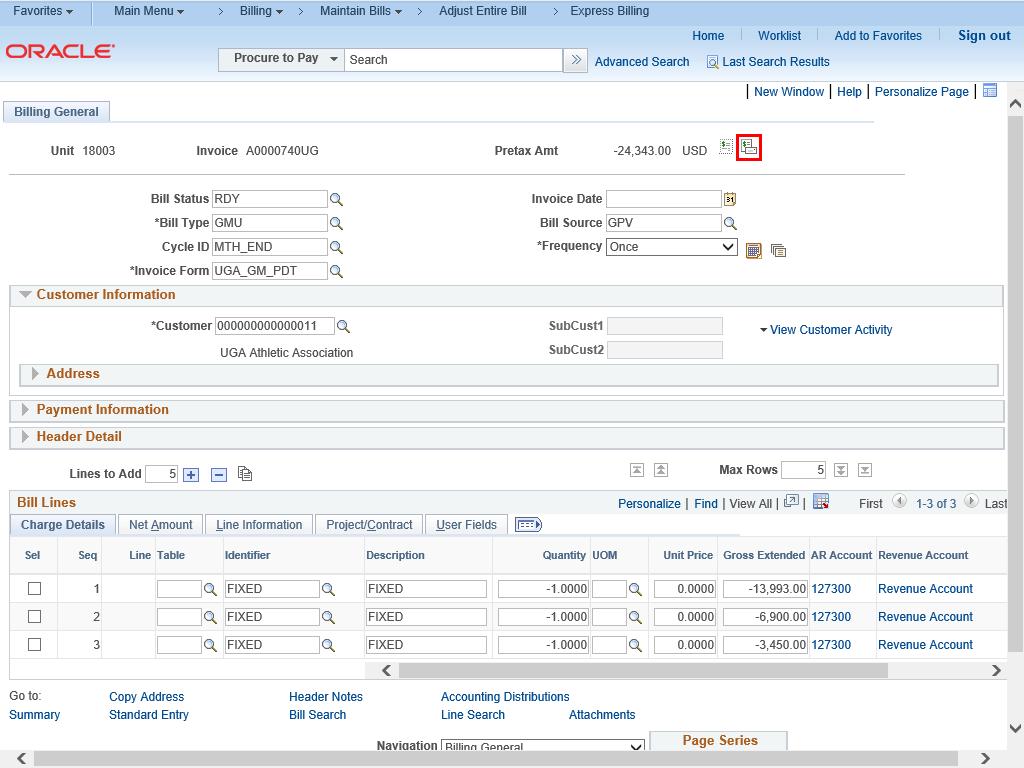 |
To initiate the adjusting invoice, click the Single Action Invoice button to the right of the Pretax Amt field.
|
|
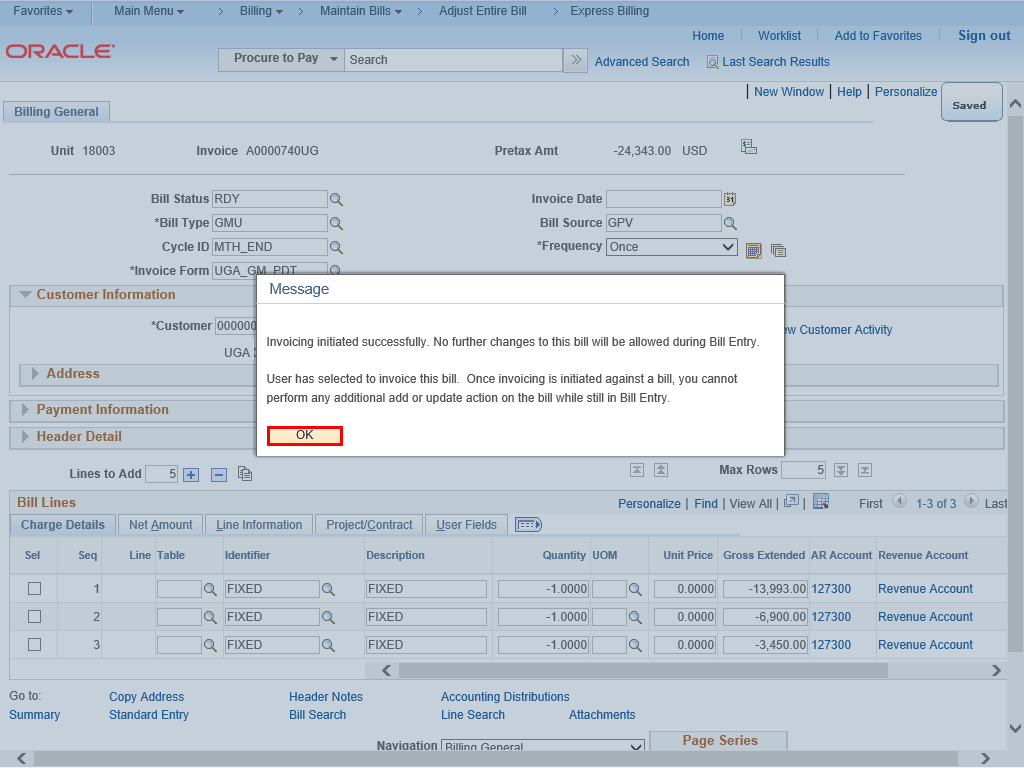 |
A confirmation window is displayed to inform you that the invoice has been initiated and that no further changes can be made during Bill Entry.
Click the OK button.
|
|
 |
Return to the Adjust Entire Bill tab.
Now that you have adjusted the original bill, you must rebill the customer for the accurate amount.
|
|
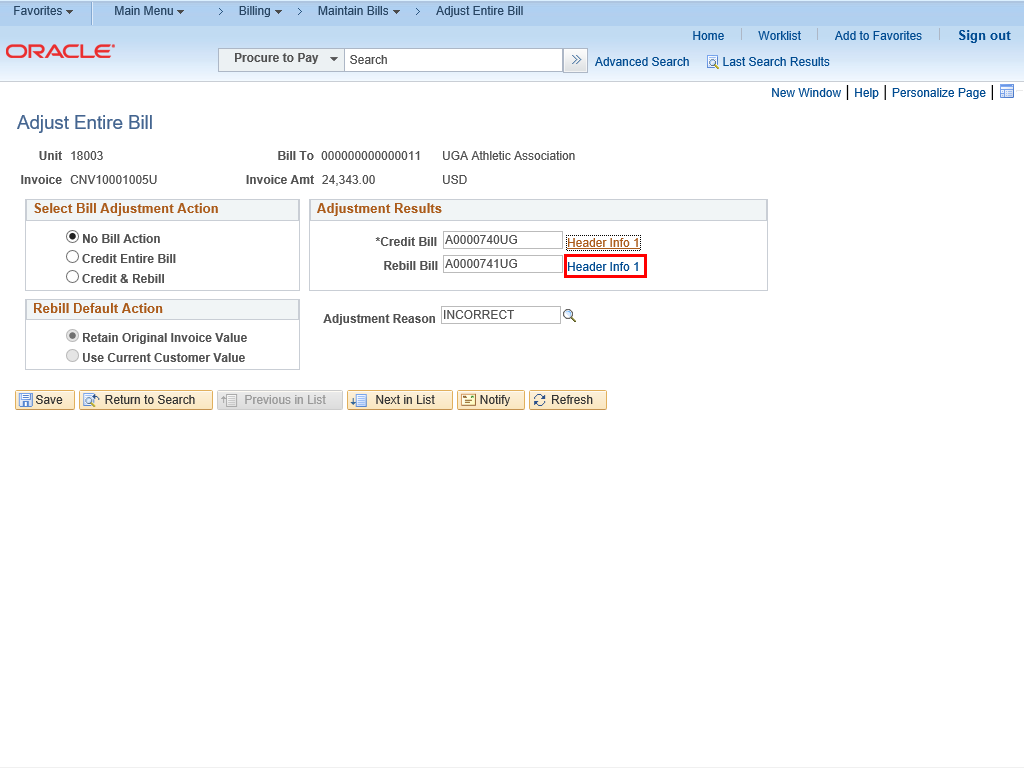 |
Click the Header Info 1 link next to the Rebill Bill field.
|
|
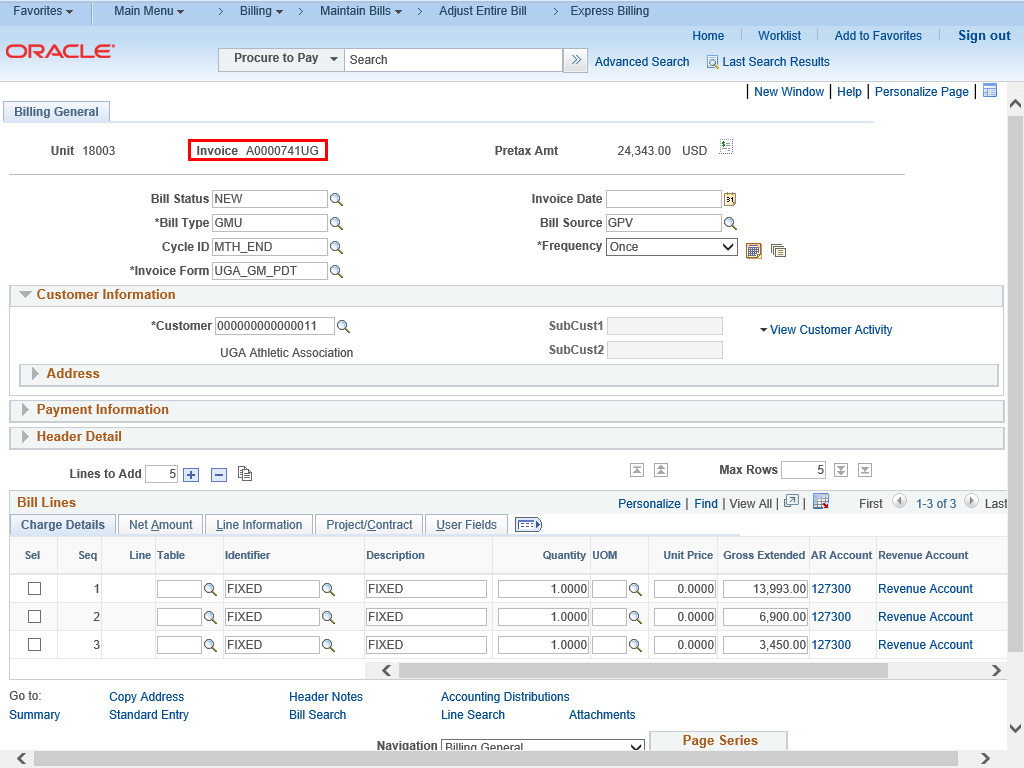 |
The Billing General page is displayed.
The Invoice field displays the Rebill Bill Invoice number.
|
|
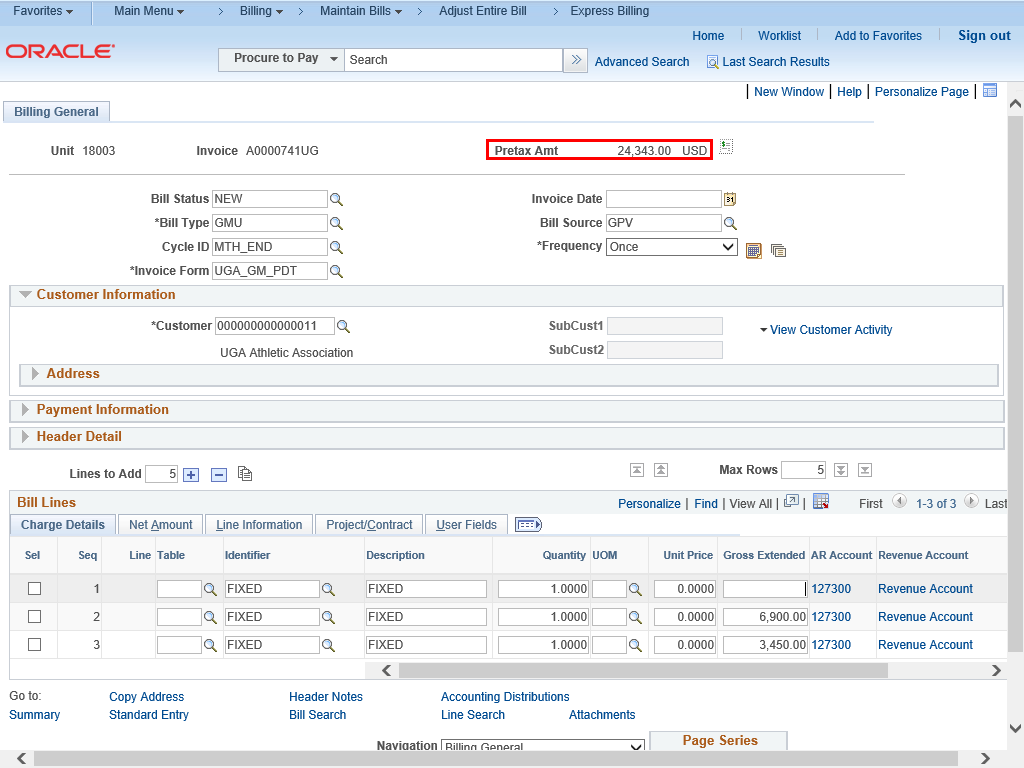 |
The Pretax Amt field displays the amount prior to the adjustment that you will do in the next step.
|
|
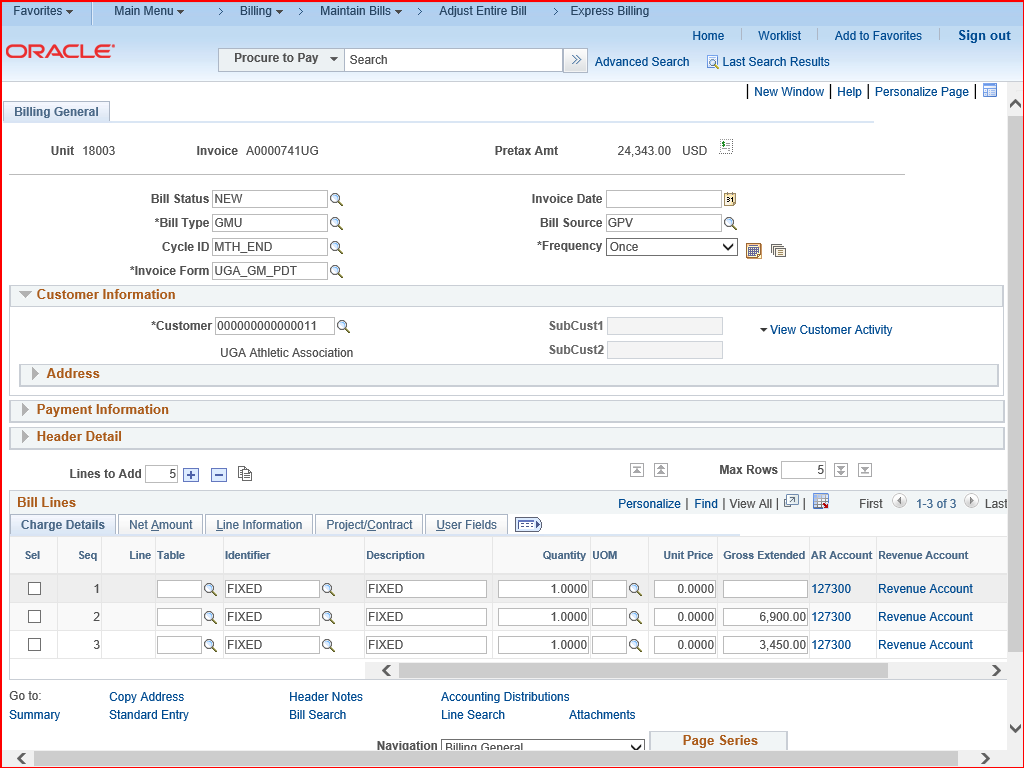 |
Make any necessary changes to the billing details.
|
|
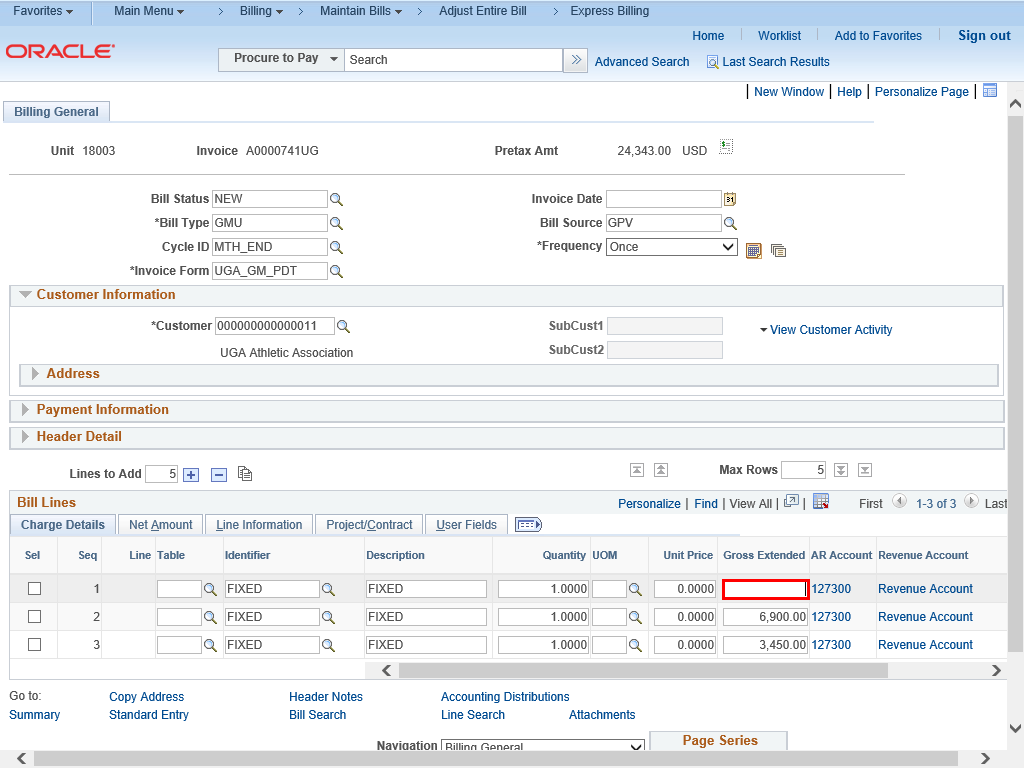 |
Enter the appropriate information in the Gross Extended field.
Example shown here: 1399.30.
|
|
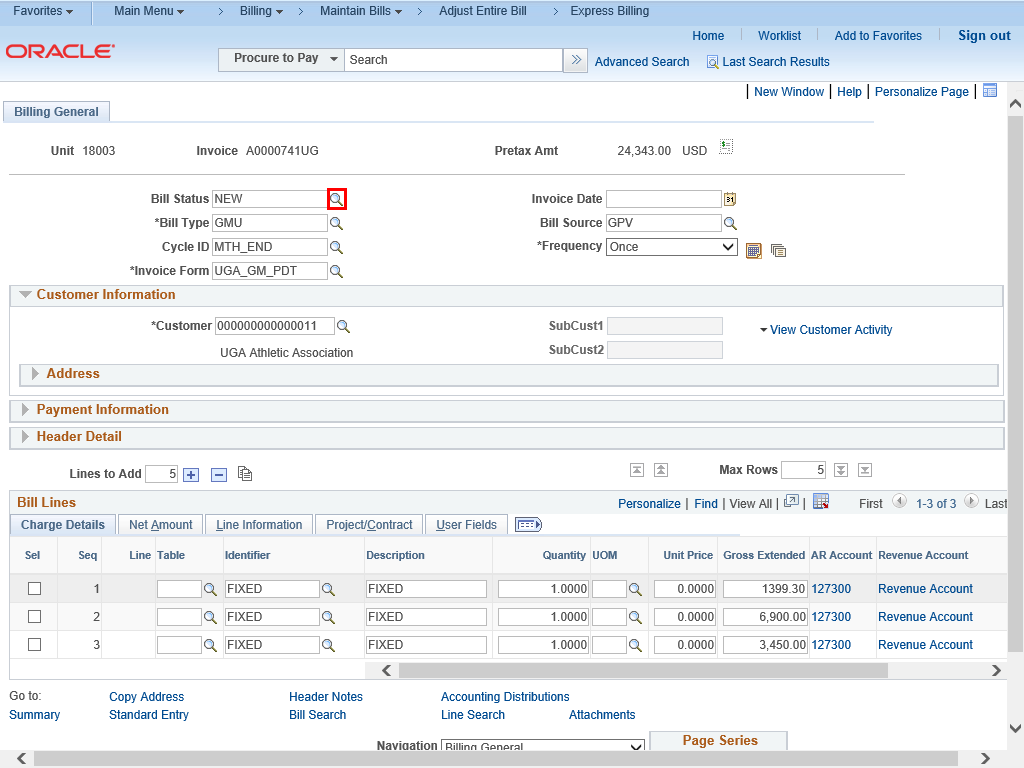 |
To change the Bill Status from NEW to RDY, click the lookup magnifying glass next to the Bill Status field.
|
|
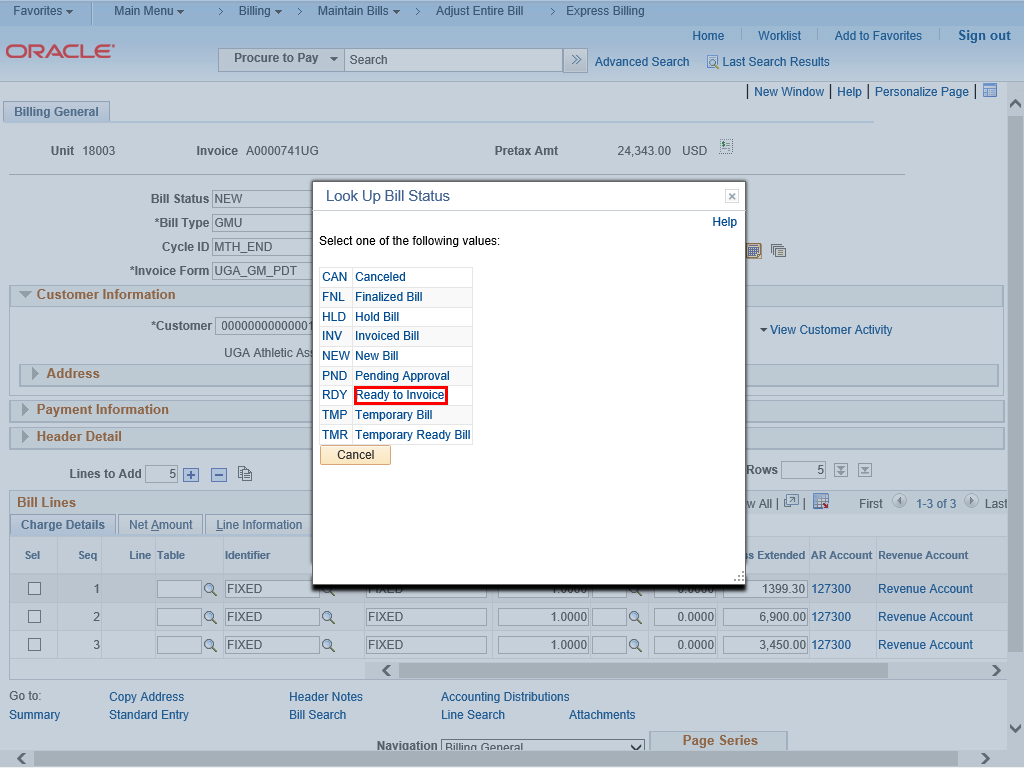 |
Click the appropriate Bill Status link.
Example shown here: Ready to Invoice link.
|
|
 |
| Click the Save button.
|
|
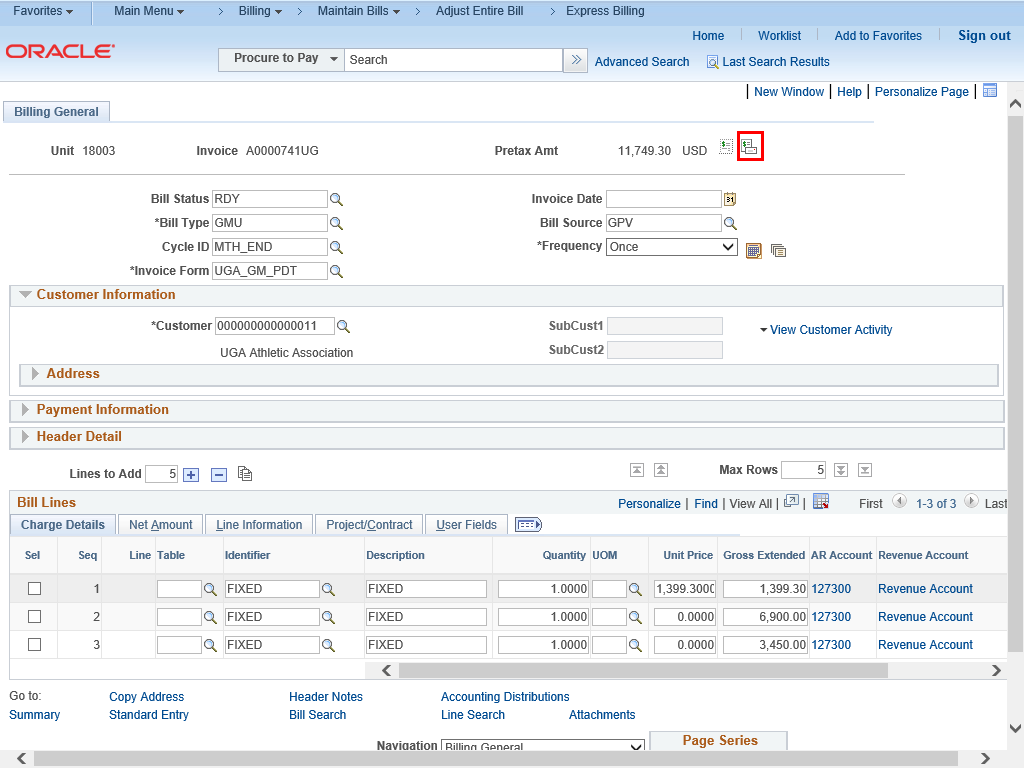 |
To initiate the invoice, click the Single Action Invoice button.
|
|
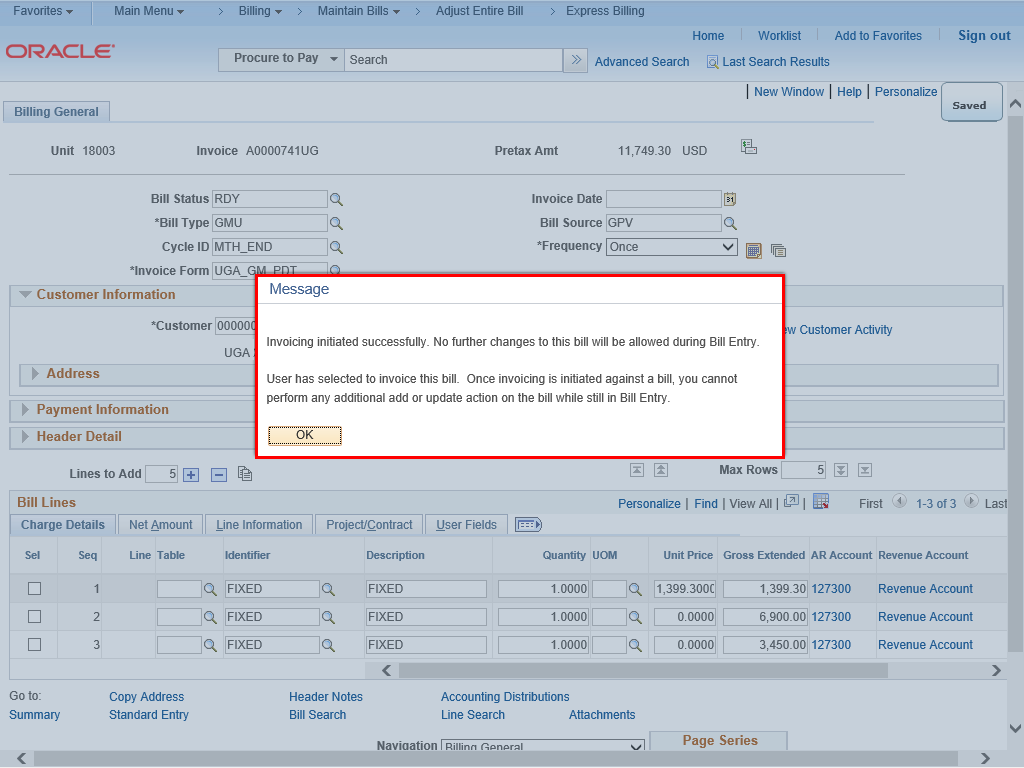 |
A confirmation window is displayed to inform you that the invoice has been initiated and that no further changes can be made during Bill Entry.
|
|
Details
Details
Article ID:
149506
Created
Sat 9/24/22 11:16 PM
Modified
Tue 4/28/26 10:27 AM