Recording an Off-Site Asset
Summary
In this article, you will learn how to record an asset as off-site or off campus.
Body
Overview
The term off-site is used for equipment used off campus. Previously, in UGA's legacy system the room number field was used to identify off campus equipment. Now, in the UGA Financial Management System a checkbox is used to easily identify any equipment used off-site/off campus.
In this article, you will learn how to record an asset as off-site or off campus.
 |
To navigate to the Basic Add page, select:
Main Menu > Asset Management > Asset Transactions > Owned Assets > Basic Add
|
|
 |
The Basic Add search page is displayed.
The Business Unit field will default to the value defined in your user Preferences.
Note: For Asset Management the Business Unit will always be 18000.
Enter the 18000 into the Business Unit field.
|
|
 |
Enter the appropriate information into the Tag Number field.
Example shown here: "674390".
|
|
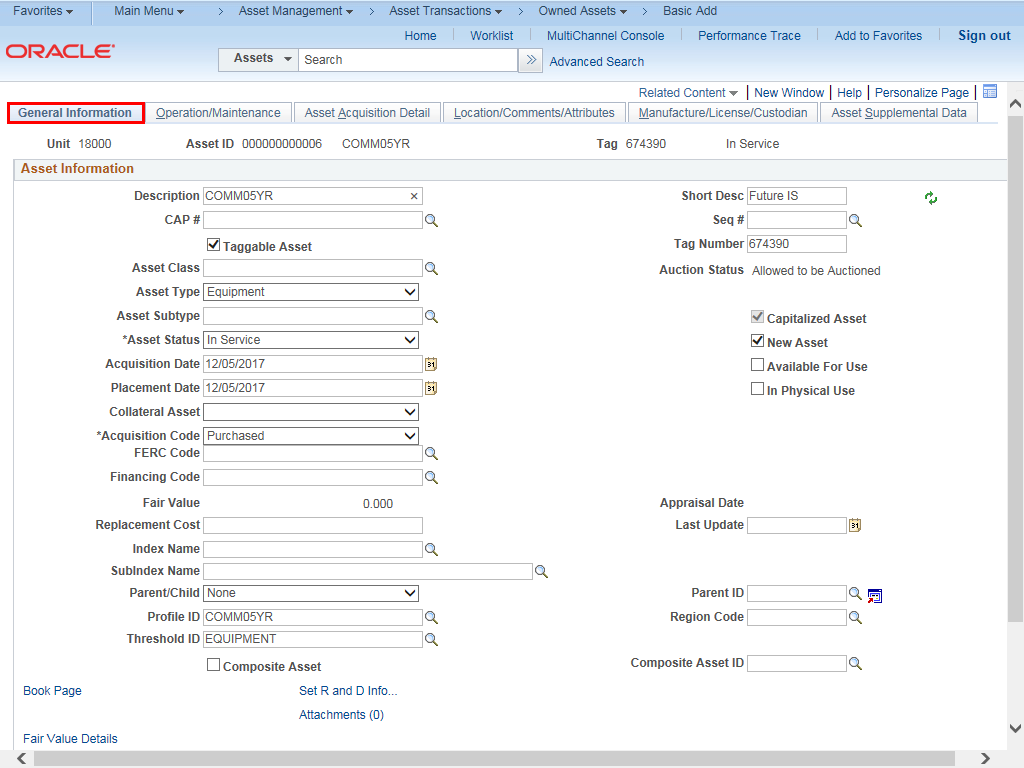 |
The General Information page is displayed.
The General Information page shows you a short description of the asset with acquired dates and type of assets.
|
|
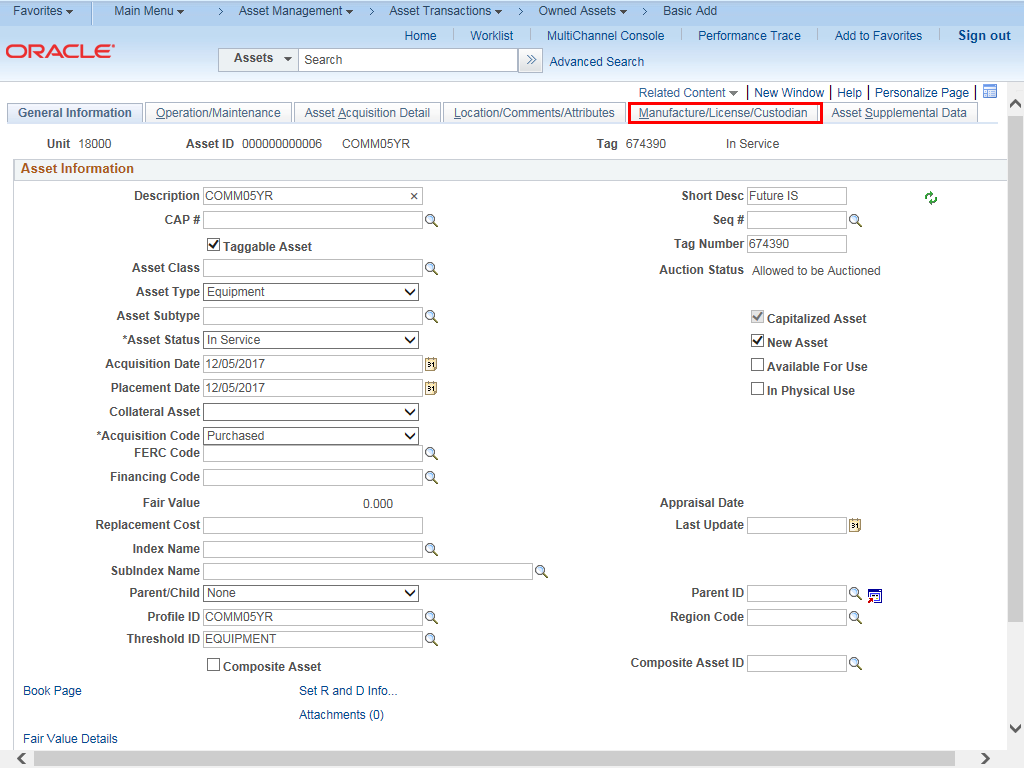 |
Select the Manufacturer/License/ Custodian tab.
|
|
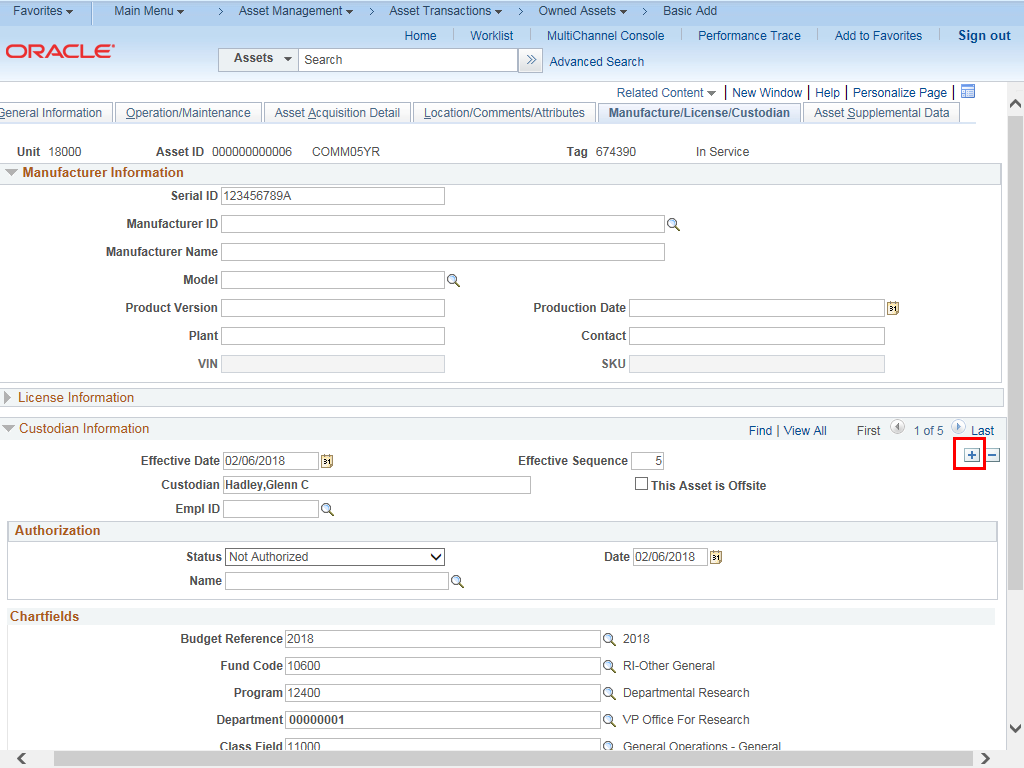 |
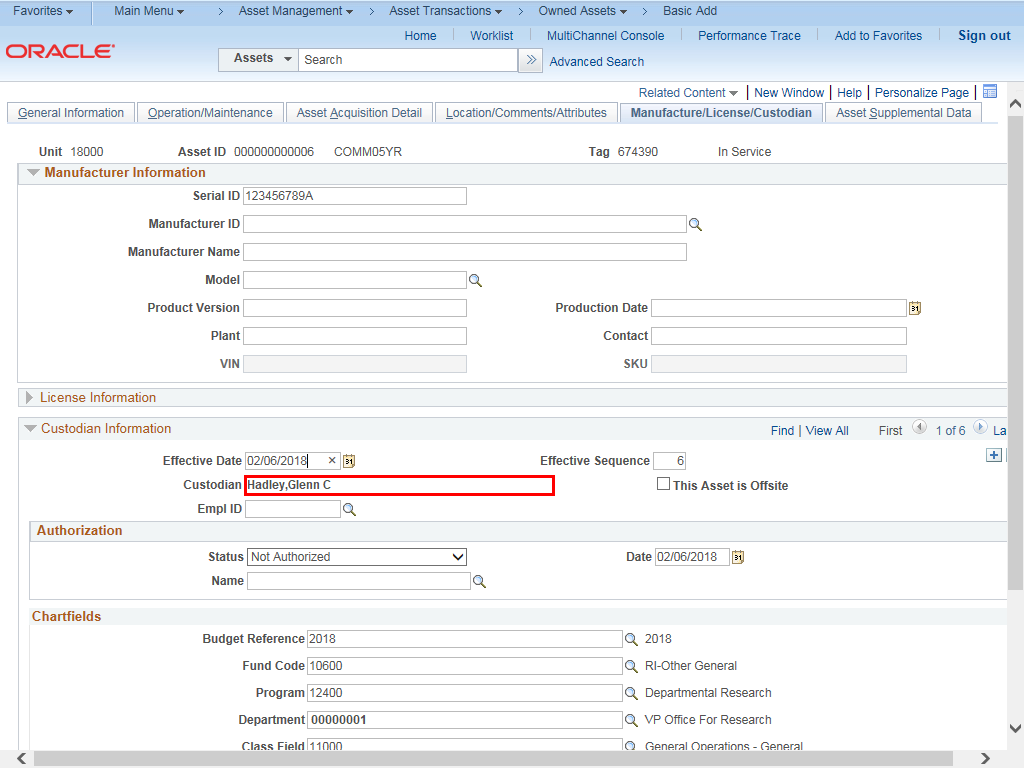
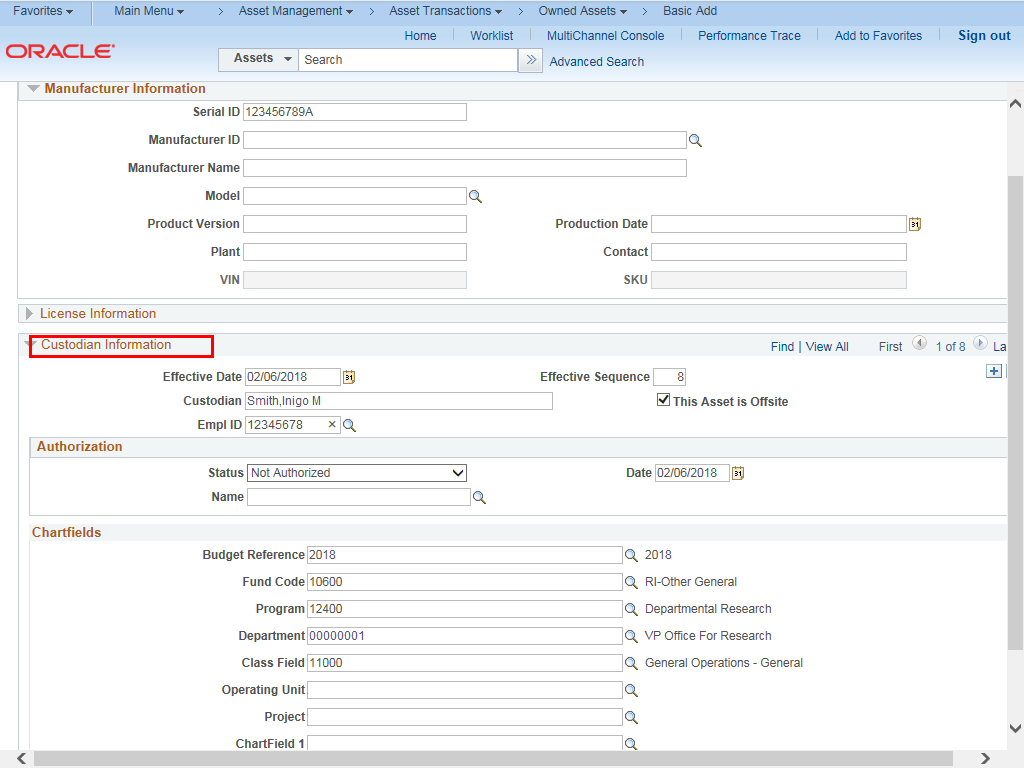
The Manufacture/License/ Custodian page is displayed.
The Manufacture/License/Custodian page shows you the manufacturer serial number, along with custodial information.
Note: Data has been distorted to protect employee information.
In the Custodian Information section click the Add Row (+) icon to the far right to insert a new row.
|
|
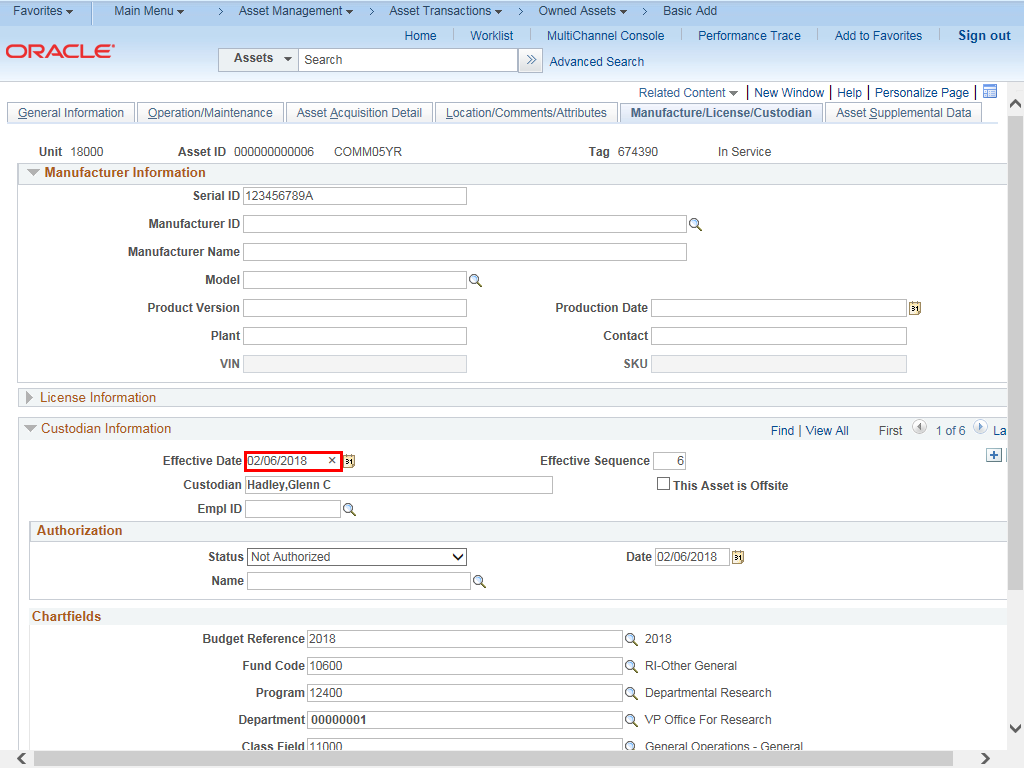 |
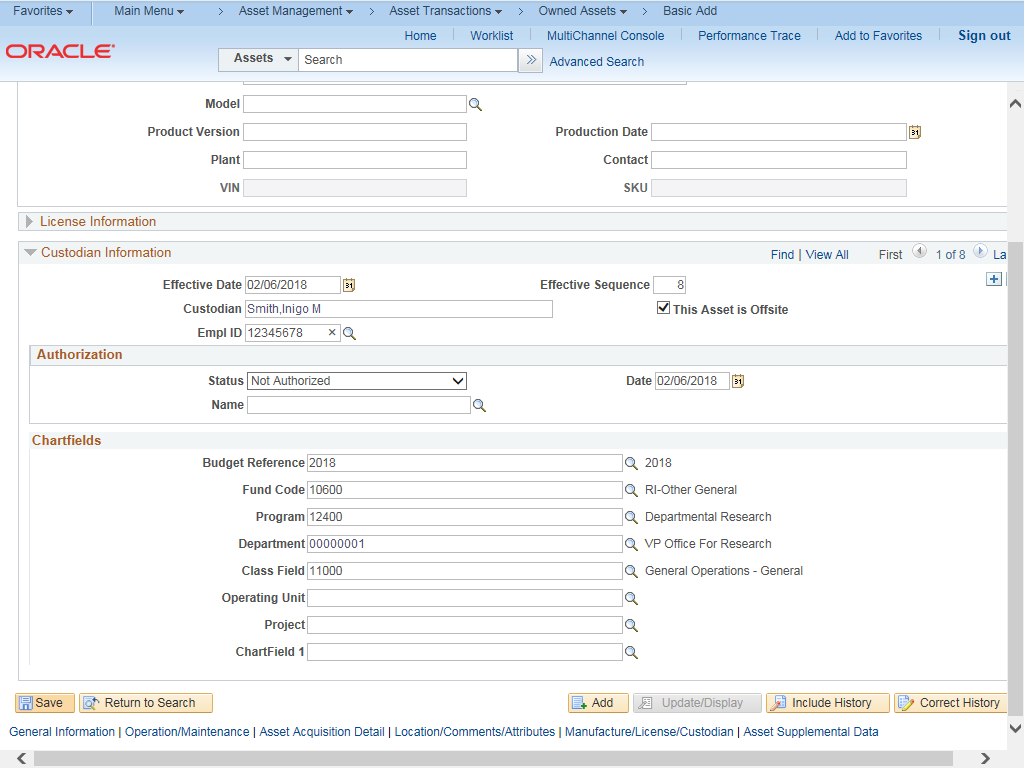
The Effective Date field will default to the current date. Change the date to the day the asset was taken offsite.
You can change the date by clicking on the calendar icon to the right or by typing in the date.
|
|
 |
Enter the appropriate Custodian information or leave as is.
Example shown here: leave Custodian field as is.
|
|
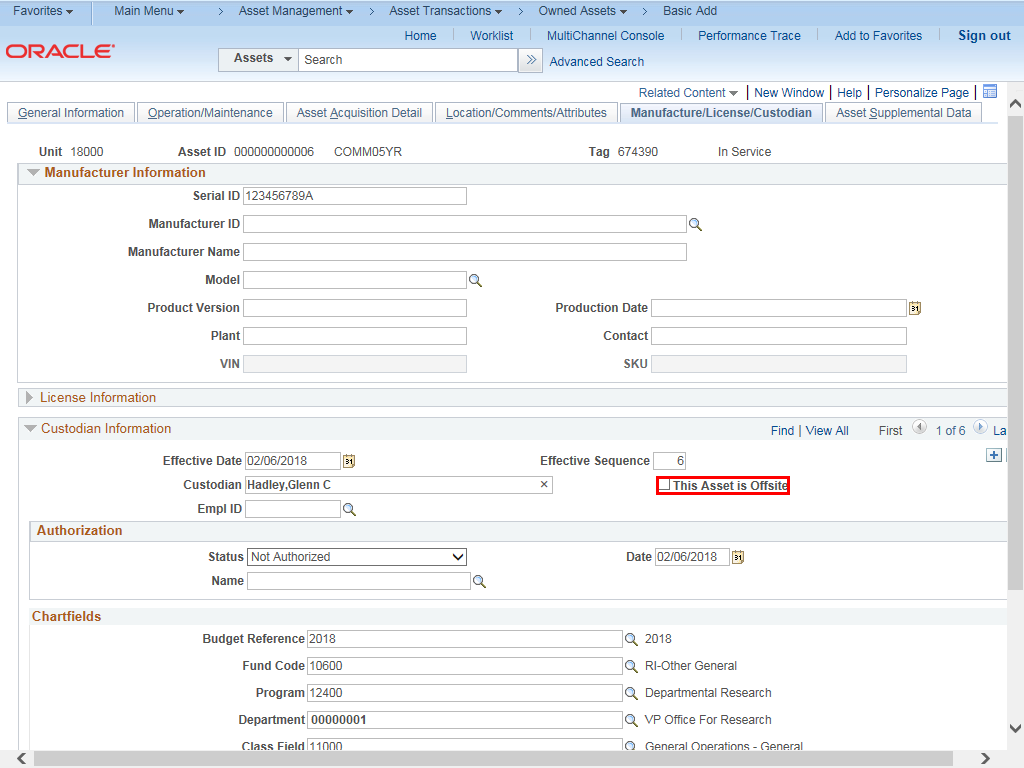 |
Click the This Asset is Offsite box.
|
|
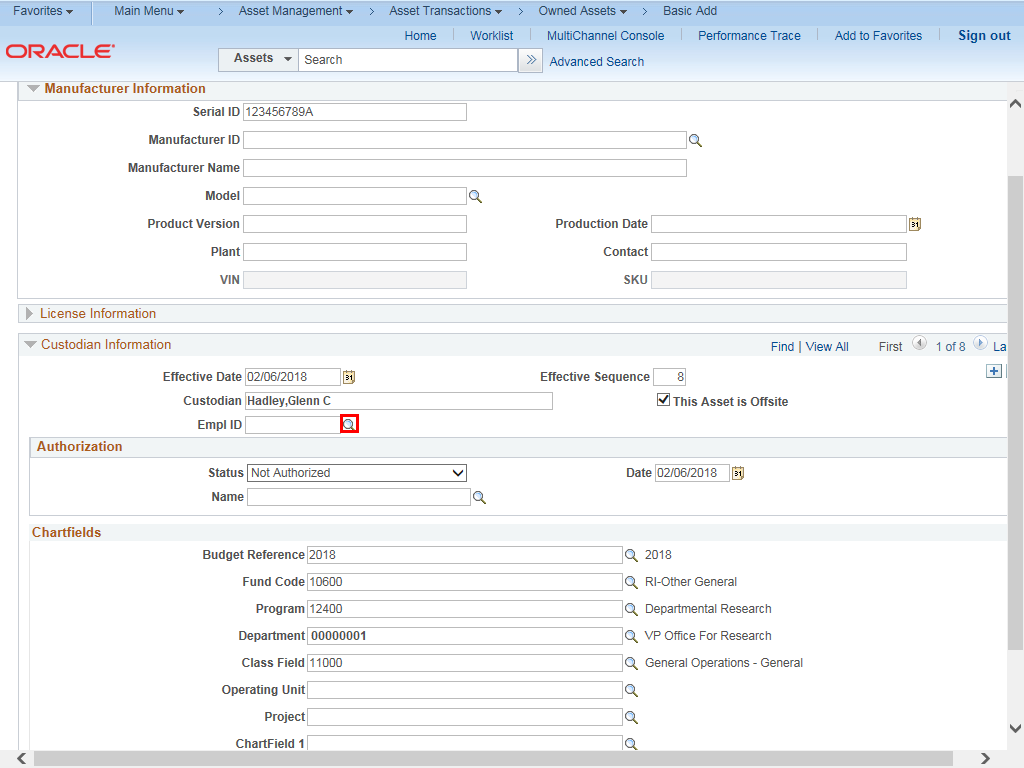 |
Click the lookup magnifying glass to the right of the Empl ID field.
|
|
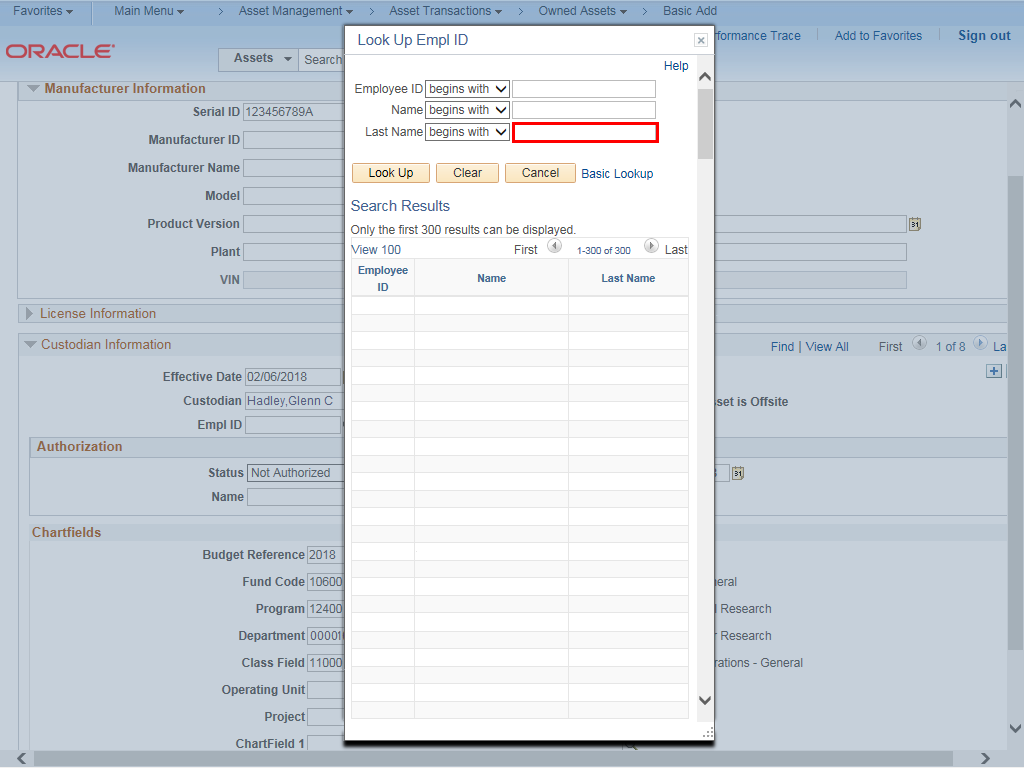 |
Leave the Employee ID field and Name field blank.
Enter appropriate information into the Last Name field.
Example shown here: "Smith".
|
|
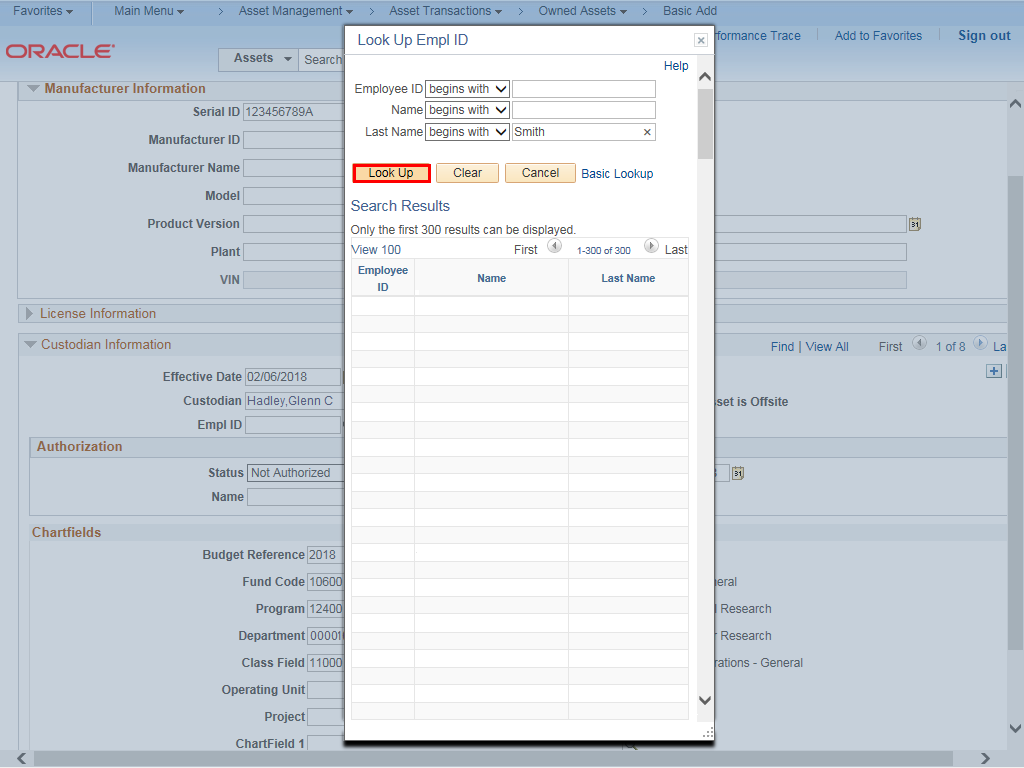 |
Click the Look Up button.
|
|
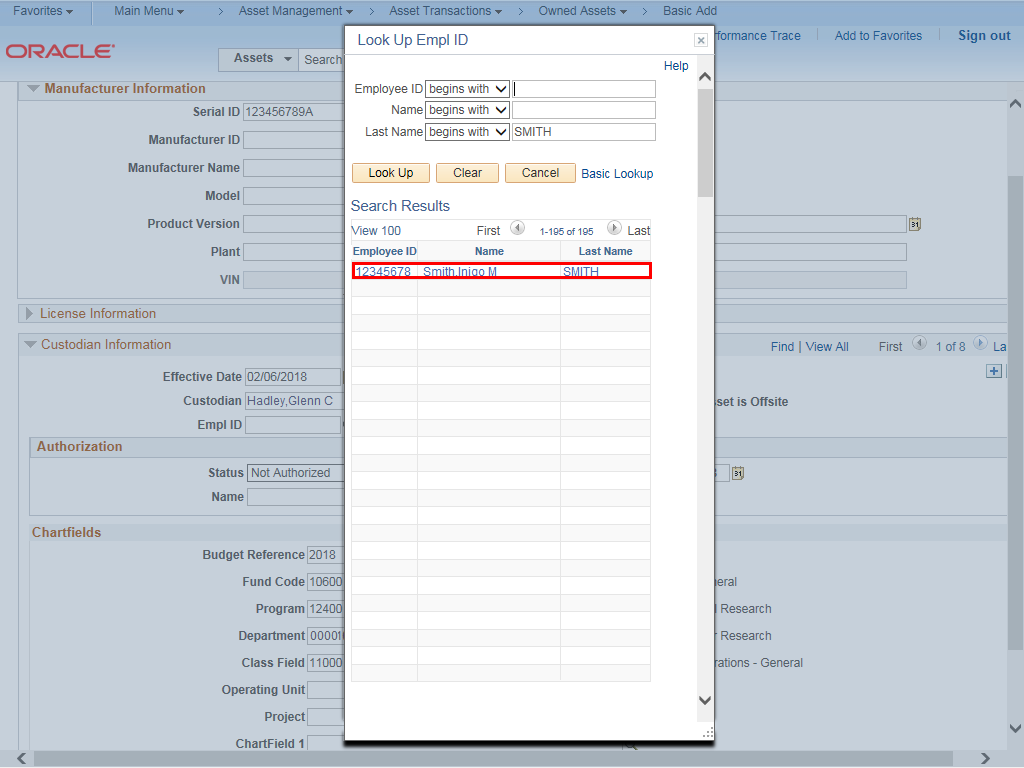 |
Click the appropriate Employee ID link.
|
|
 |
The Custodian Information field will populate with the employee's full name and the Empl ID field will populate with the Employee ID.
NOTE: The Empl ID search box is not required to change the custodian. The custodian can be changed by typing in last name,first name (no space between the comma).
|
|
 |
The asset record is updated accordingly.
|
|
Details
Details
Article ID:
149435
Created
Sat 9/24/22 11:13 PM
Modified
Thu 4/16/26 12:10 PM