Using the Accounts Payable / Receivable WorkCenter
Summary
In this article you will learn how to use the Accounts Payable / Receivable WorkCenter to organize and perform your work.
Body
Overview
WorkCenters are a central navigational component that is designed to help the end user be more efficient in the use of the UGA Financial Management System. The design of the WorkCenter is to help the end user by accessing frequently used pages and pagelets in one page or Center.
In this article you will learn how to use the Accounts Receivable WorkCenter to organize and perform your work.
You will begin by walking through the navigation basics of the Accounts Payable WorkCenter, followed by configuring links and tasks in the Accounts Receivables WorkCenter.
Note: This article was recorded using sample values. Actual values may differ in the production version of the UGA Financial Management System.
 |
|
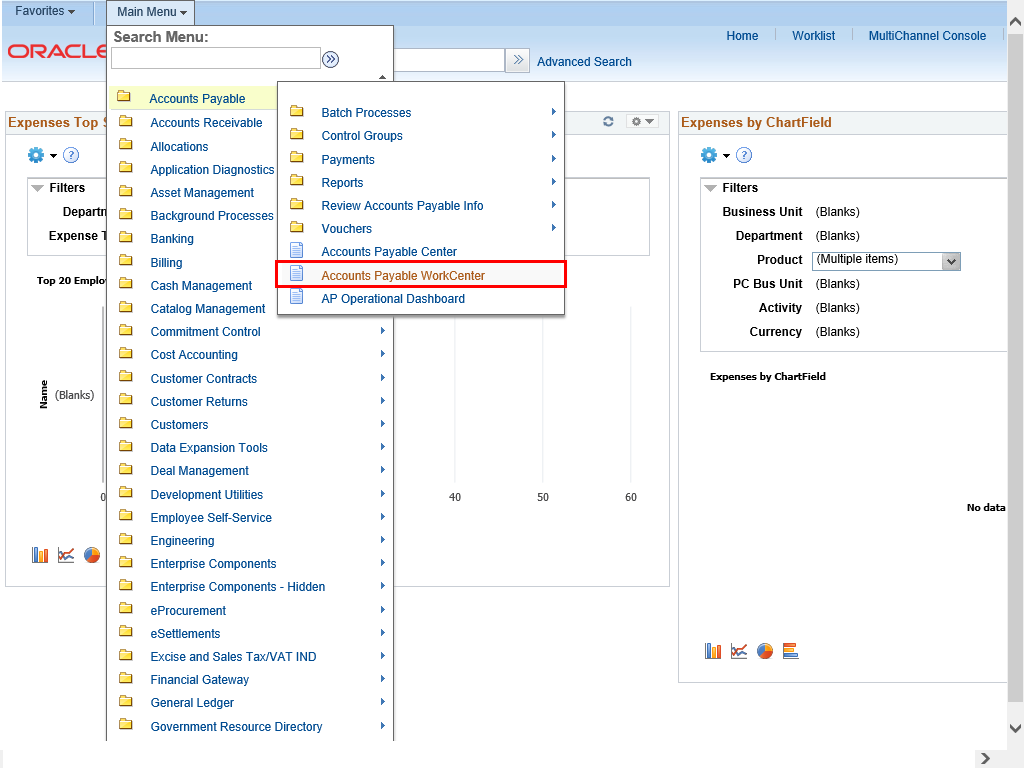
Each module has its own WorkCenter. For this part of this article, you will review the WorkCenter basics by viewing the Accounts Payable WorkCenter.
To navigate to the Accounts Payable WorkCenter, select:
Main Menu > Accounts Payable > Accounts Payable WorkCenter
|
|
 |
|
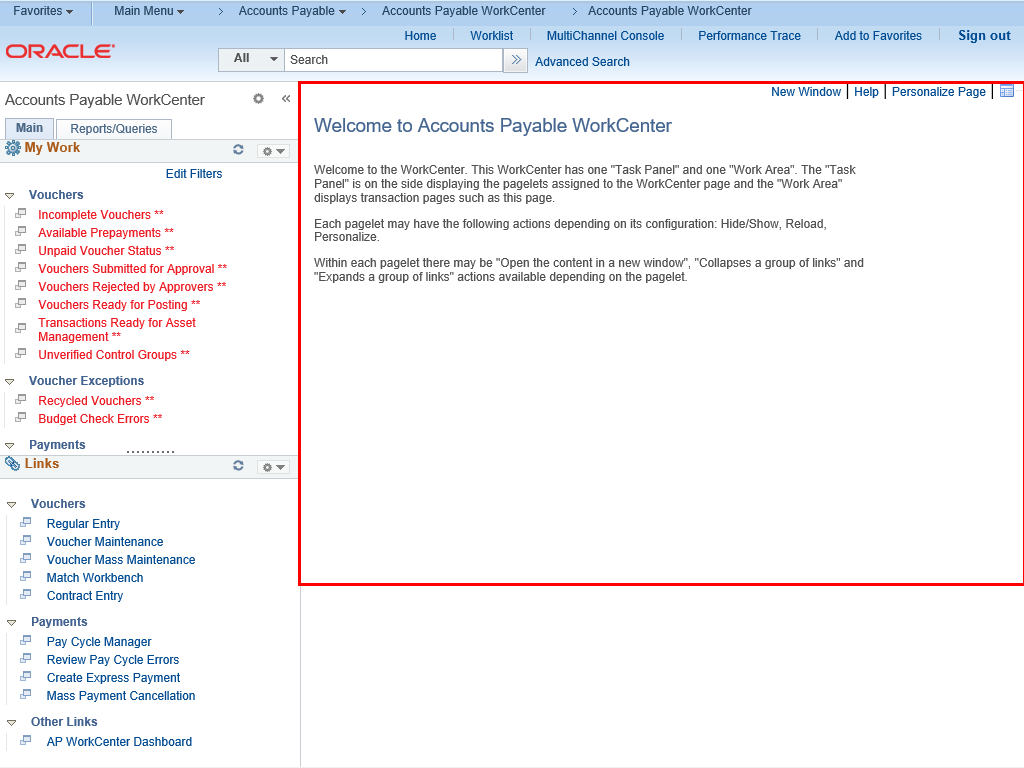
All WorkCenters are organized in the same fashion. They are divided into two main areas.
|
|
 |
|
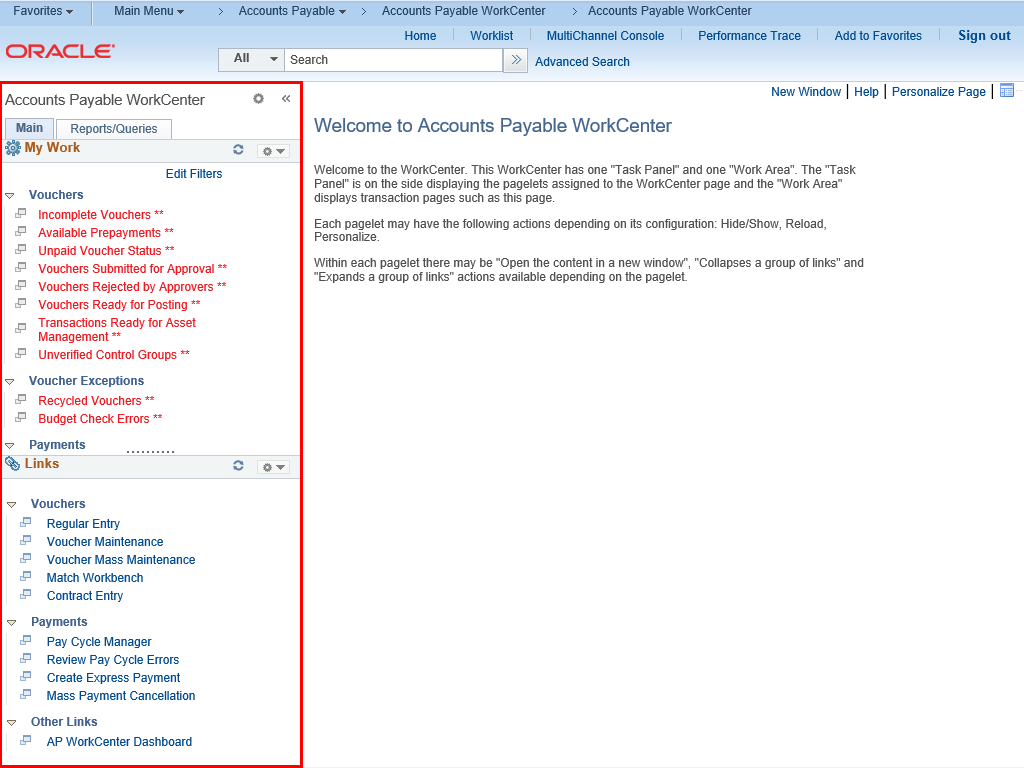
The left side of the WorkCenter page is called the pagelet area.
There are two tabs, Main and Reports/Queries, with two pagelets on each.
|
|
 |
|
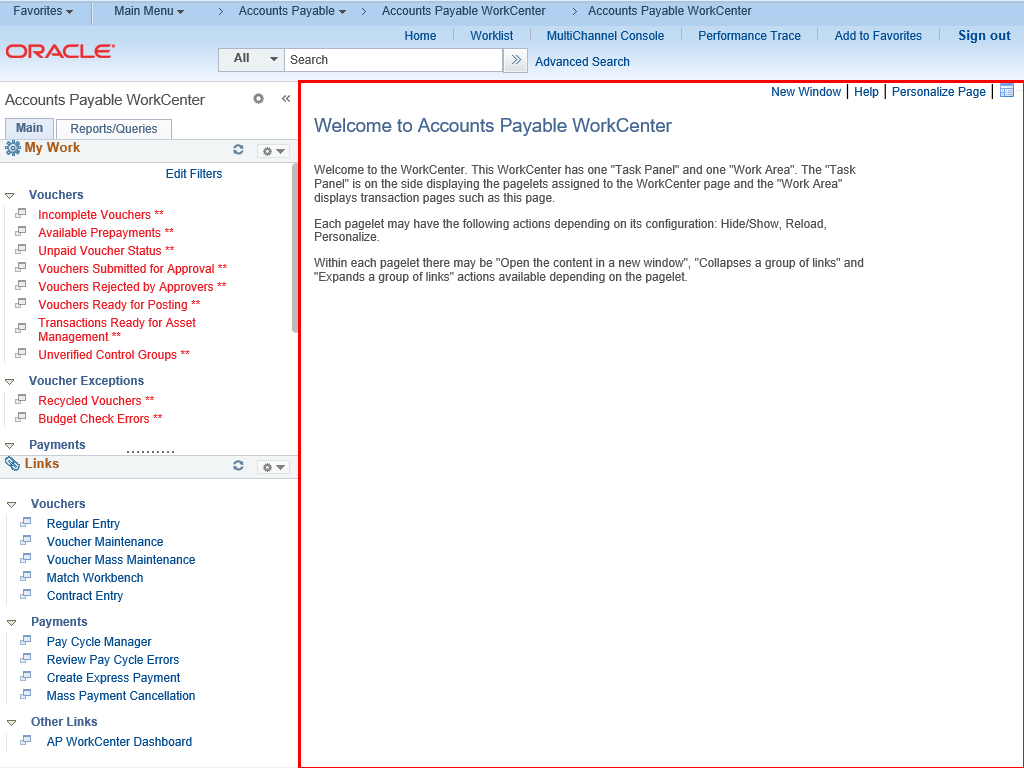
The right side of the page is the transaction area. This is the area where you will perform the work associated with the tasks you select.
|
|
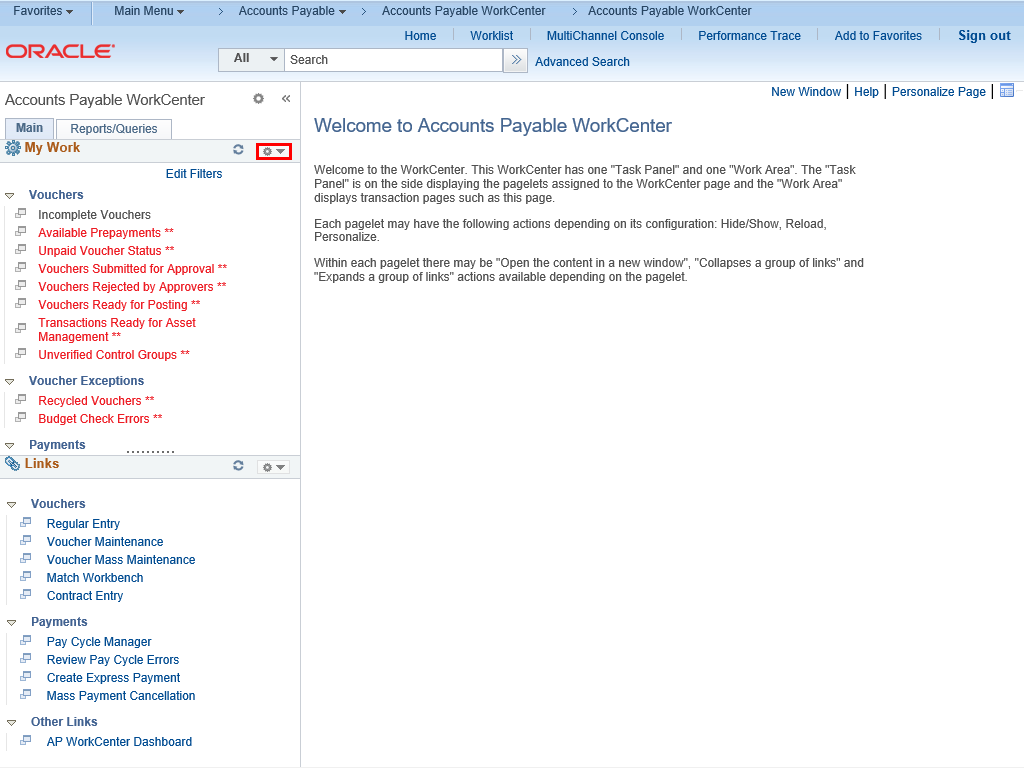 |
You can collapse the pagelets to more easily see the other pagelet on the page.
|
|
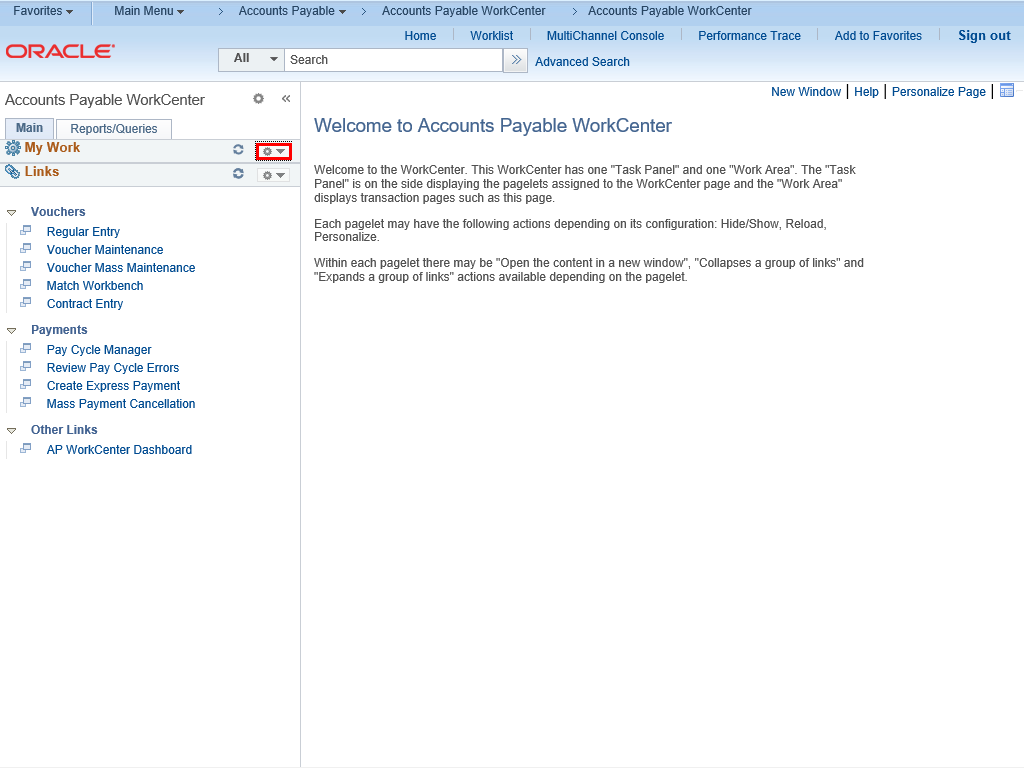 |
Notice that the My Work pagelet has minimized so that you can see the information in the Links pagelet.
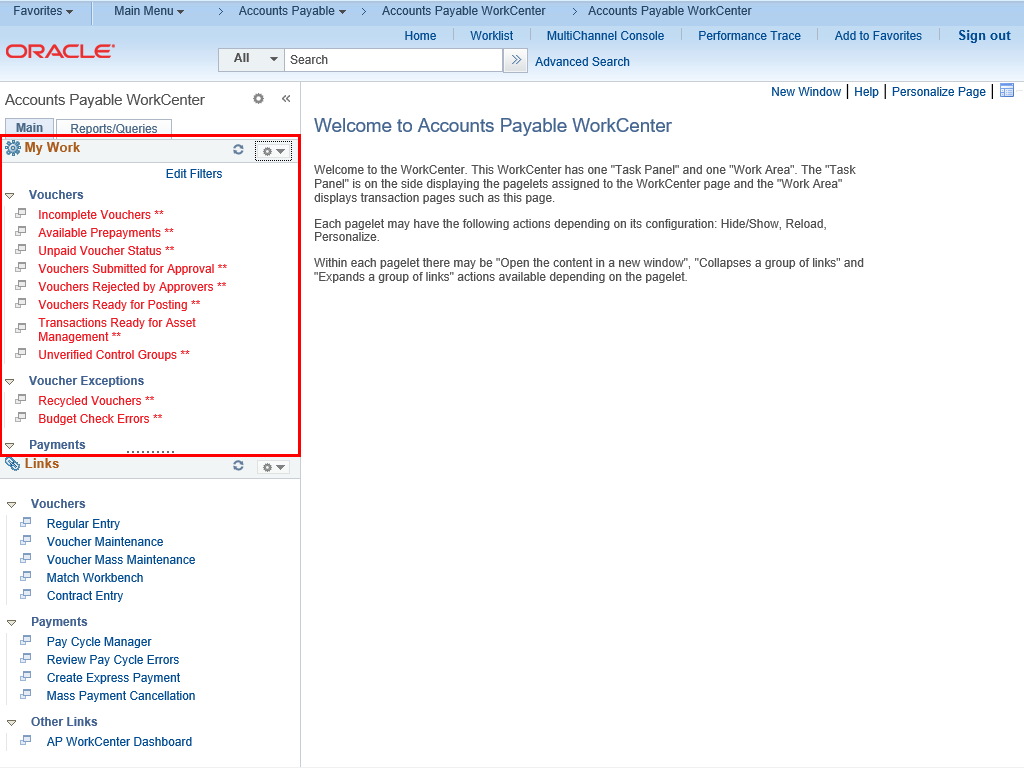
To explore what the My Work pagelet contains, you will need to expand this section.
|
|
 |
|
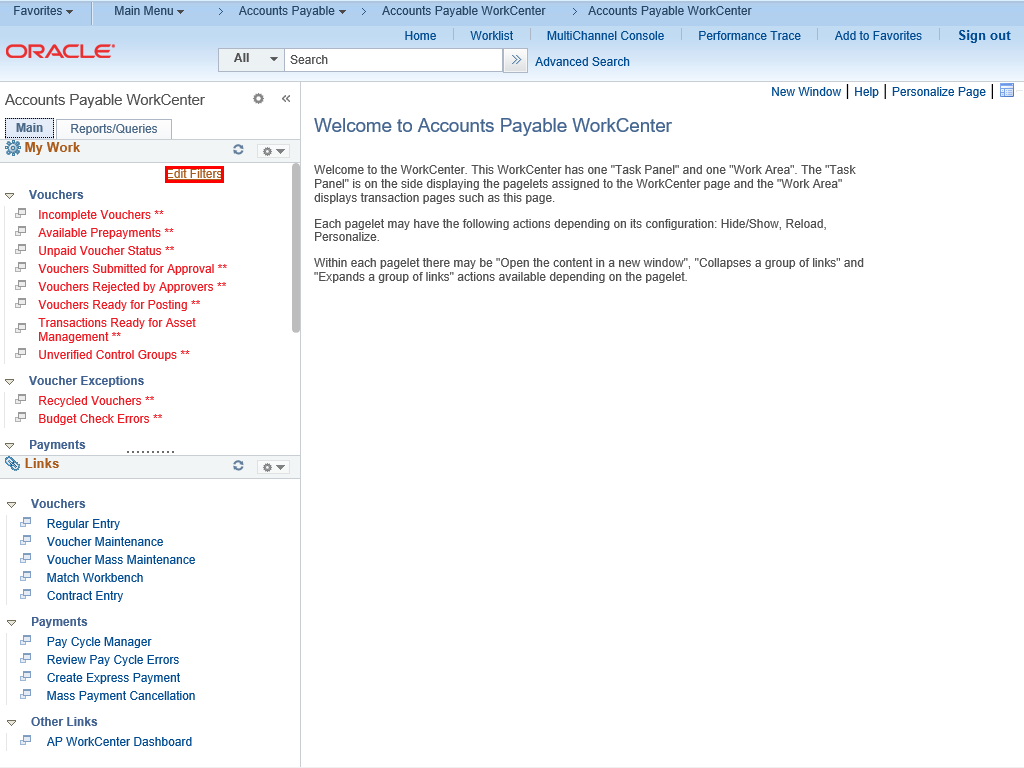
The Main tab contains the My Work and Links pagelets.
The My Work pagelet contains information to point you to tasks that need your attention. You will find notifications, links to items awaiting your approval, and links to other work items that are awaiting action.
Notice that these links are divided into groupings based on the type of work. These group headings are expandable and collapsible to make items for your attention easier to access.
|
|
 |
|
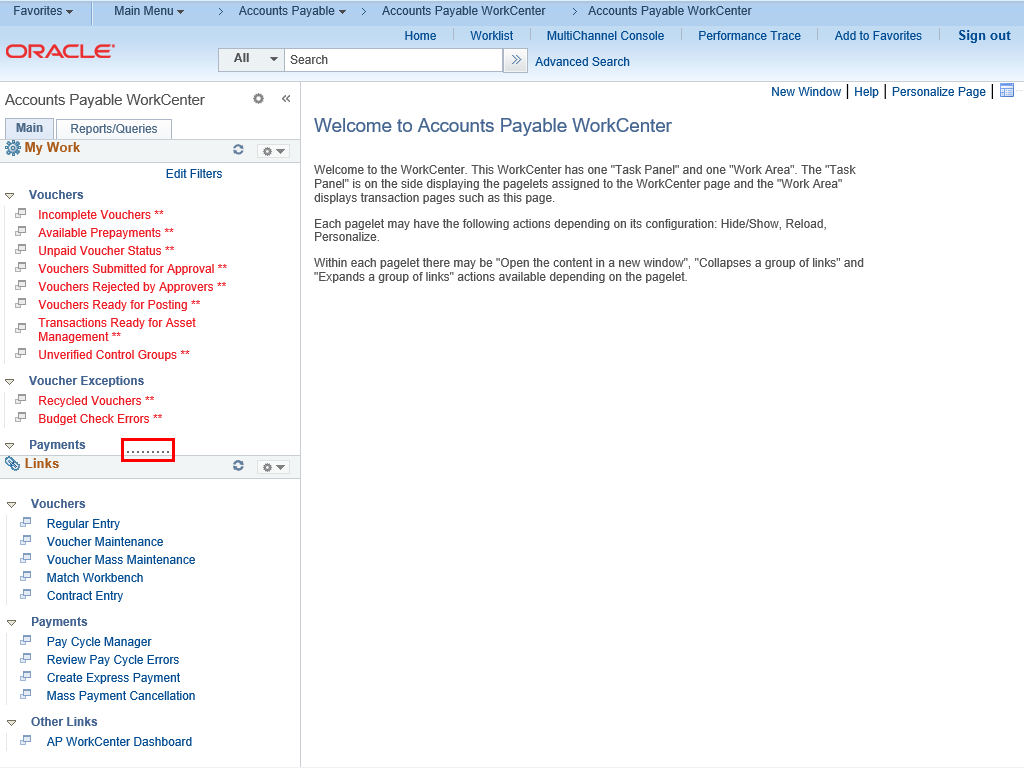
You can also resize the pagelets using the dotted line in each pagelet. Hover over the line until it turns into a double-sided arrow and drag it up or down to resize the area.
|
|
 |
|
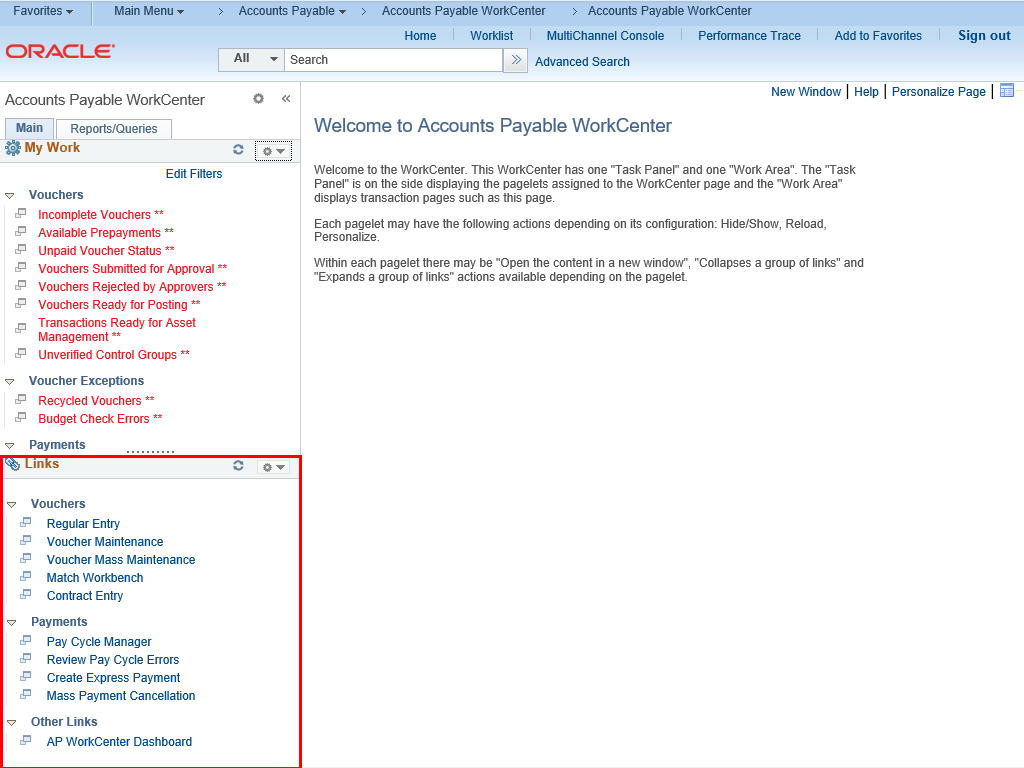
The Links Pagelet includes links to other pages to enter, modify and view data. You can click on these links to open the pages to enter transactions.
|
|
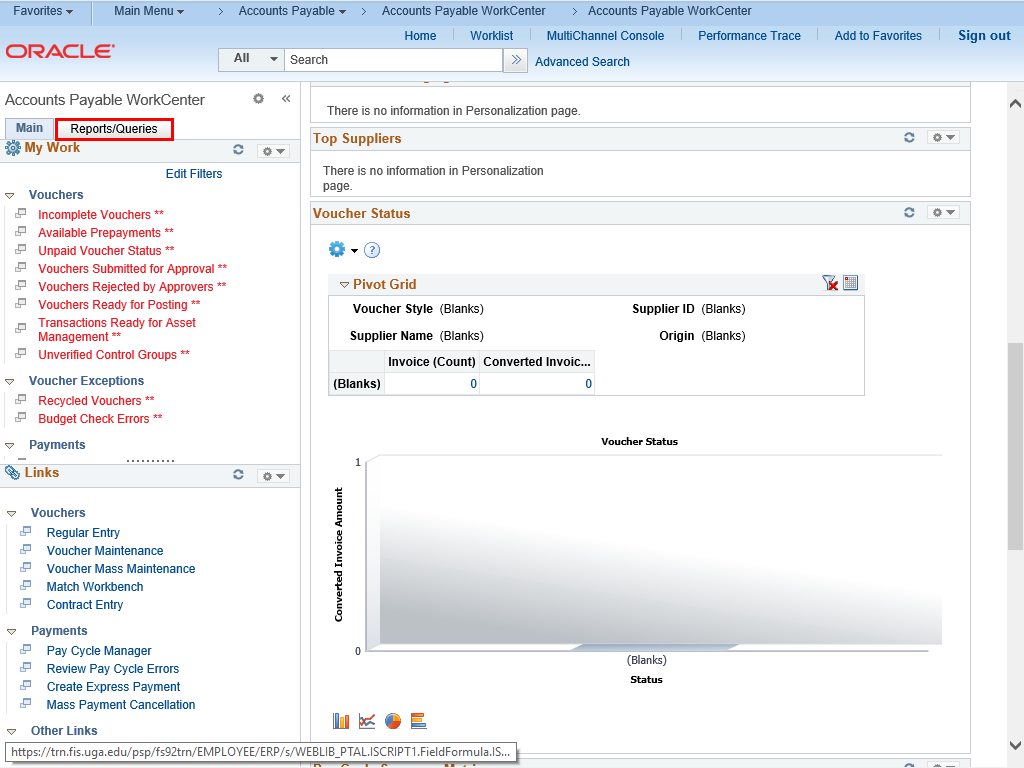 |
Click the Reports/Queries tab.
|
|
 |
|
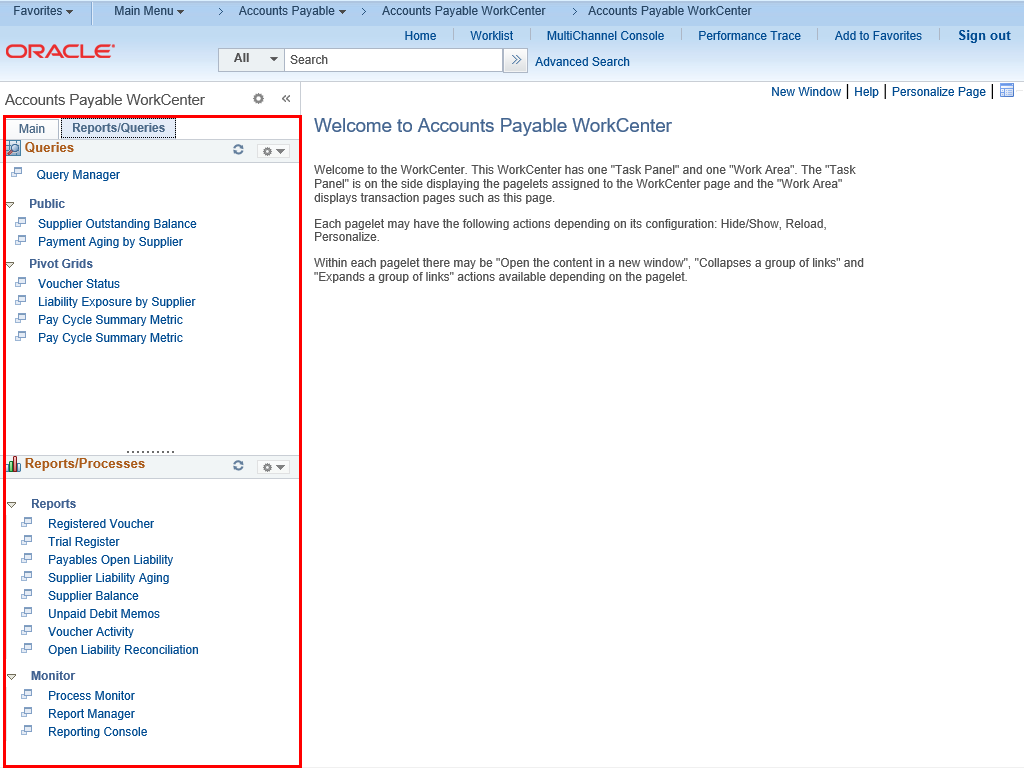
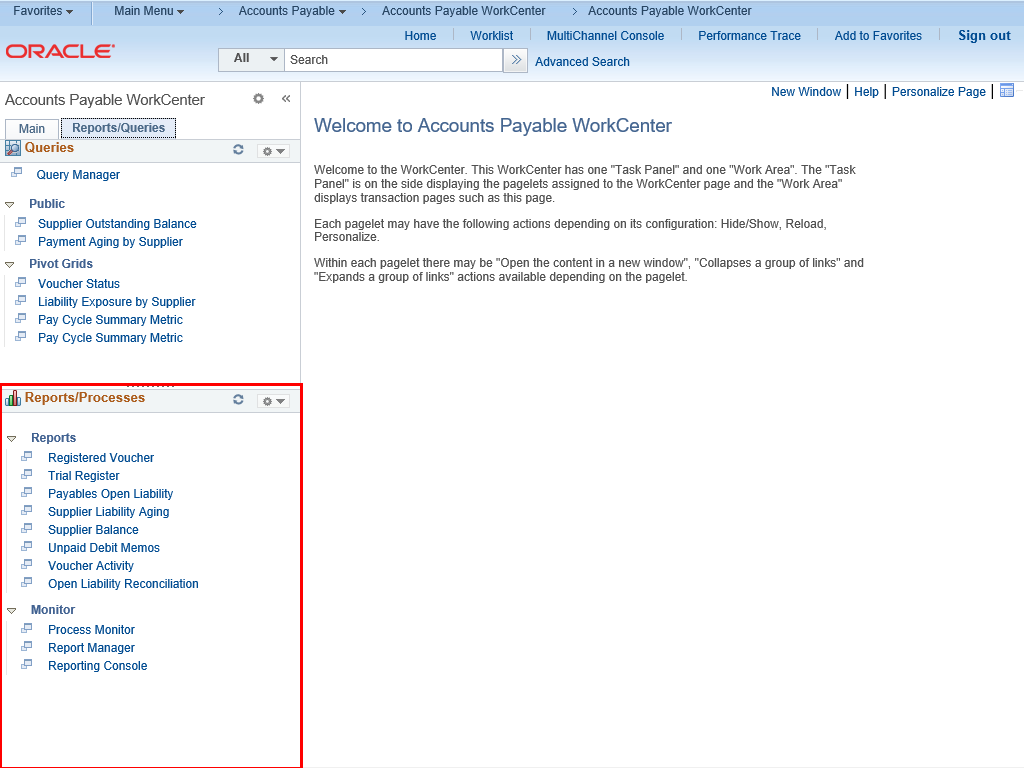
The Reports/Queries tab contains two pagelets.
|
|
 |
|
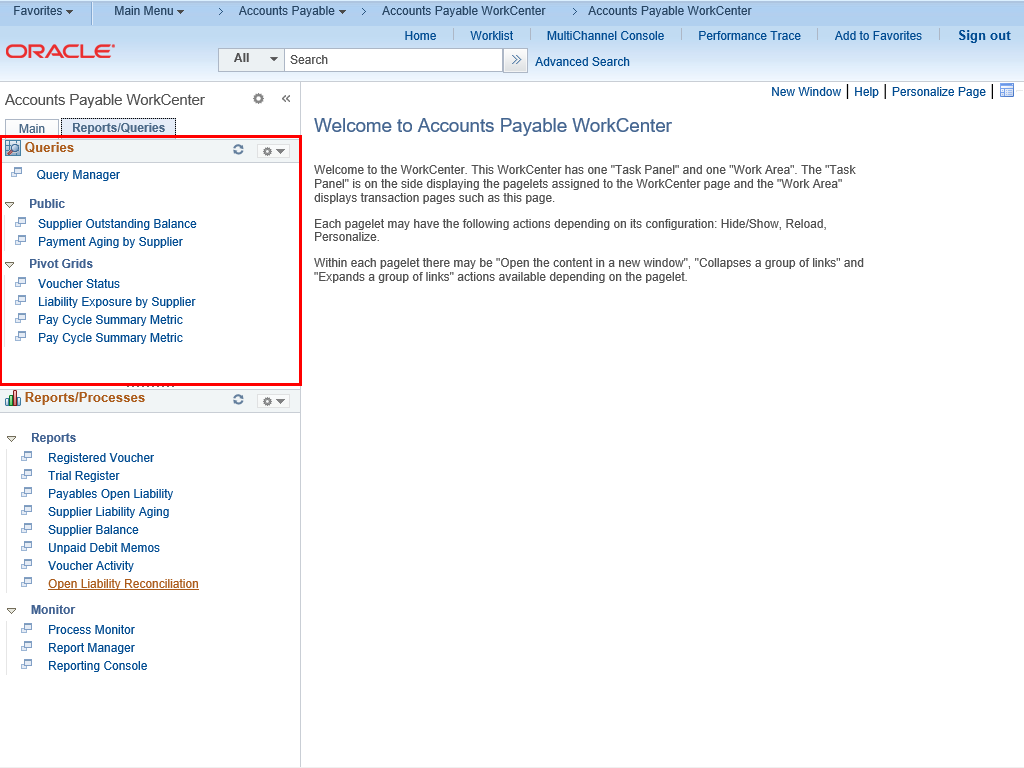
The Queries pagelet contains links to run queries that have been created to provide information relevant to that module's activity. These queries have been selected specifically as the system was built and the list is maintained by the system administrator.
|
|
 |
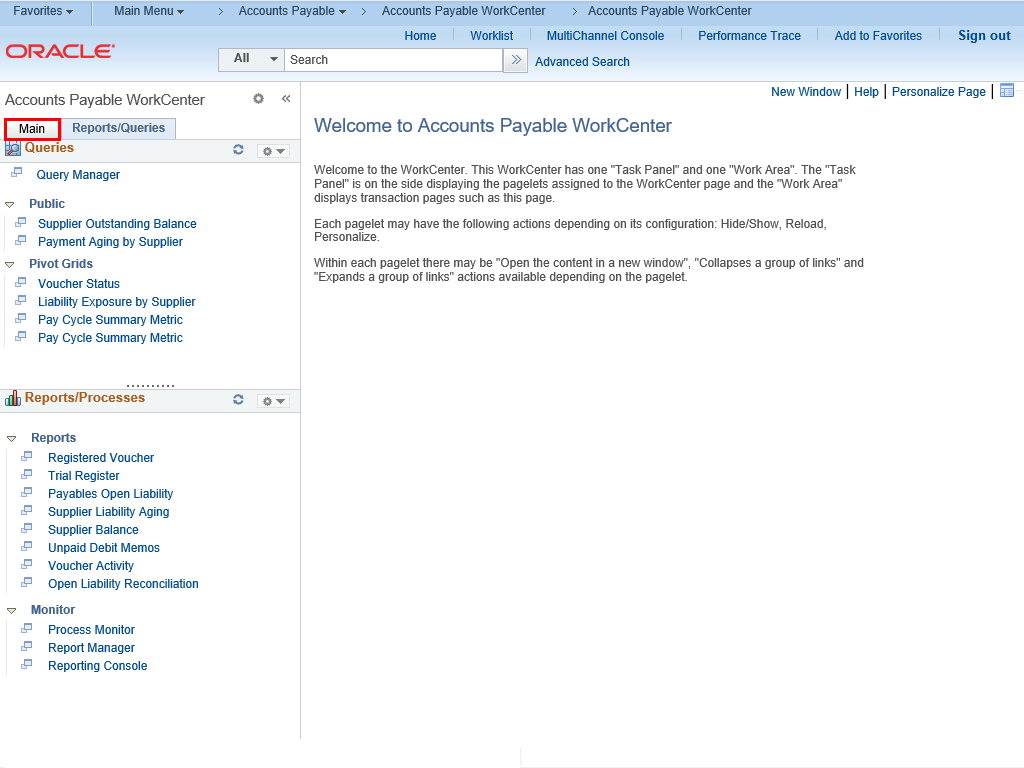
The Reports/Processes pagelet provides links to reports and processes that are frequently used. The links go directly to the Run Control page for the selected report or process.
These are also maintained by the system administrator.
|
|
 |
There is one other link that can help you control information retrieved from the WorkCenter.
Click the Main tab.
|
|
 |
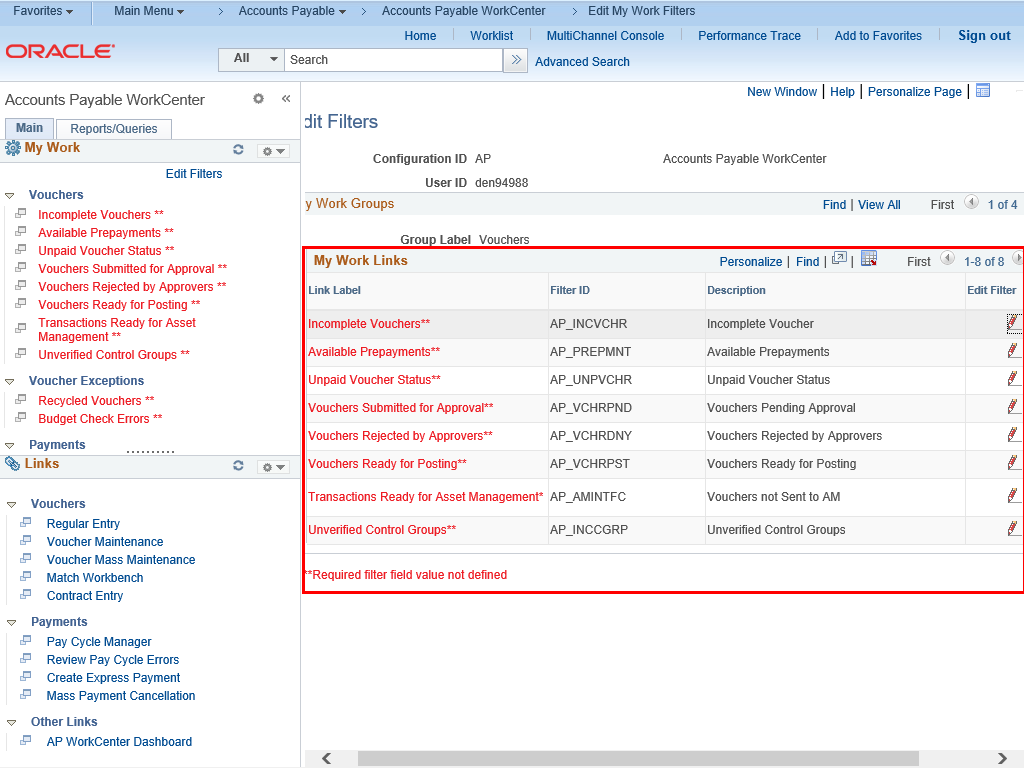
The Edit Filters link allows you to specify criteria for the items in your My Work pagelet.
If an item in that area appears in red, the filters have not been specified.
Click the Edit Filters link.
|
|
 |
|
The Edit Filters page is displayed. Use this page to adjust filters for the links in the My Work pagelet.
|
|
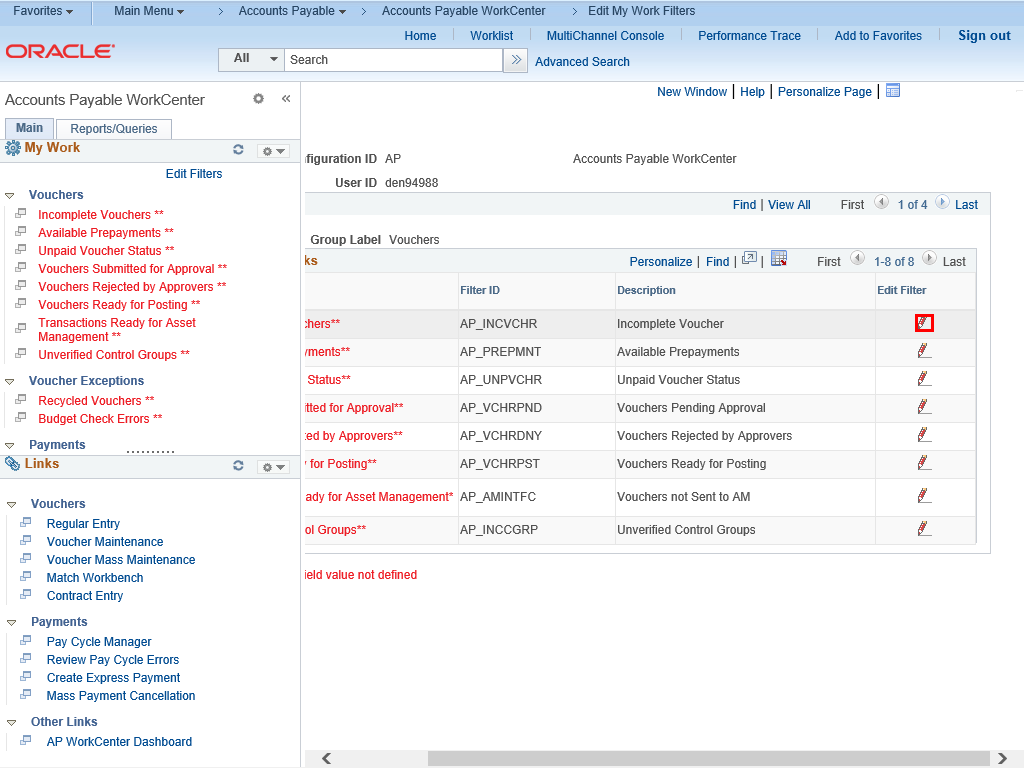 |
Click the Edit Filter button to add criteria for the menu item.
|
|
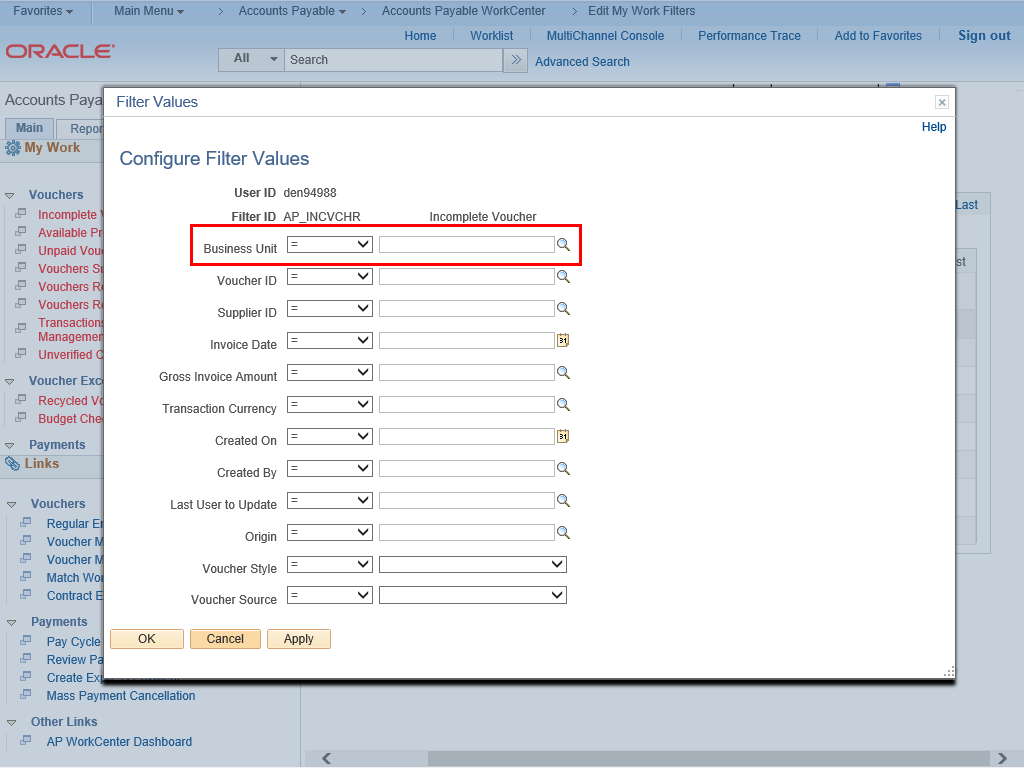 |
Use the operators and lookup information to set the parameters you use most of the time.
For example, you may want to enter the Business Unit so that each time you click the work item, it fills in that information.
|
|
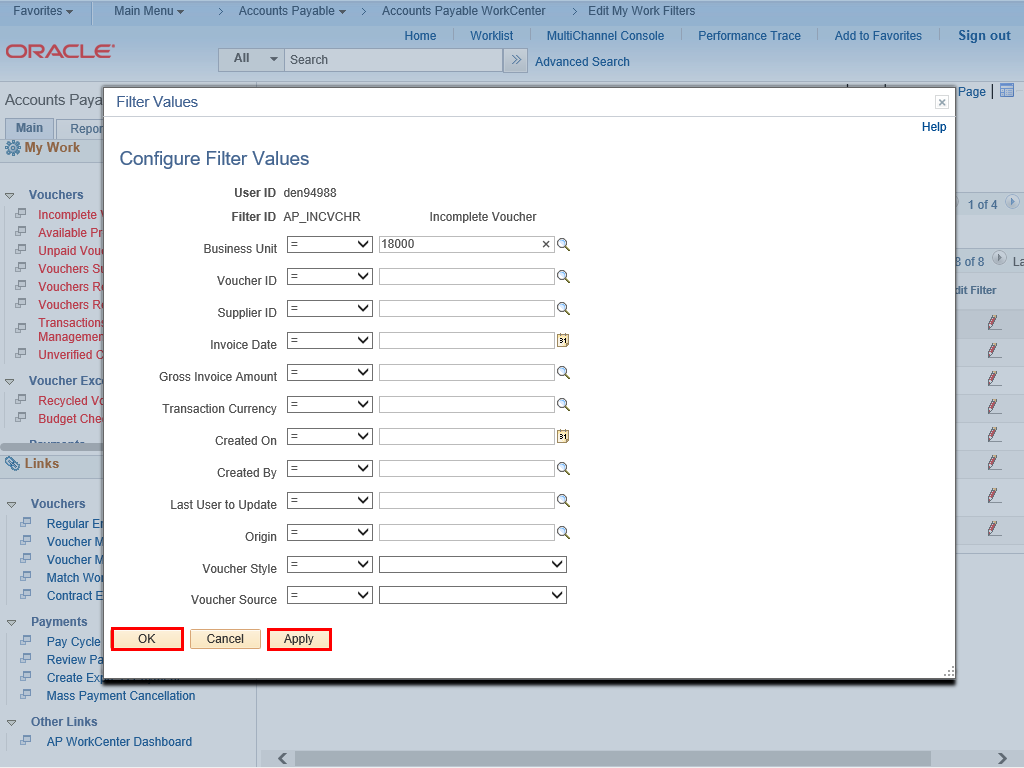 |
When you have entered the needed values, click OK or Apply.
|
|
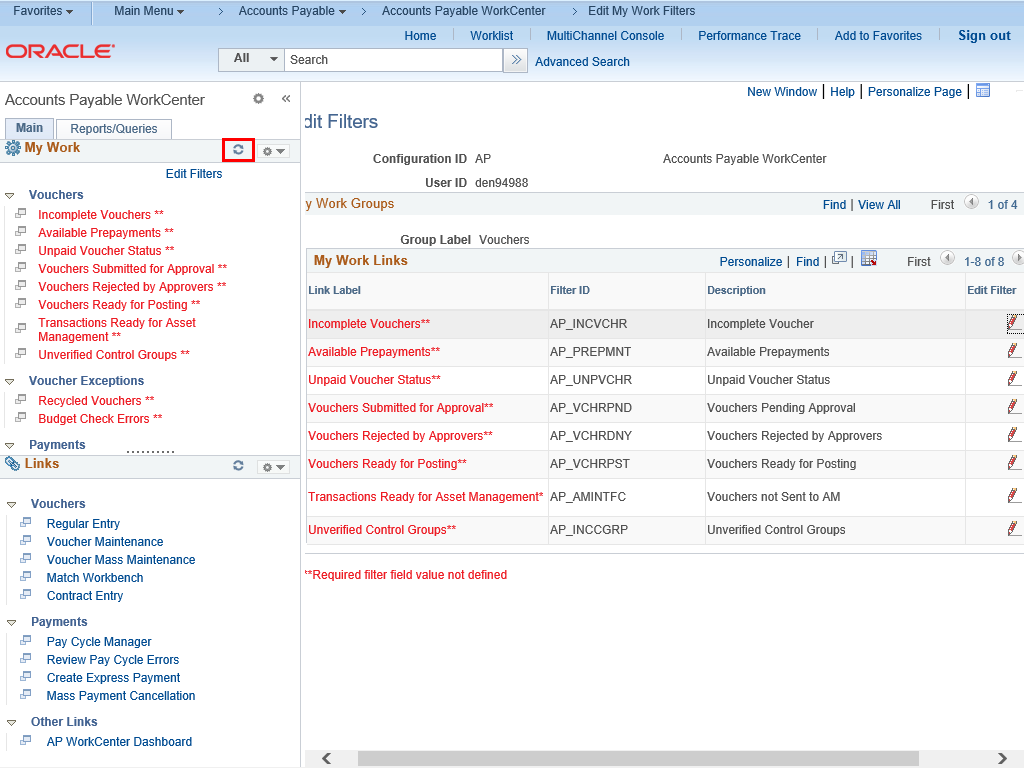 |
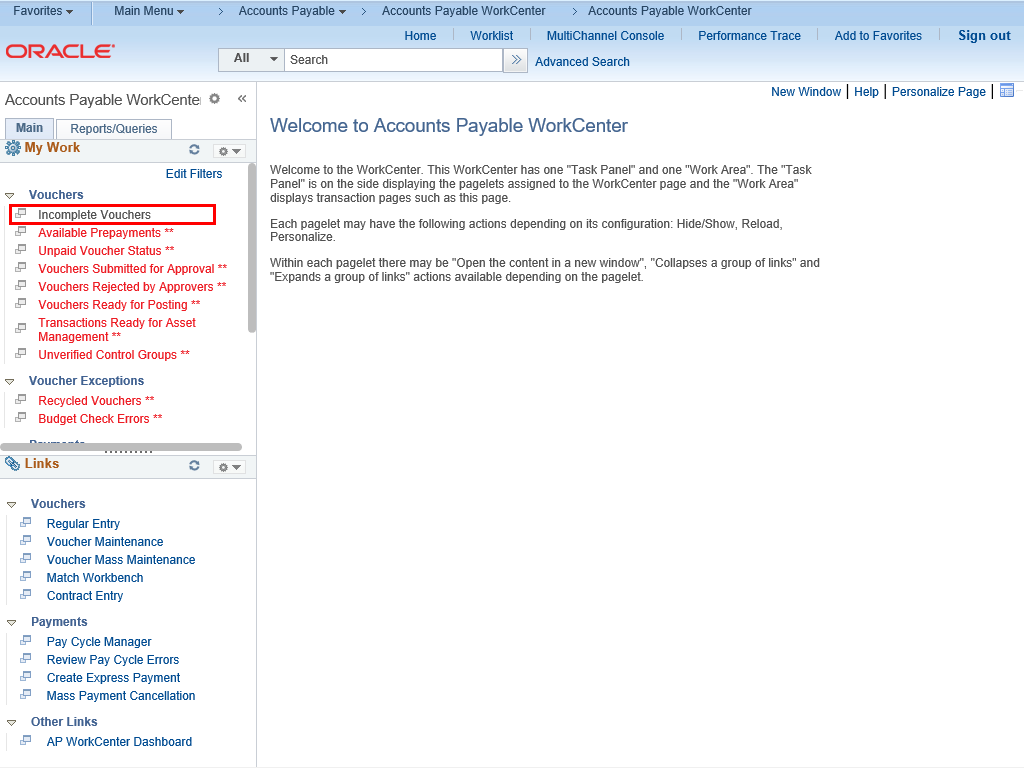
After making a change, you need to reload the My Work pagelet to make sure the change is available.
Click the Reload button.
|
|
 |
|
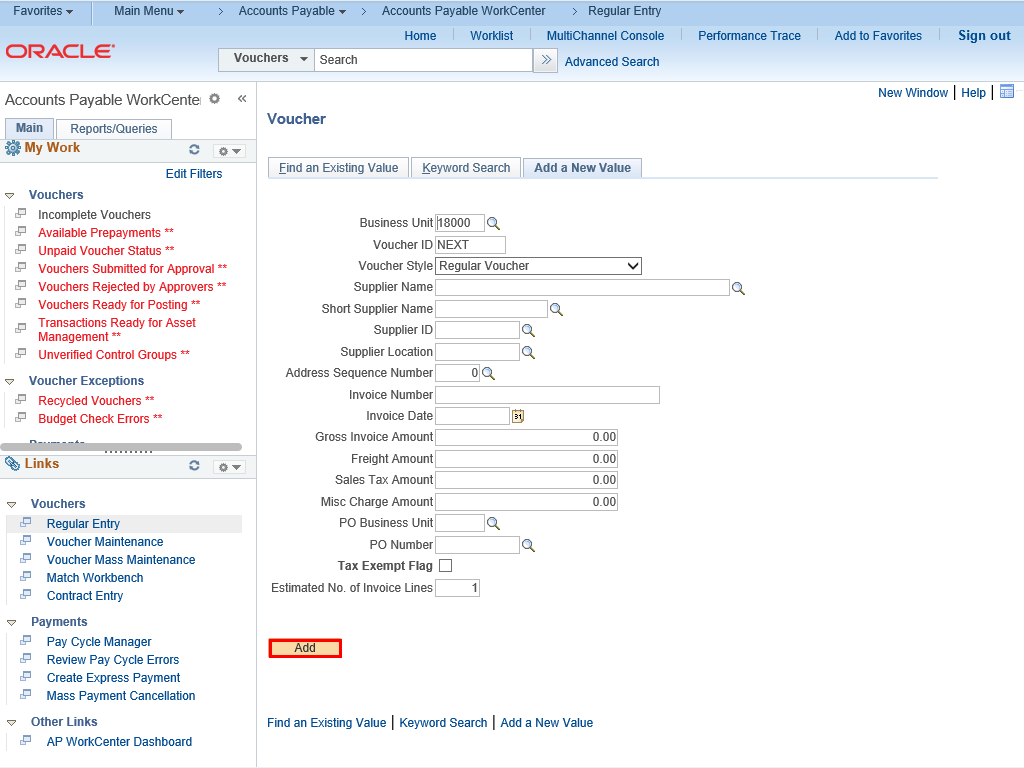
Notice that the item is no longer red, and available for use on the My Work pagelet.
|
|
 |
|
If you click the link, the search page appears in the transaction area so you can perform that task.
|
|
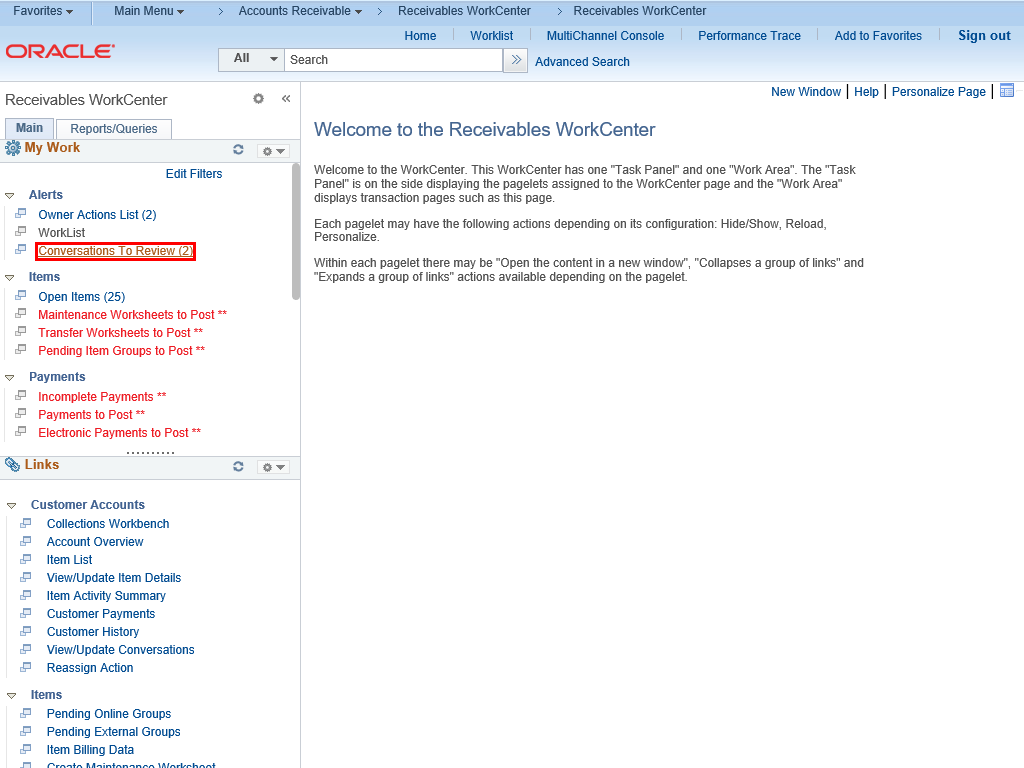 |
This section of the article will show you some of the information you might see in the Accounts Receivables WorkCenter depending on how you have set up your configurations.
The Conversations to Review (2) link shows you have 2 conversations that you can review for action.
Click the Conversations to Review (2) link.
|
|
 |
|
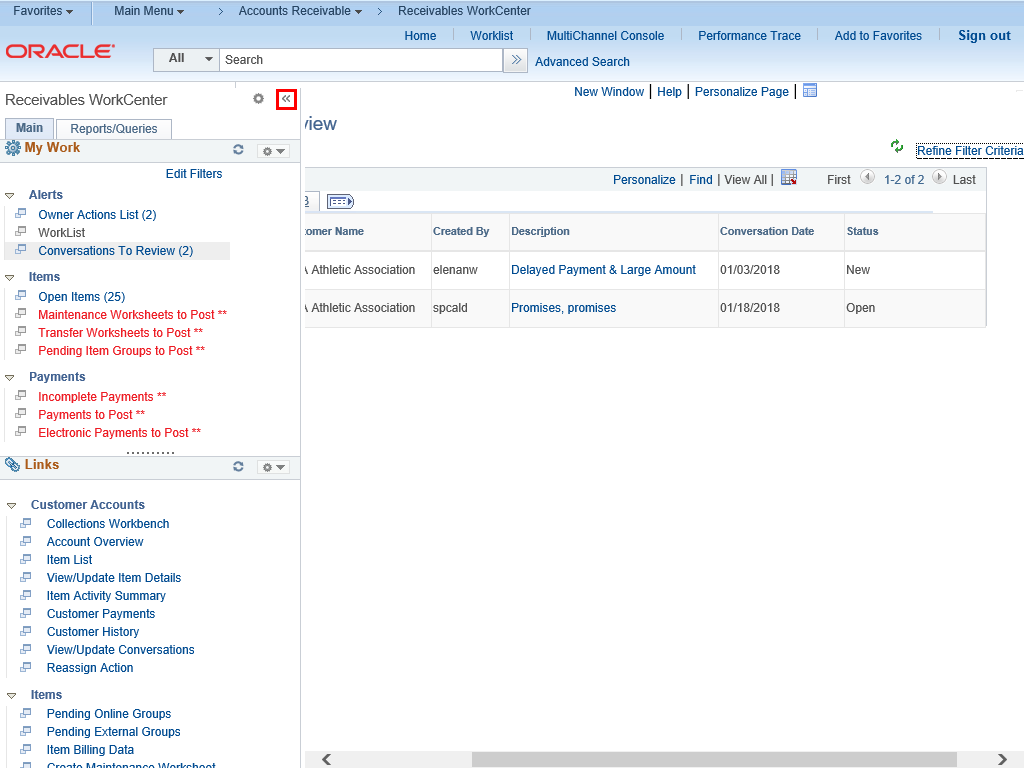
Click the Minimize Receivables WorkCenter button.
|
|
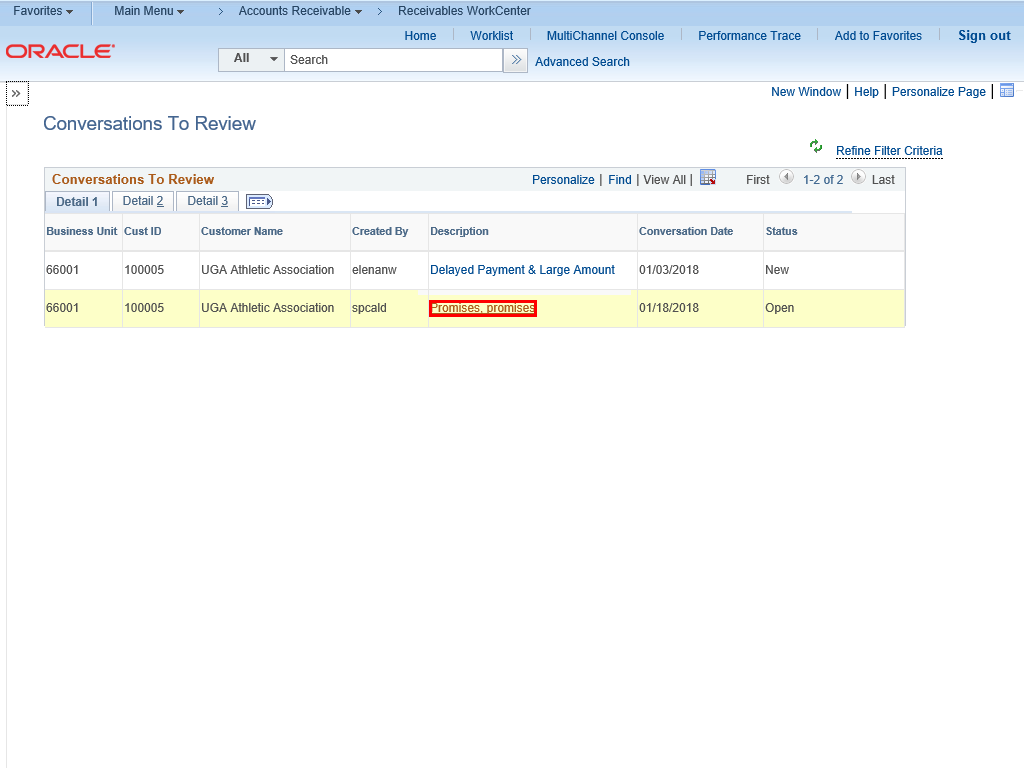 |
The Conversations to Review page is displayed. This page is used to display a list of conversations by Business Unit, Cust ID, Customer Name, Description, Conversation Date and Status.
To see details about the conversation, click the Promises, promises link for Conversation Date 01/18/2018.
To review the Conversation, click the appropriate link.
|
|
 |
|
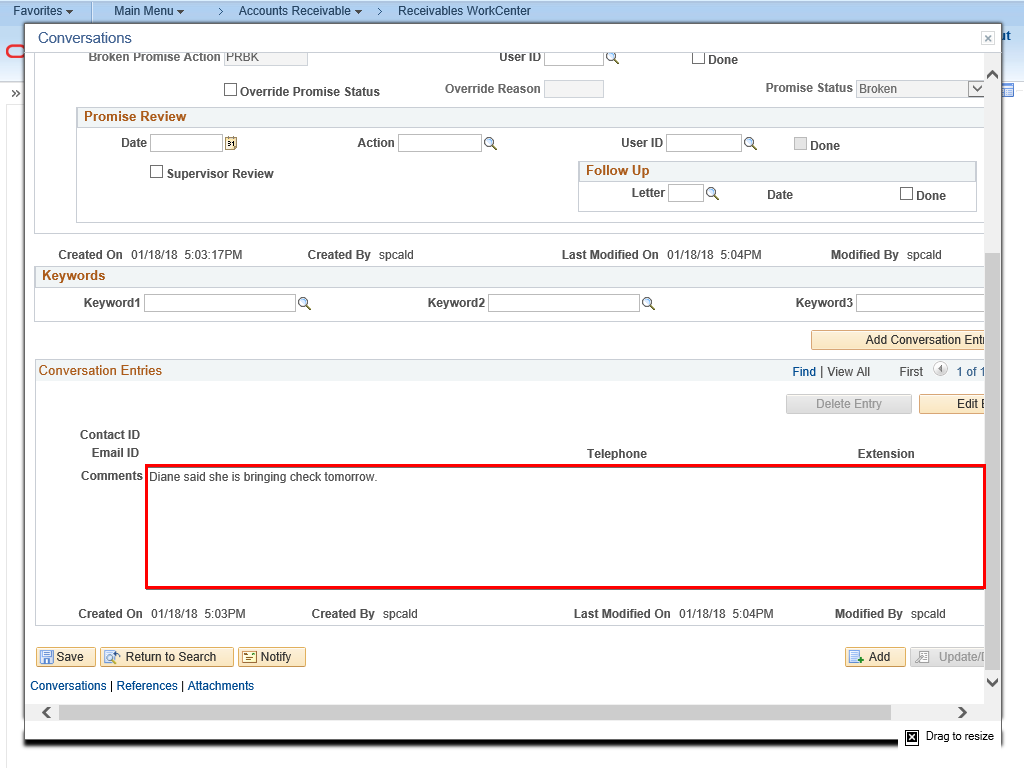
The Conversations page is displayed. The Comments text box in the Conversations Entries section displays the comment.
|
|
![Conversations page is displayed with the Close [X] button highlighted](https://uga.teamdynamix.com/TDClient/3109/FandA/Shared/FileOpen?AttachmentID=840553f8-fc68-4c66-bc6c-18d4357b6817&ItemID=150636&ItemComponent=26&IsInline=0) |
To return to the WorkCenter, click the Close button.
|
|
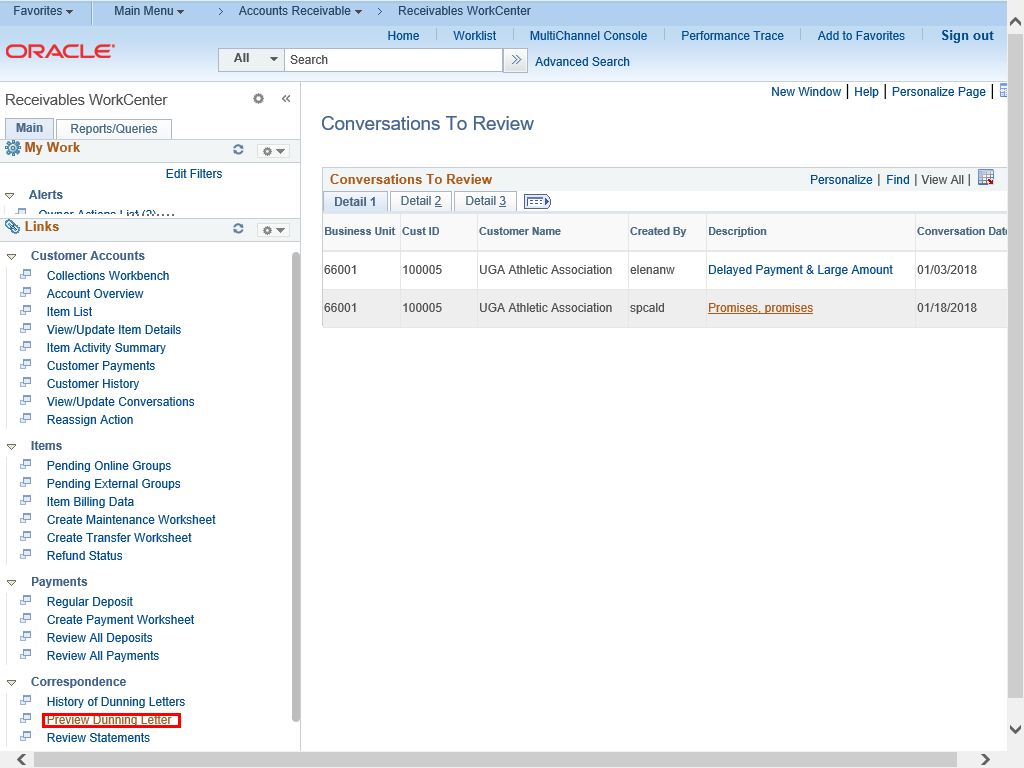 |
Click the Preview Dunning Letter link in the Correspondence section.
|
|
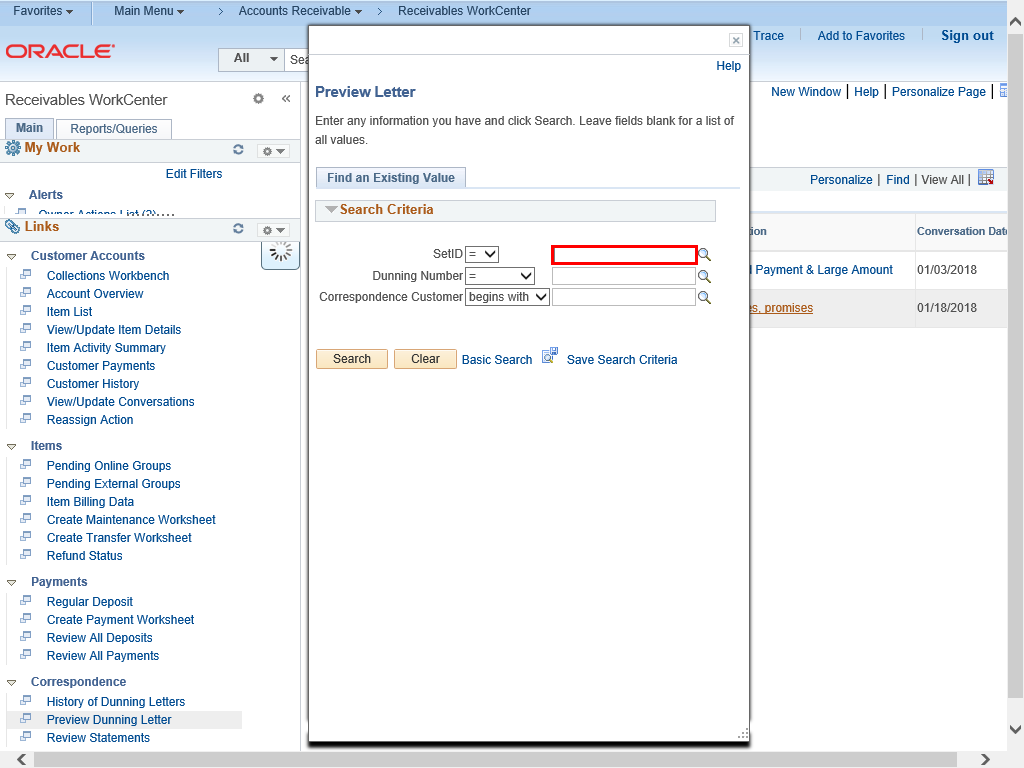 |
Enter the appropriate information into the SetID field.
To locate the Preview Letter, in the SetID field, enter " UGA01 ".
|
|
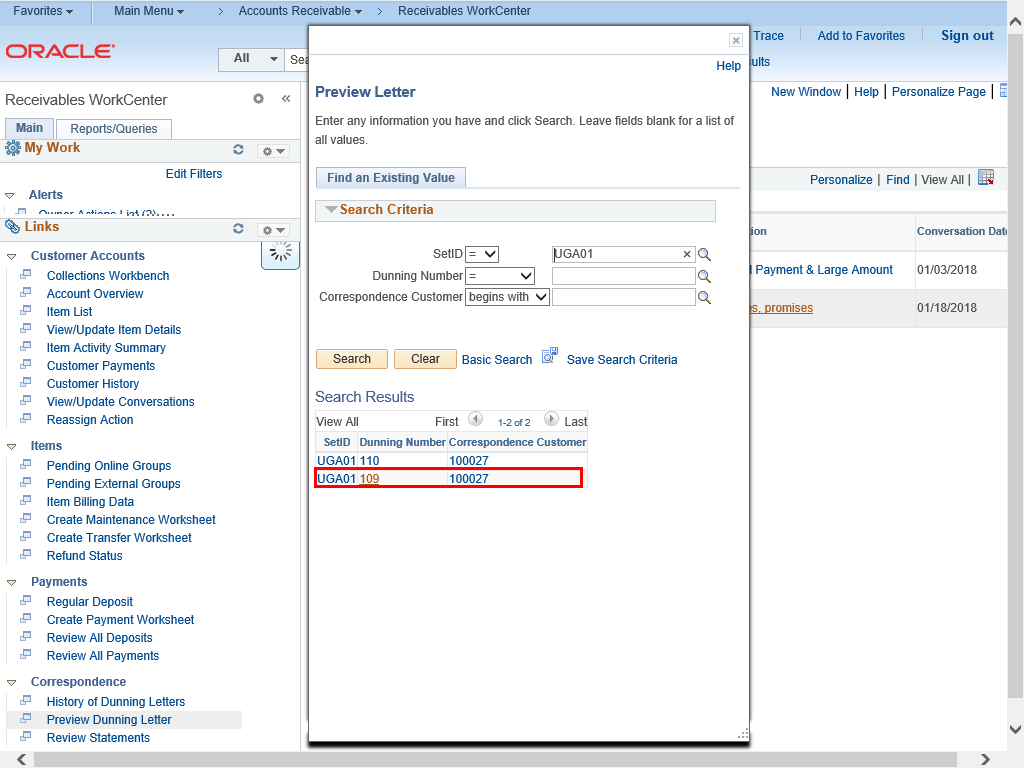 |
The Search Results are displayed beneath the Search Criteria. Click the appropriate Dunning Number link.
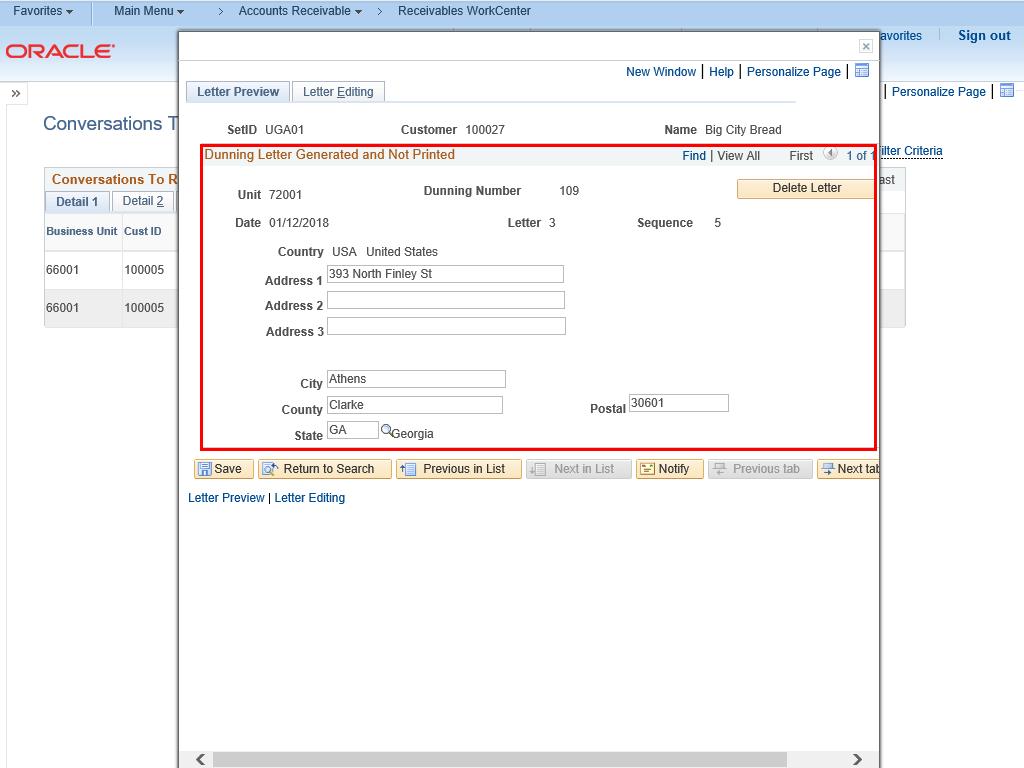
To Preview the Dunning letter, click the 109 link .
|
|
 |
|
The Letter Preview page is displayed. You can use this page to review the customer information.
|
|
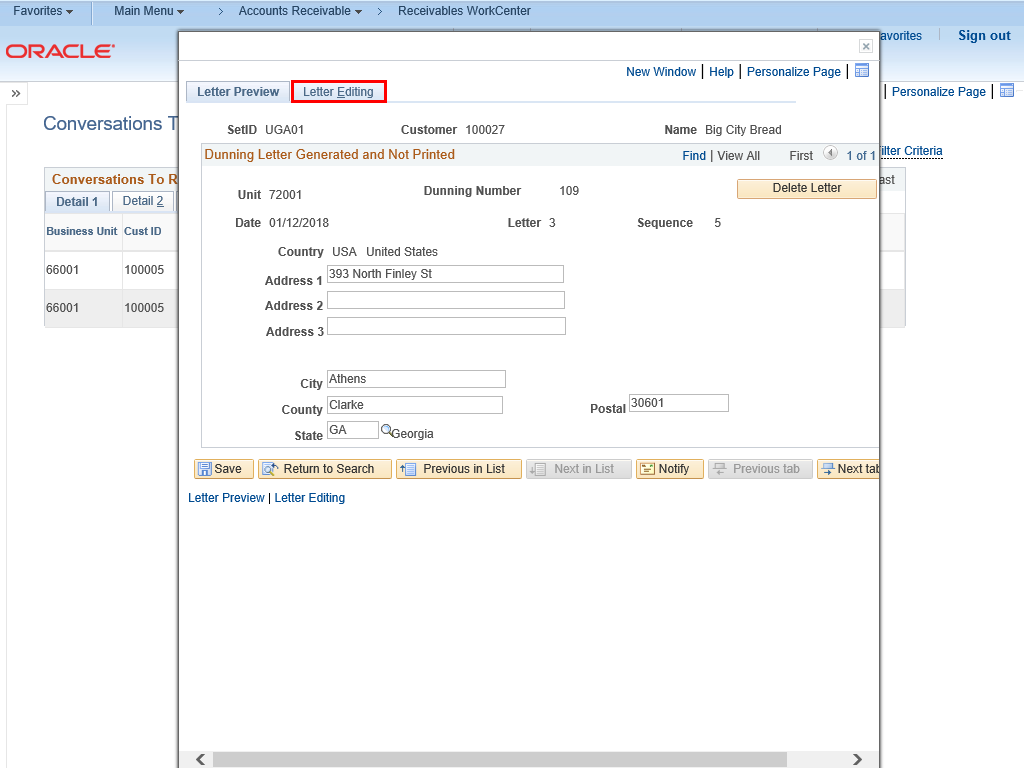 |
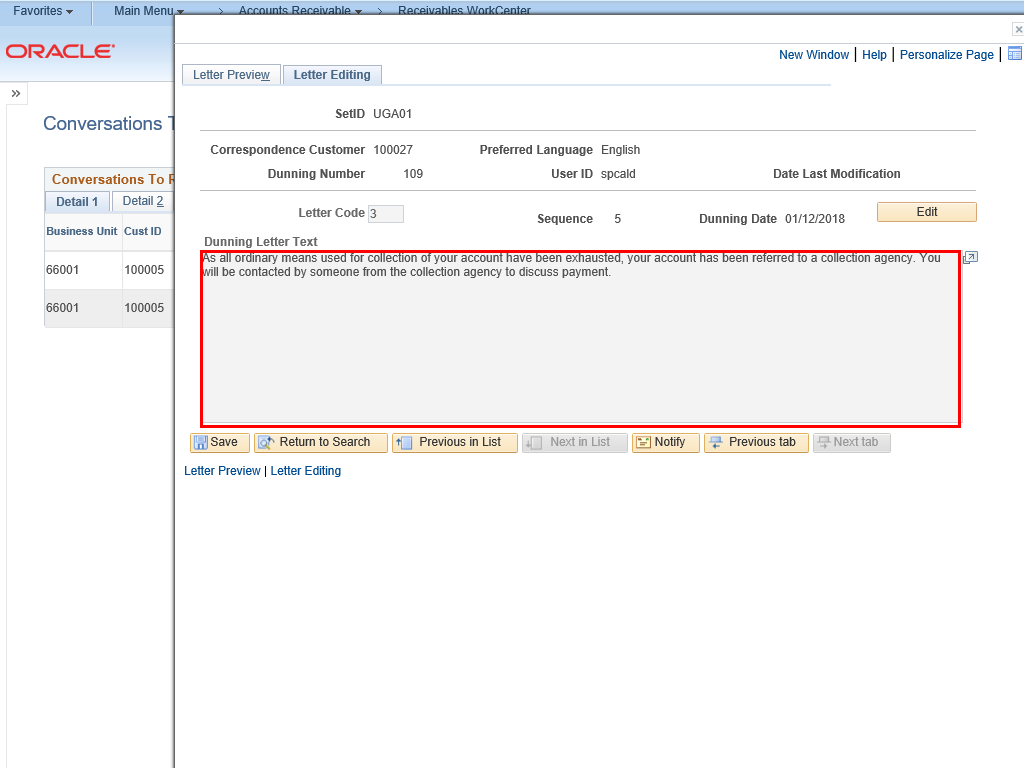
Click the Letter Editing tab.
|
|
 |
|
The Dunning Letter text is displayed.
|
|
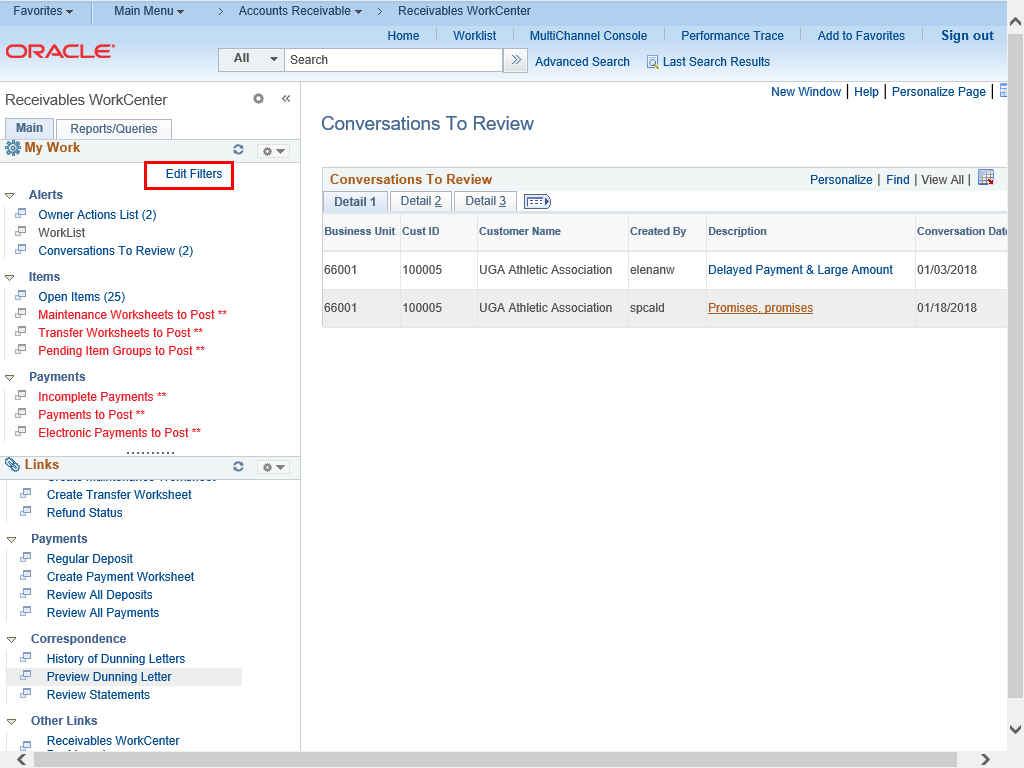 |
You are returned to the Receivables WorkCenter pagelet area.
To specify a filter for the Pending Item Groups to Post, click the Edit Filters link.
|
|
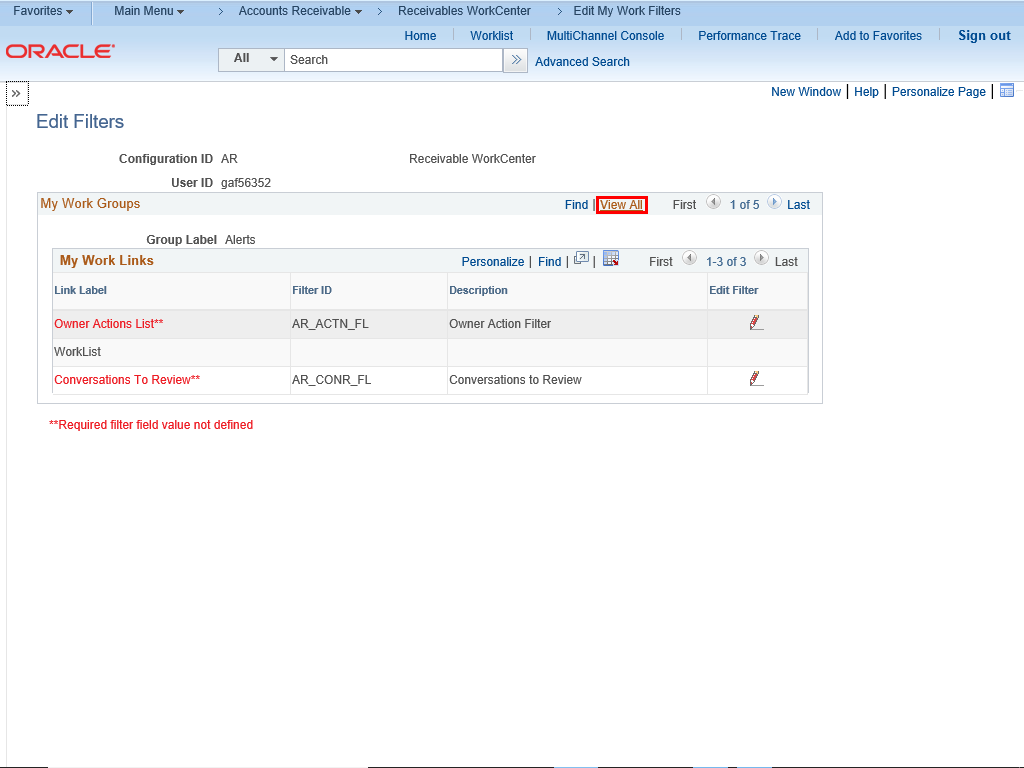 |
The Edit Filters page is displayed.
|
|
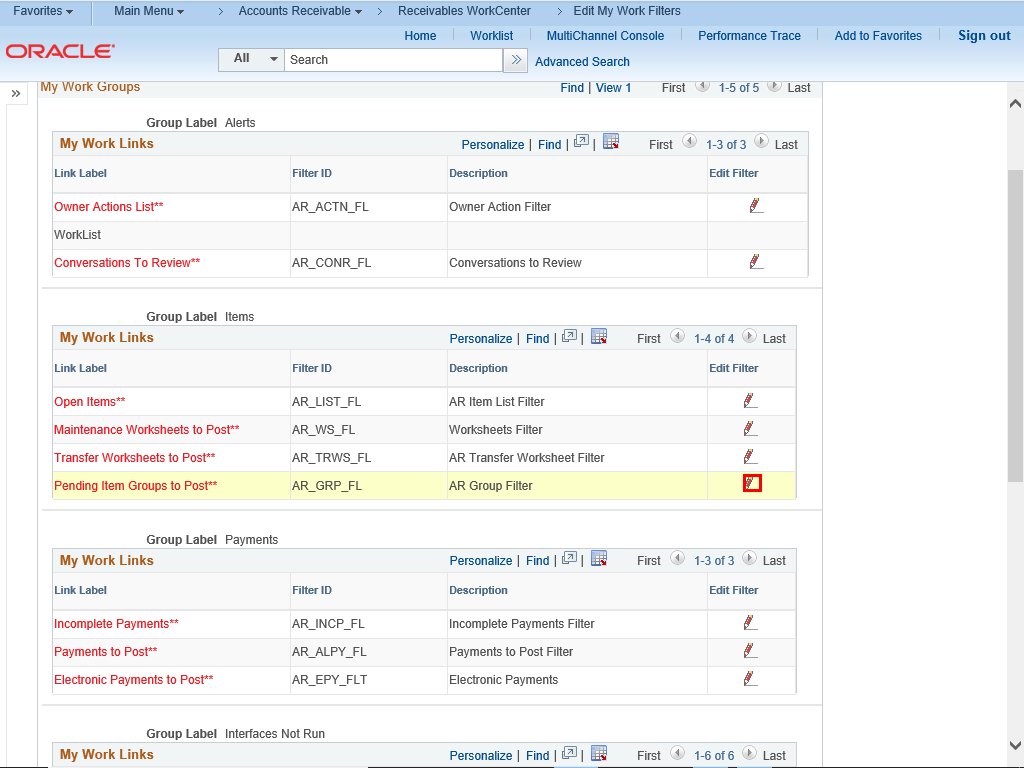 |
Click the Edit Filter button.
|
|
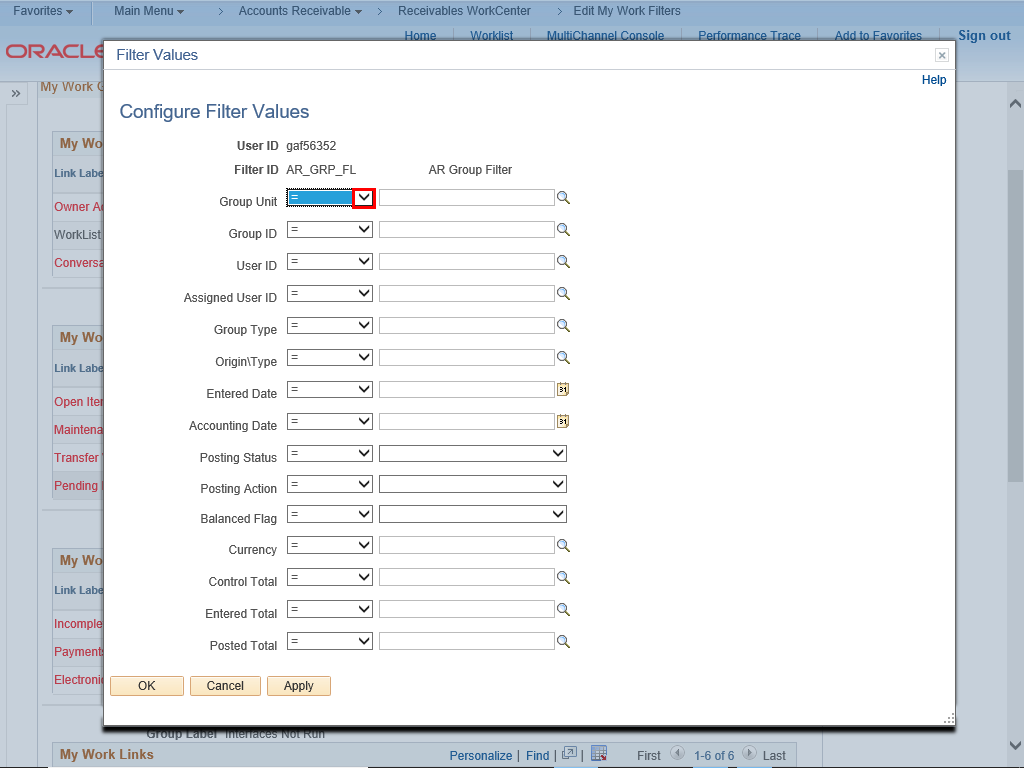 |
The Configure Filter values page is displayed.
Click the Group Unit list.
|
|
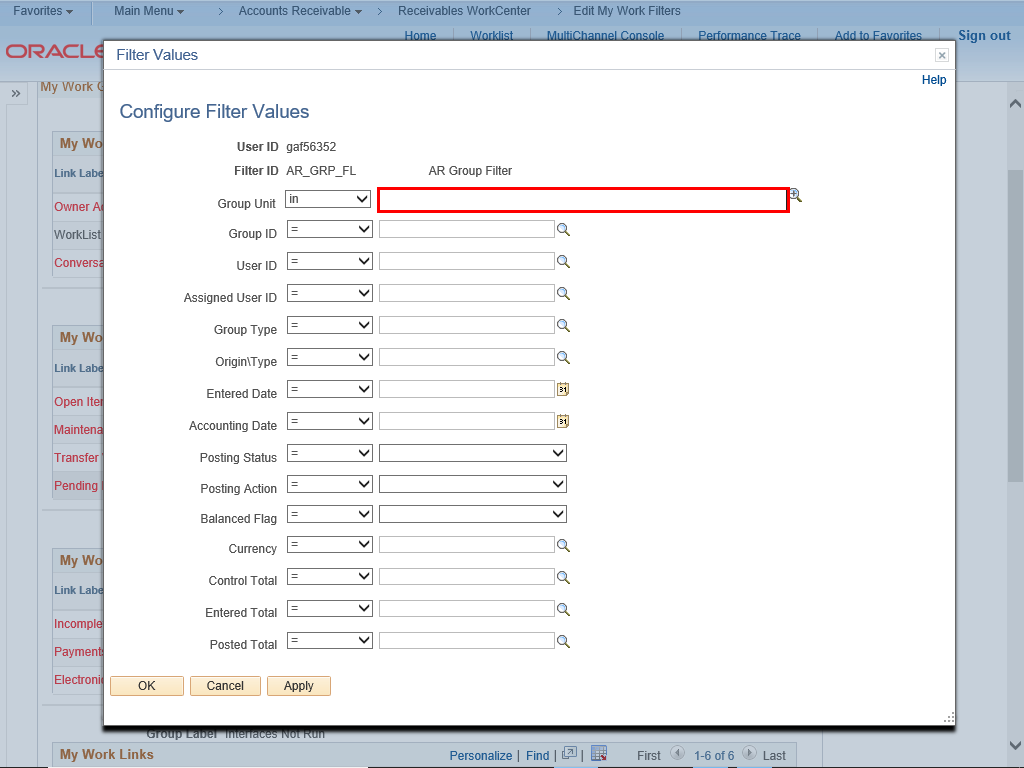 |
Enter the appropriate information into the Group Unit field.
Example shown here: Business Units, " 66001,72001,72002 ".
|
|
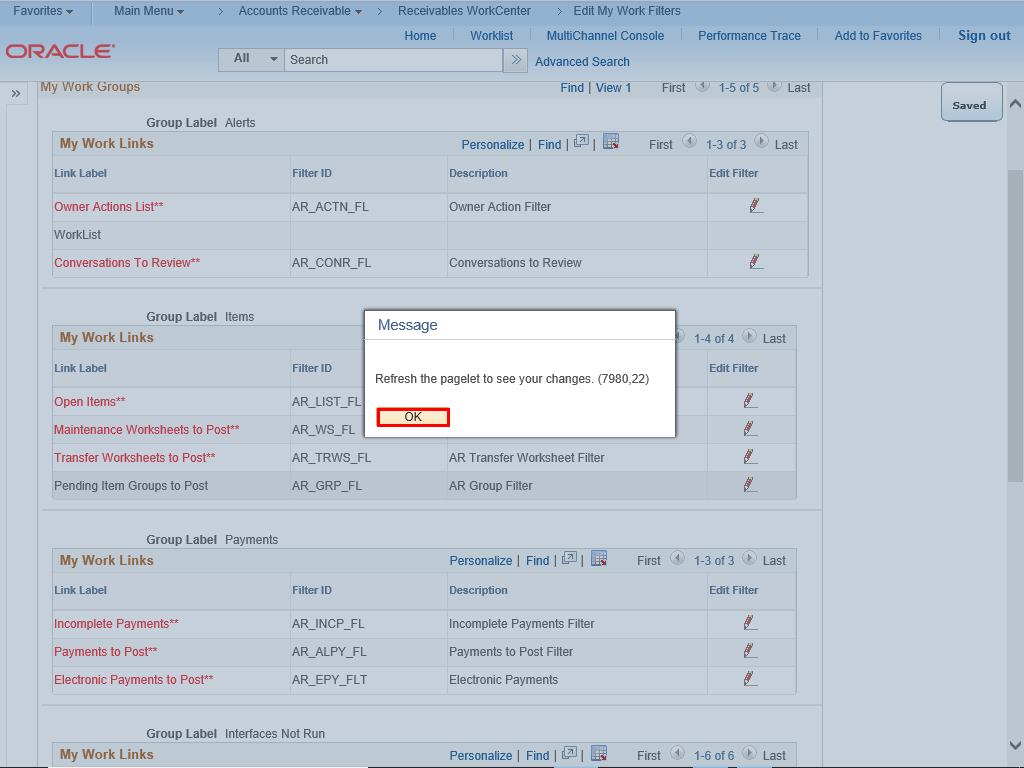 |
To refresh the pagelet and see your changes, click the OK button.
|
|
 |
|
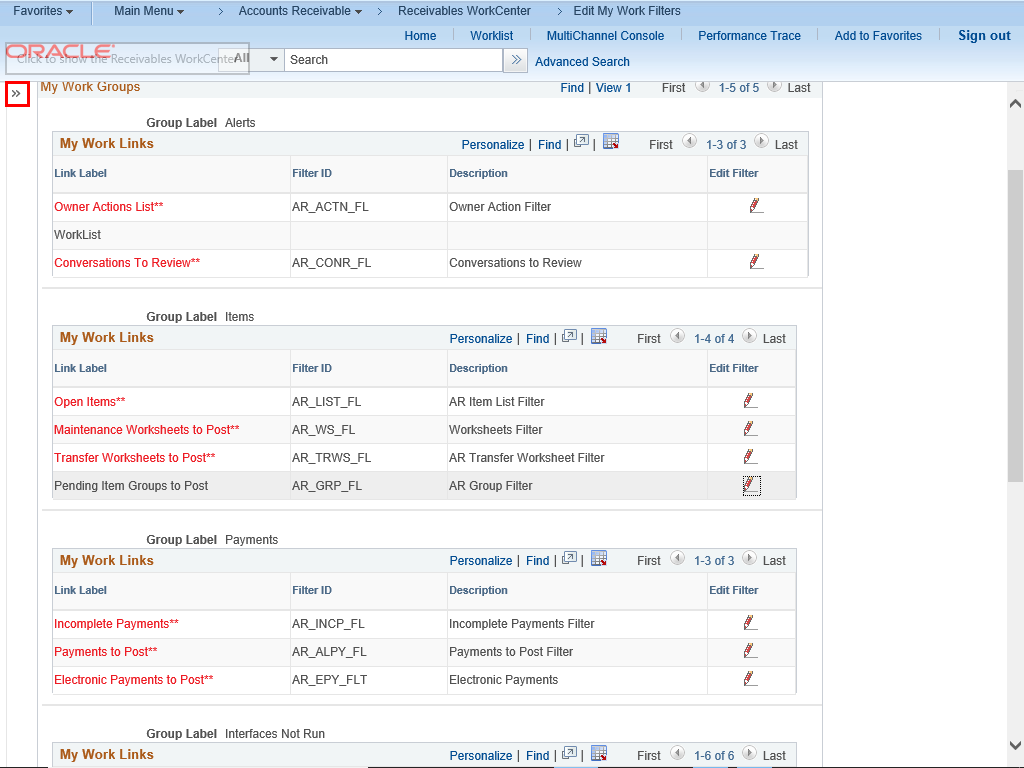
Click the Expand button.
|
|
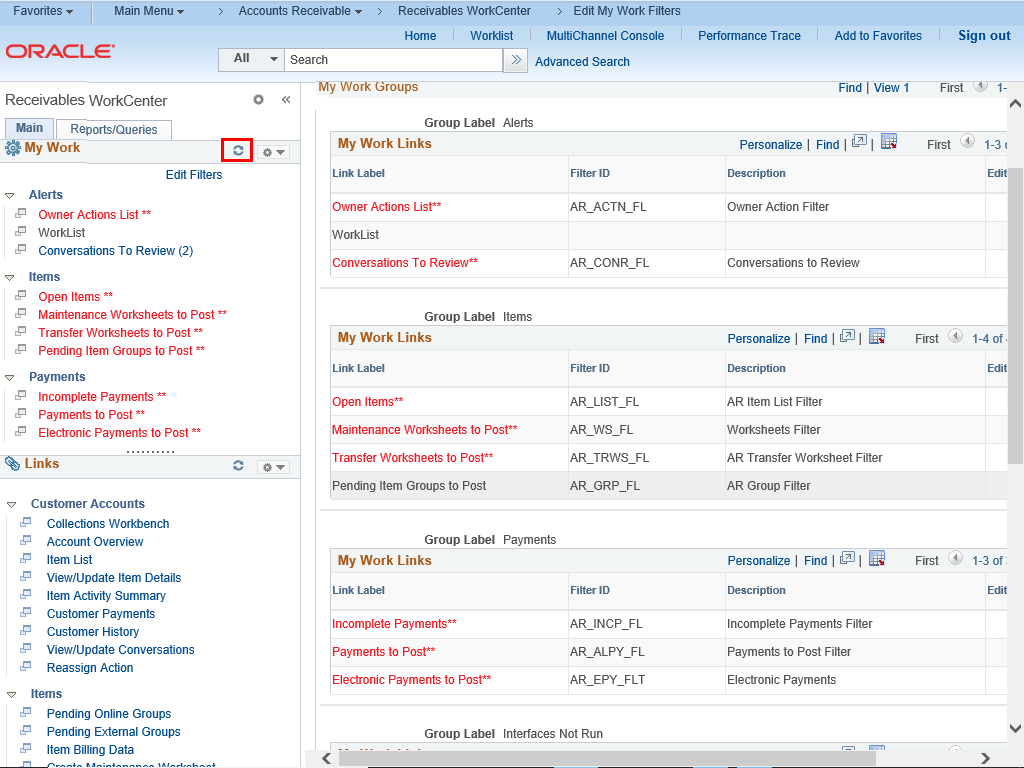 |
Click the reload My Work link.
|
|
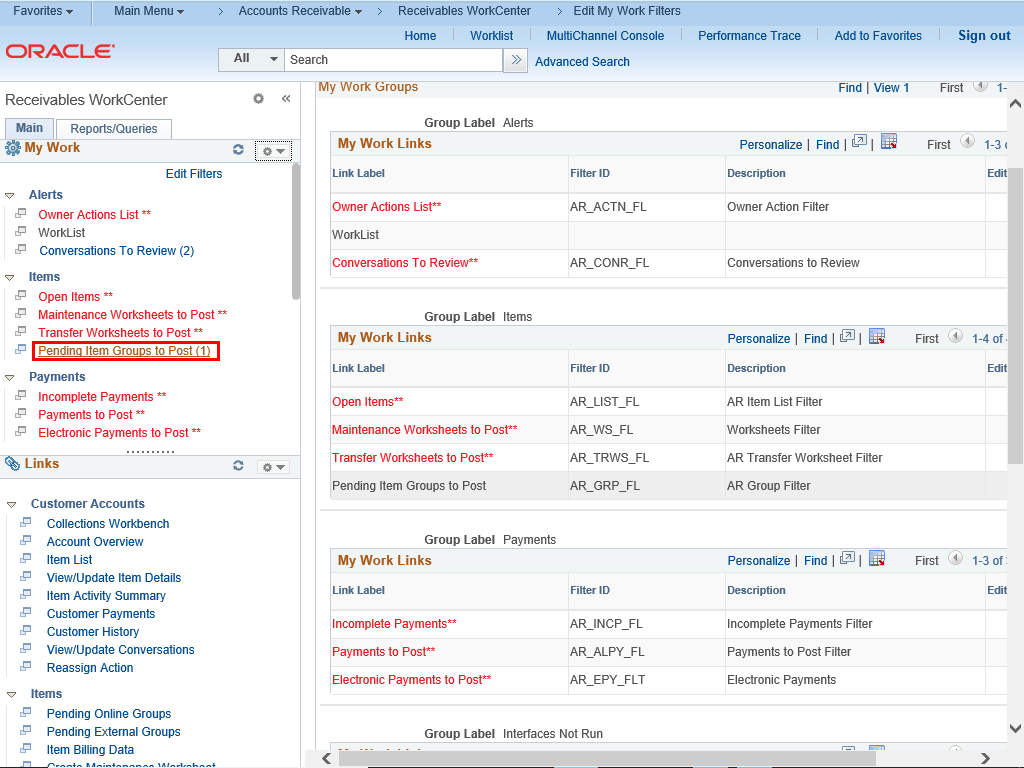 |
The Pending Item Groups to Post link is no longer red and shows 1 task is awaiting action.
Click the Pending Item Groups to Post (1) link.
|
|
 |
|
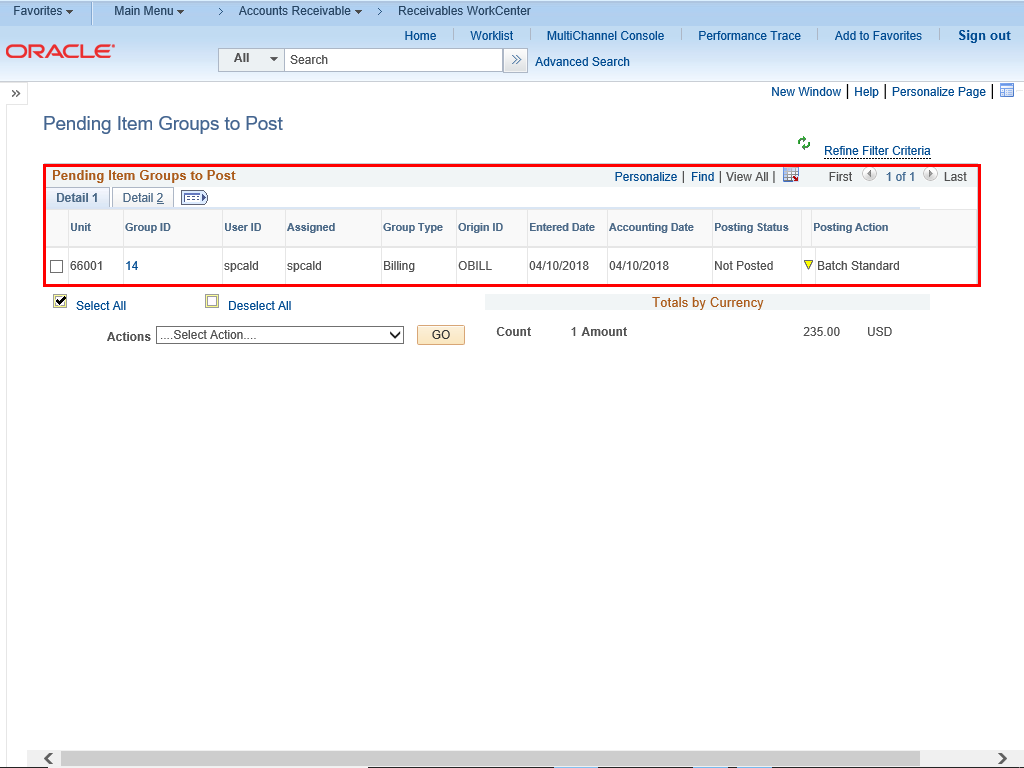
The Pending Item Groups to Post page is displayed and the item available for you to take the appropriate action.
|
|
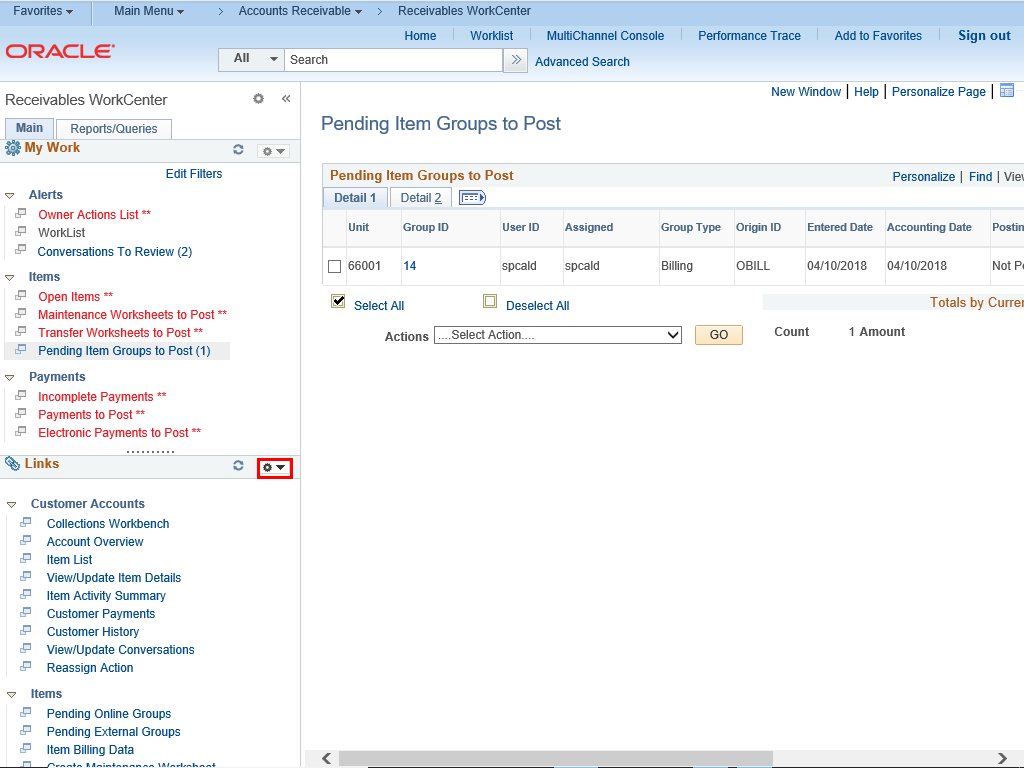 |
To add a Link to the pagelet area, click the Links Pagelet Settings button.
|
|
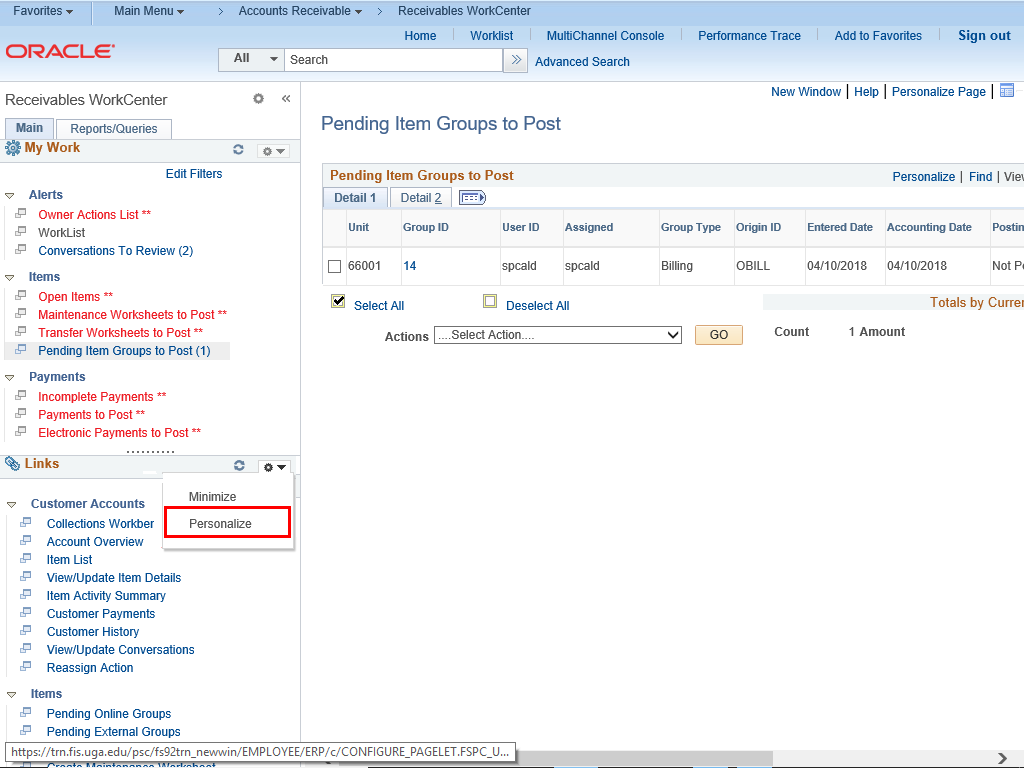 |
Click the Personalize menu.
|
|
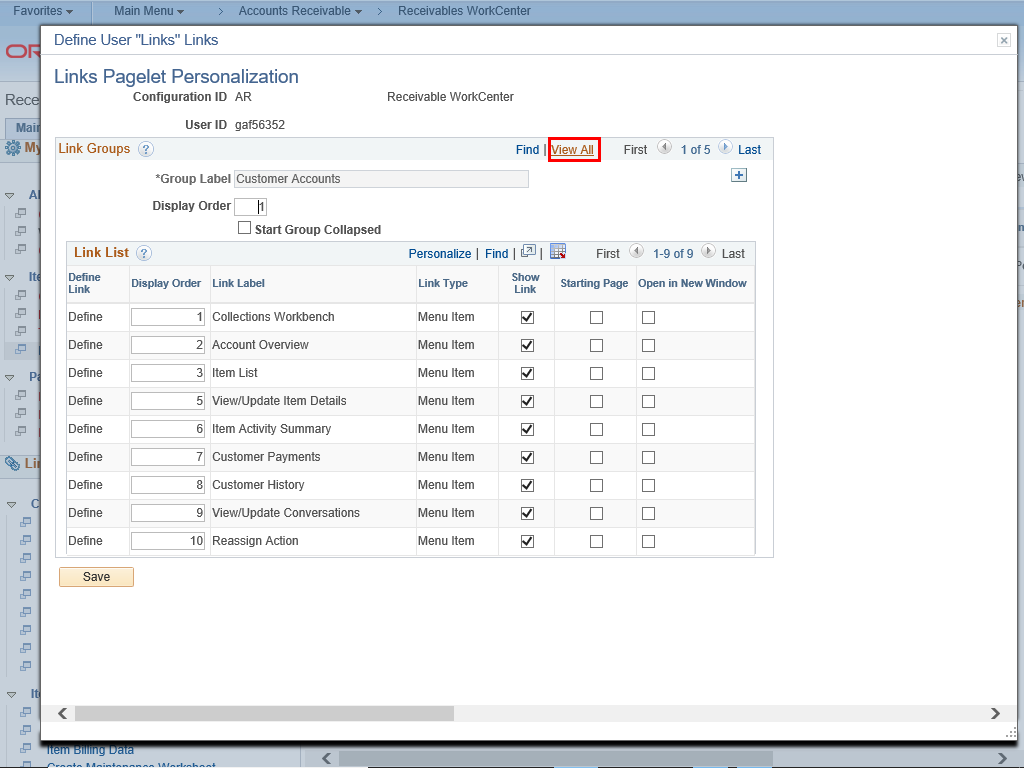 |
The Links Pagelet Personalization page is displayed.
Click the View All link.
|
|
![Links Pagelet Personalization page is displayed with the Add Row [+] button highlighted](https://uga.teamdynamix.com/TDClient/3109/FandA/Shared/FileOpen?AttachmentID=9c402e3e-5dc6-40eb-b752-2b2a7be8c196&ItemID=150636&ItemComponent=26&IsInline=0) |
If necessary, scroll to the Group Label field in the Link List section of the page.
Click the Add Row (+) button to the right of the Group Label Other Links row.
|
|
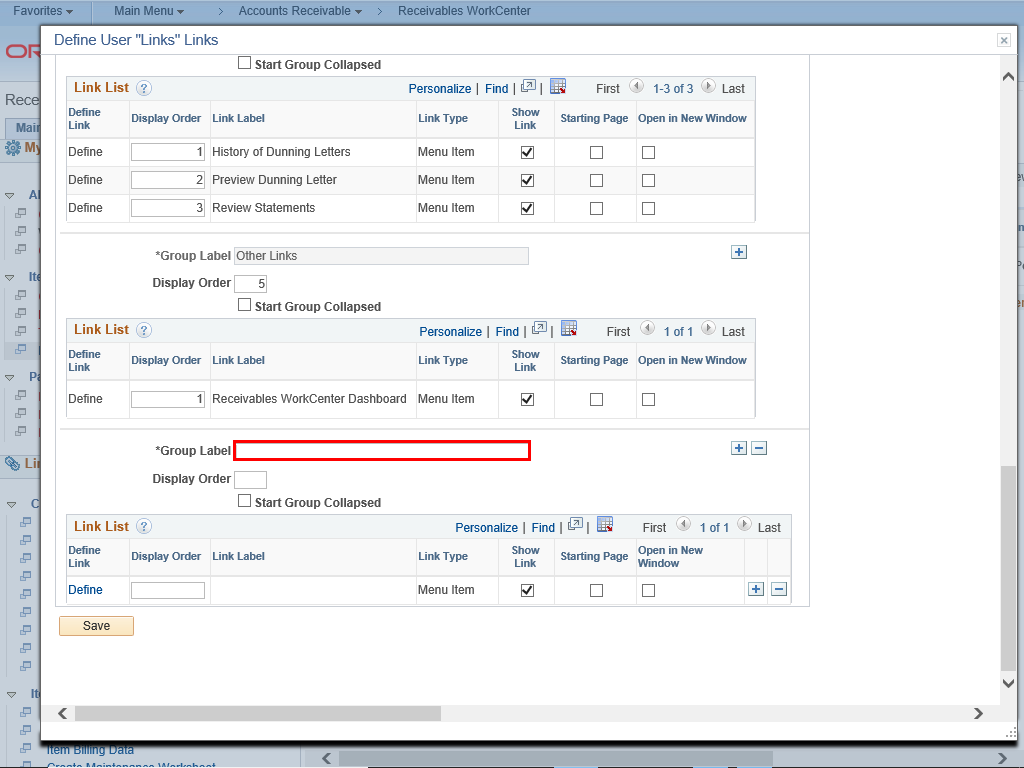 |
Enter the appropriate information into the Group Label field. In the Group Label field enter " UGA web page ".
|
|
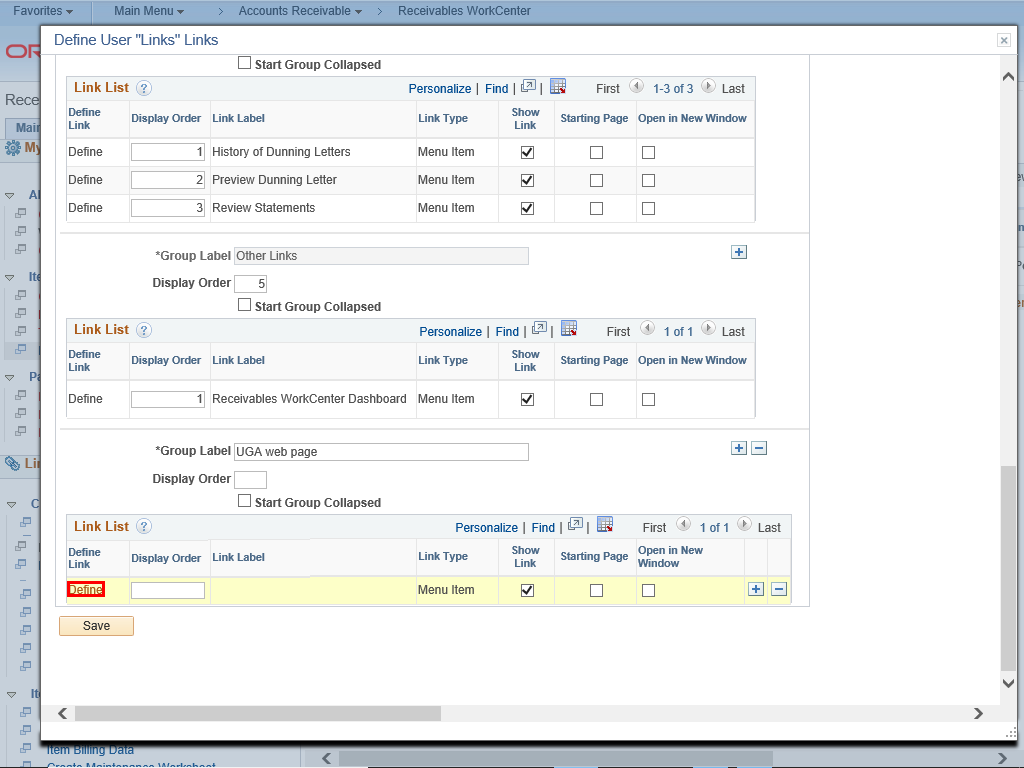 |
In the Link List section, click the Define link.
|
|
 |
The Define Link page is displayed.
Click the Link Type list.
|
|
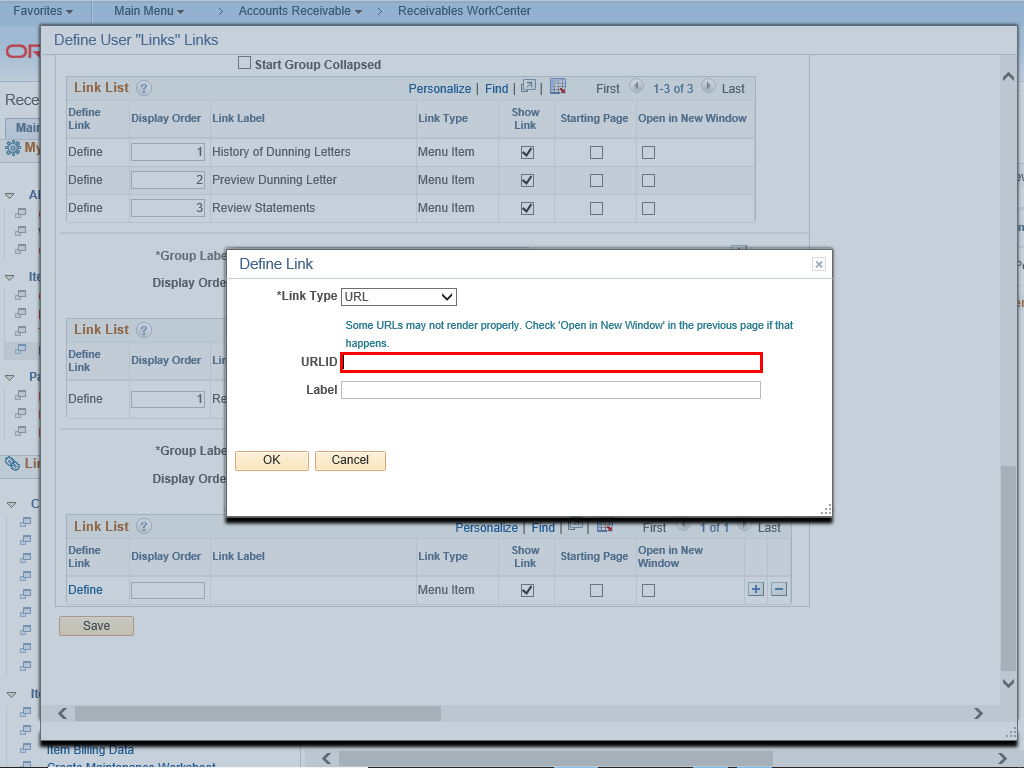 |
Enter the appropriate information into the URLID field. In the URLID field, enter " Https://UGA.EDU ".
|
|
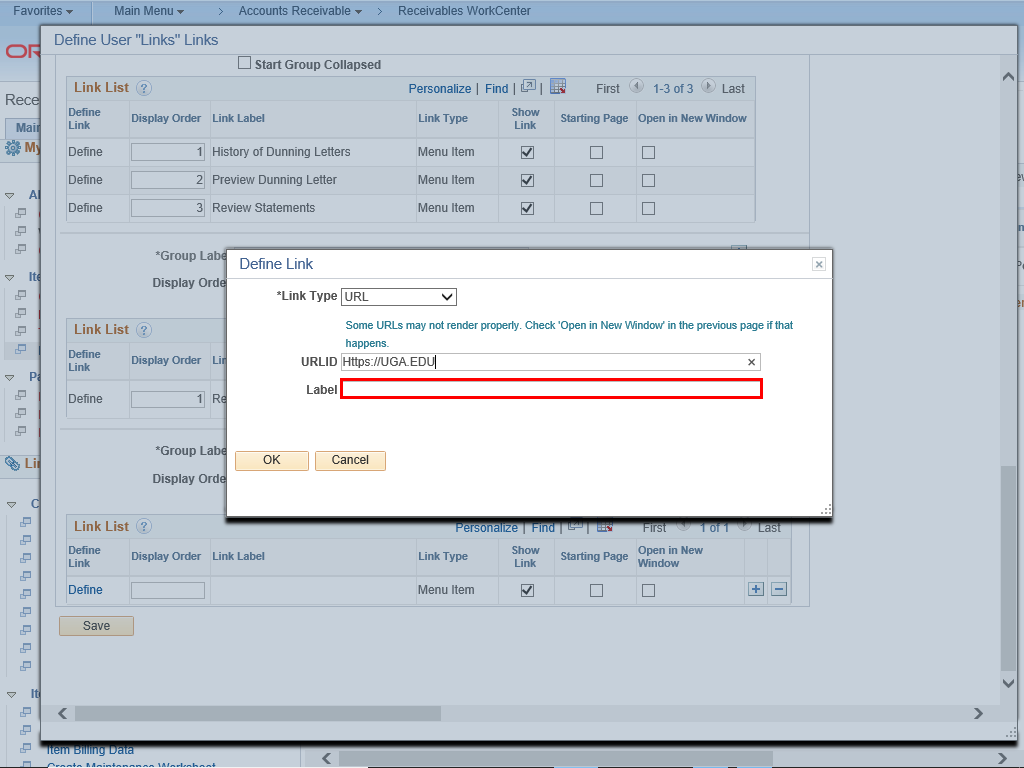 |
Enter the appropriate information into the Label field. In the Label field, enter "UGA Web Site"
|
|
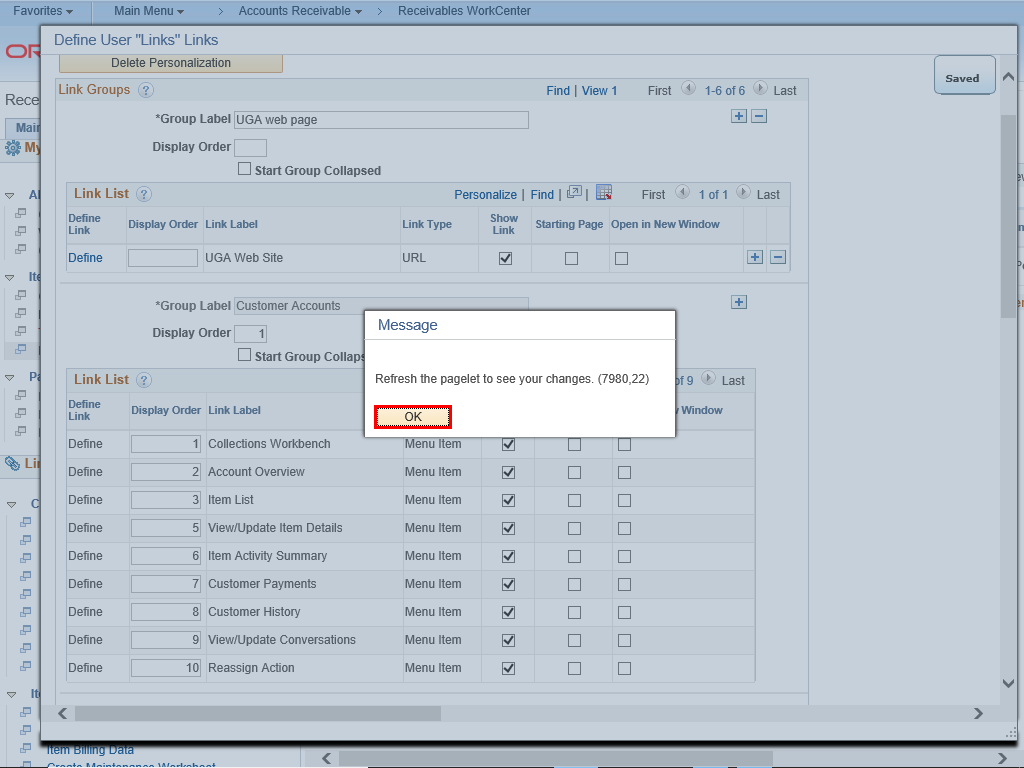 |
To refresh the page, click the OK button.
|
|
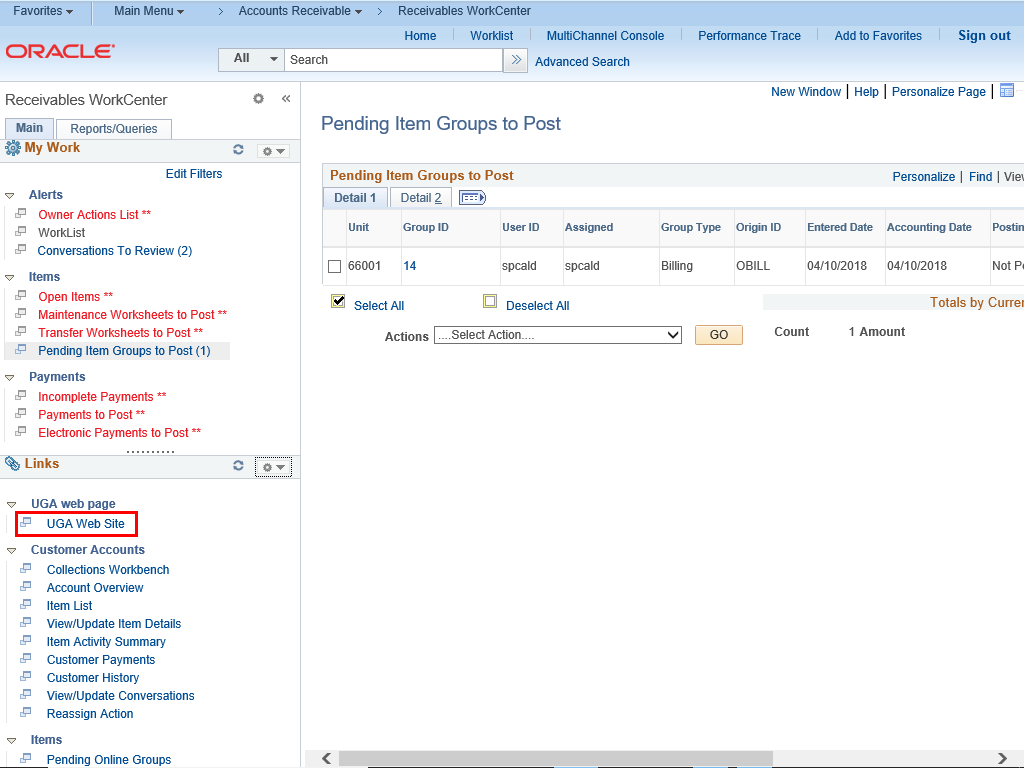 |
The UGA Web Site link is populated and available for you to access.
To view the web site, click the UGA Web Site URL.
|
|
 |
|
The UGA Web Site is displayed. You can scroll through the web site as you would normally do.
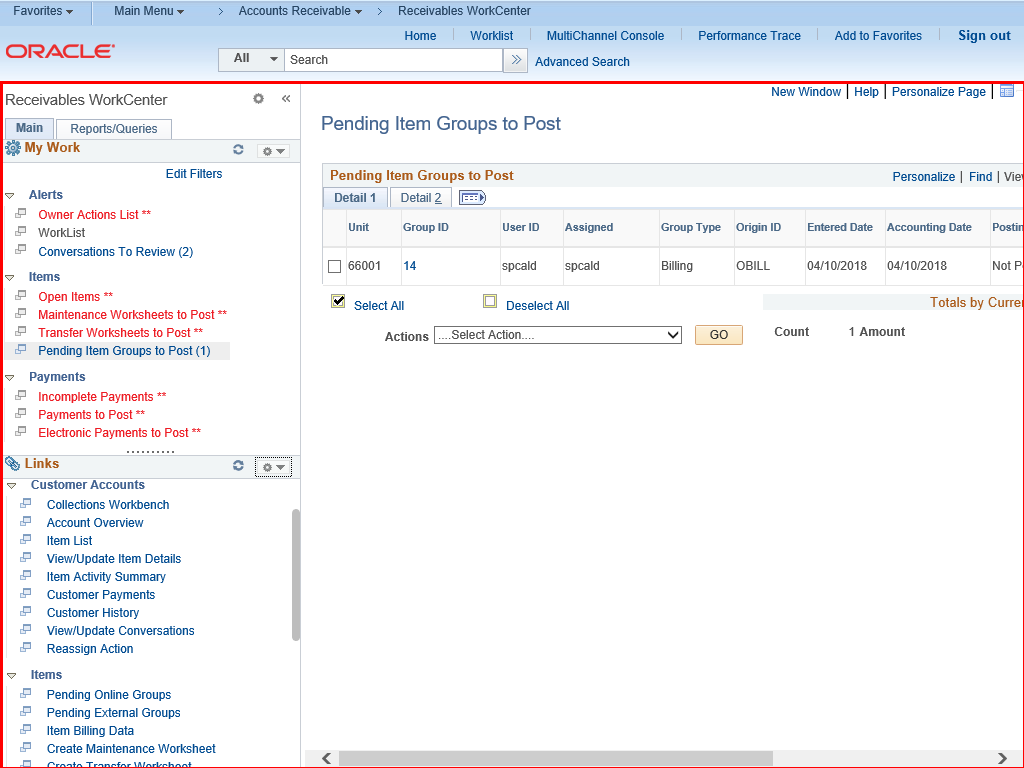
To return to the Receivables WorkCenter, close your browser.
|
|
 |
|
You are returned to the Receivables WorkCenter to continue your work.
|
Additional Information:
You can utilize WorkCenter tools such as Edit Filters to tailor the results of your WorkCenter. The WorkCenter can include primary tabs and pagelets. Each pagelet contains links to transactional pages or information.
The Reports/Queries tab contains the Queries and Reports/Processes pagelets.
Note: There are two parts to this article. The first part provides the basic navigation steps to access the Accounts Receivable WorkCenter. The second part provides the steps to configure the Receivables WorkCenter so that you have access to specific Accounts Receivables tasks.
To advance the tutorial to the steps to configure the Receivables WorkCenter, a short cut is available in See It or Try It Mode. Click the arrow next to the play back mode you prefer. You will see the Receivables WorkCenter link. Click on the link and you will advance to that part of the article.
|
Details
Details
Article ID:
149047
Created
Sat 9/24/22 11:02 PM
Modified
Fri 8/28/26 9:28 AM